

Introduction
This tutorial will install minikube & kubectl on an Ubuntu machine on the ec2 server. Also, you can follow the same steps for your local machine.
Step - 1
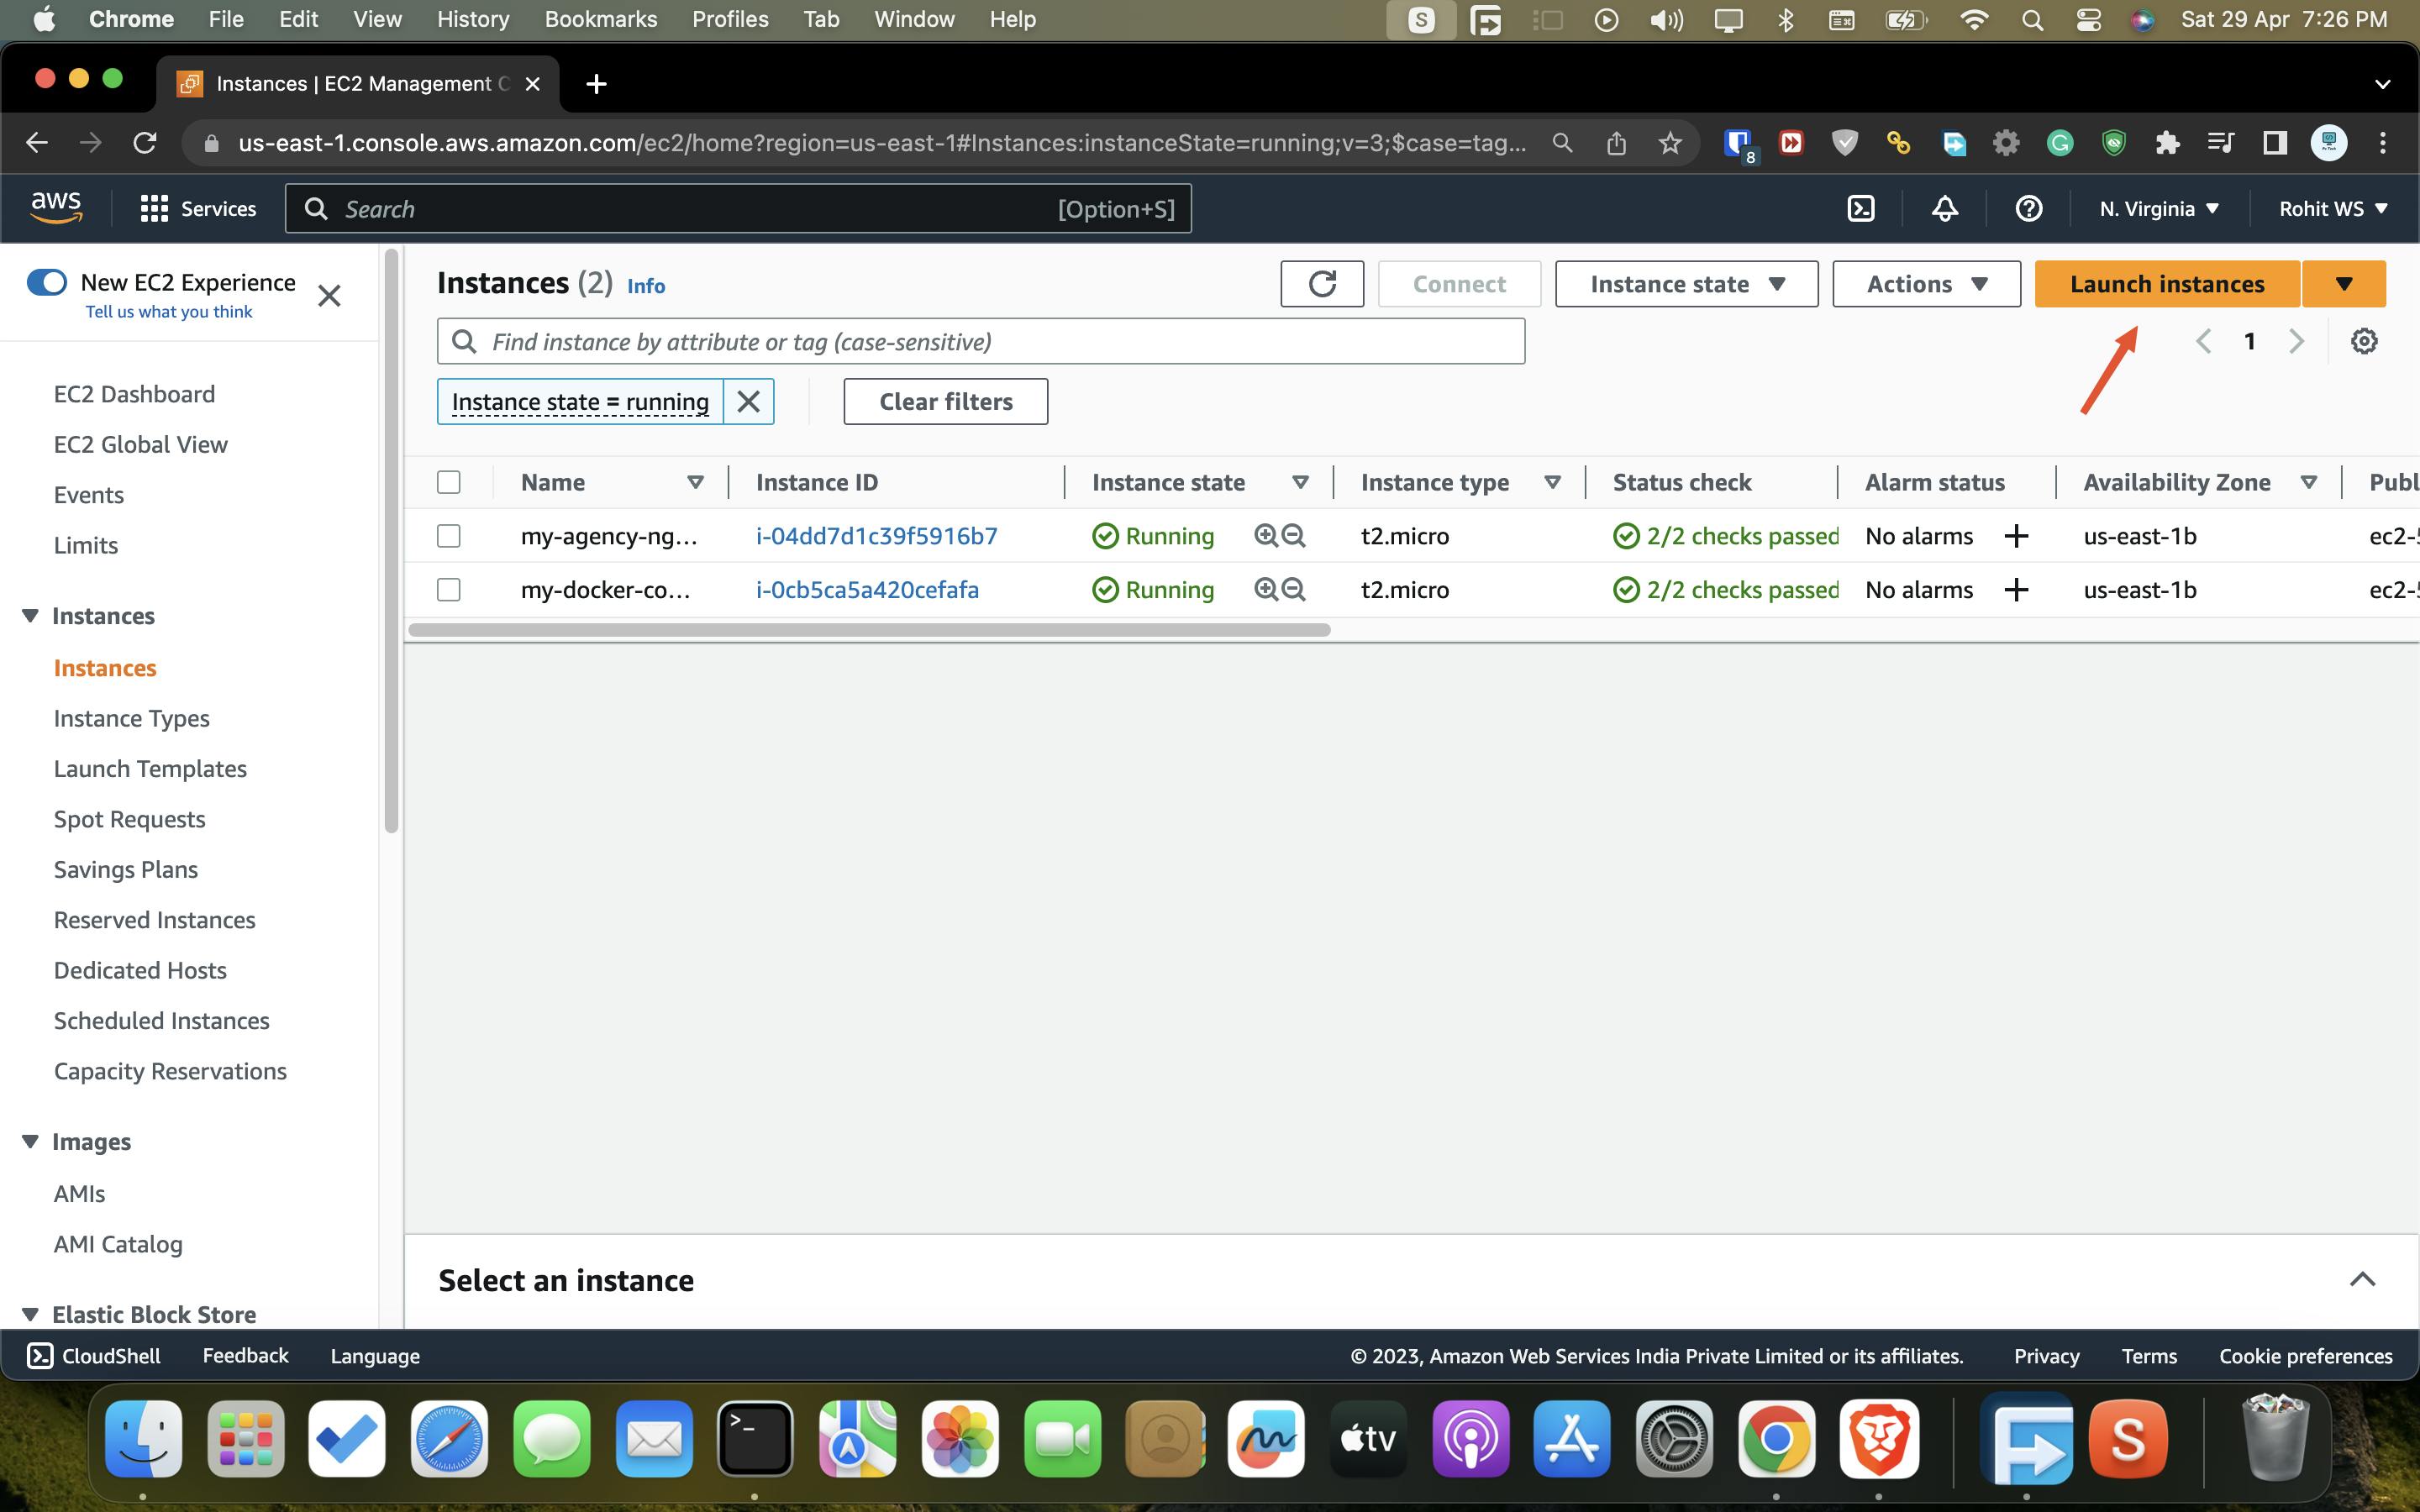
Open the ec2 dashboard and click on the launch instance from the top right corner.
Step -2
Enter the name of your ec2 server

Step - 3
Now from the AMI ( Amazon Machine Image ) section, you have to choose the Ubuntu AMI & select the 20.04 version

Step - 4
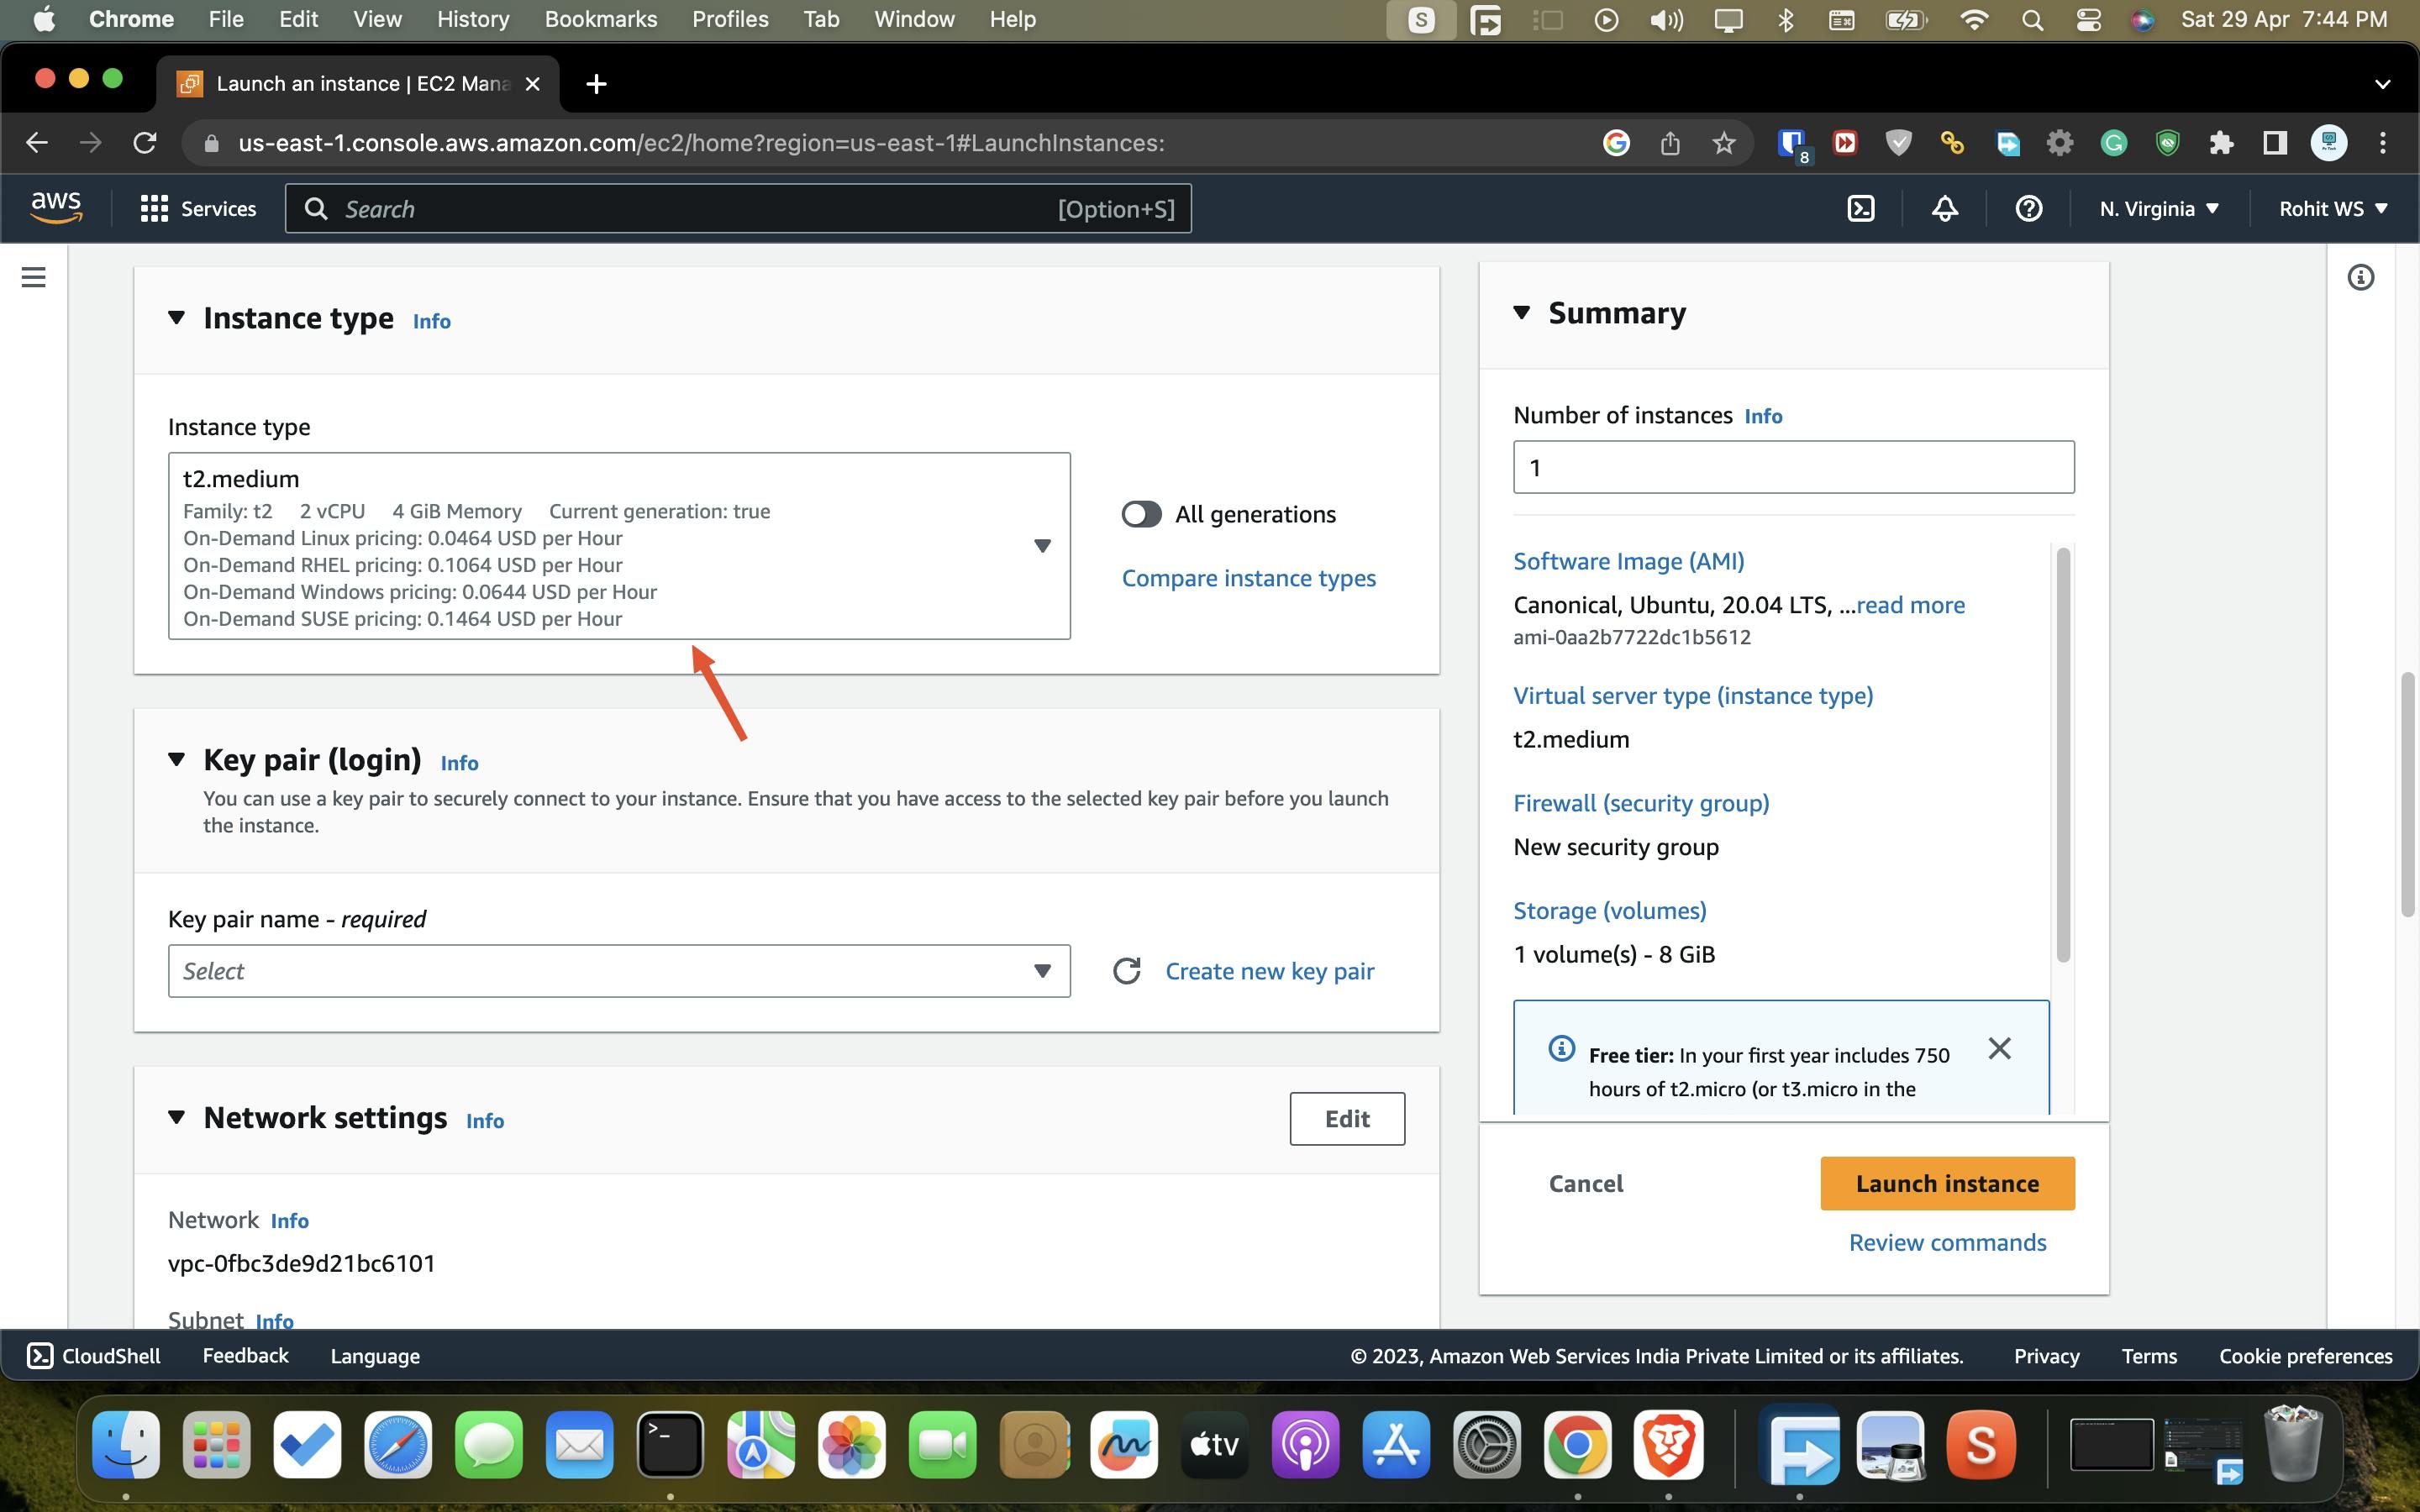
Now from the instance type you have to select the instance which has at least 2 v CPU & 2 GB RAM without it, we can not able to run install minikube & kubectl. So for this tutorial, we are going to select the t2.medium instance which has the 2 v CPU & 4 GB RAM & it will be sufficient for this tutorial also you can configure has end machine as well.
Step - 5
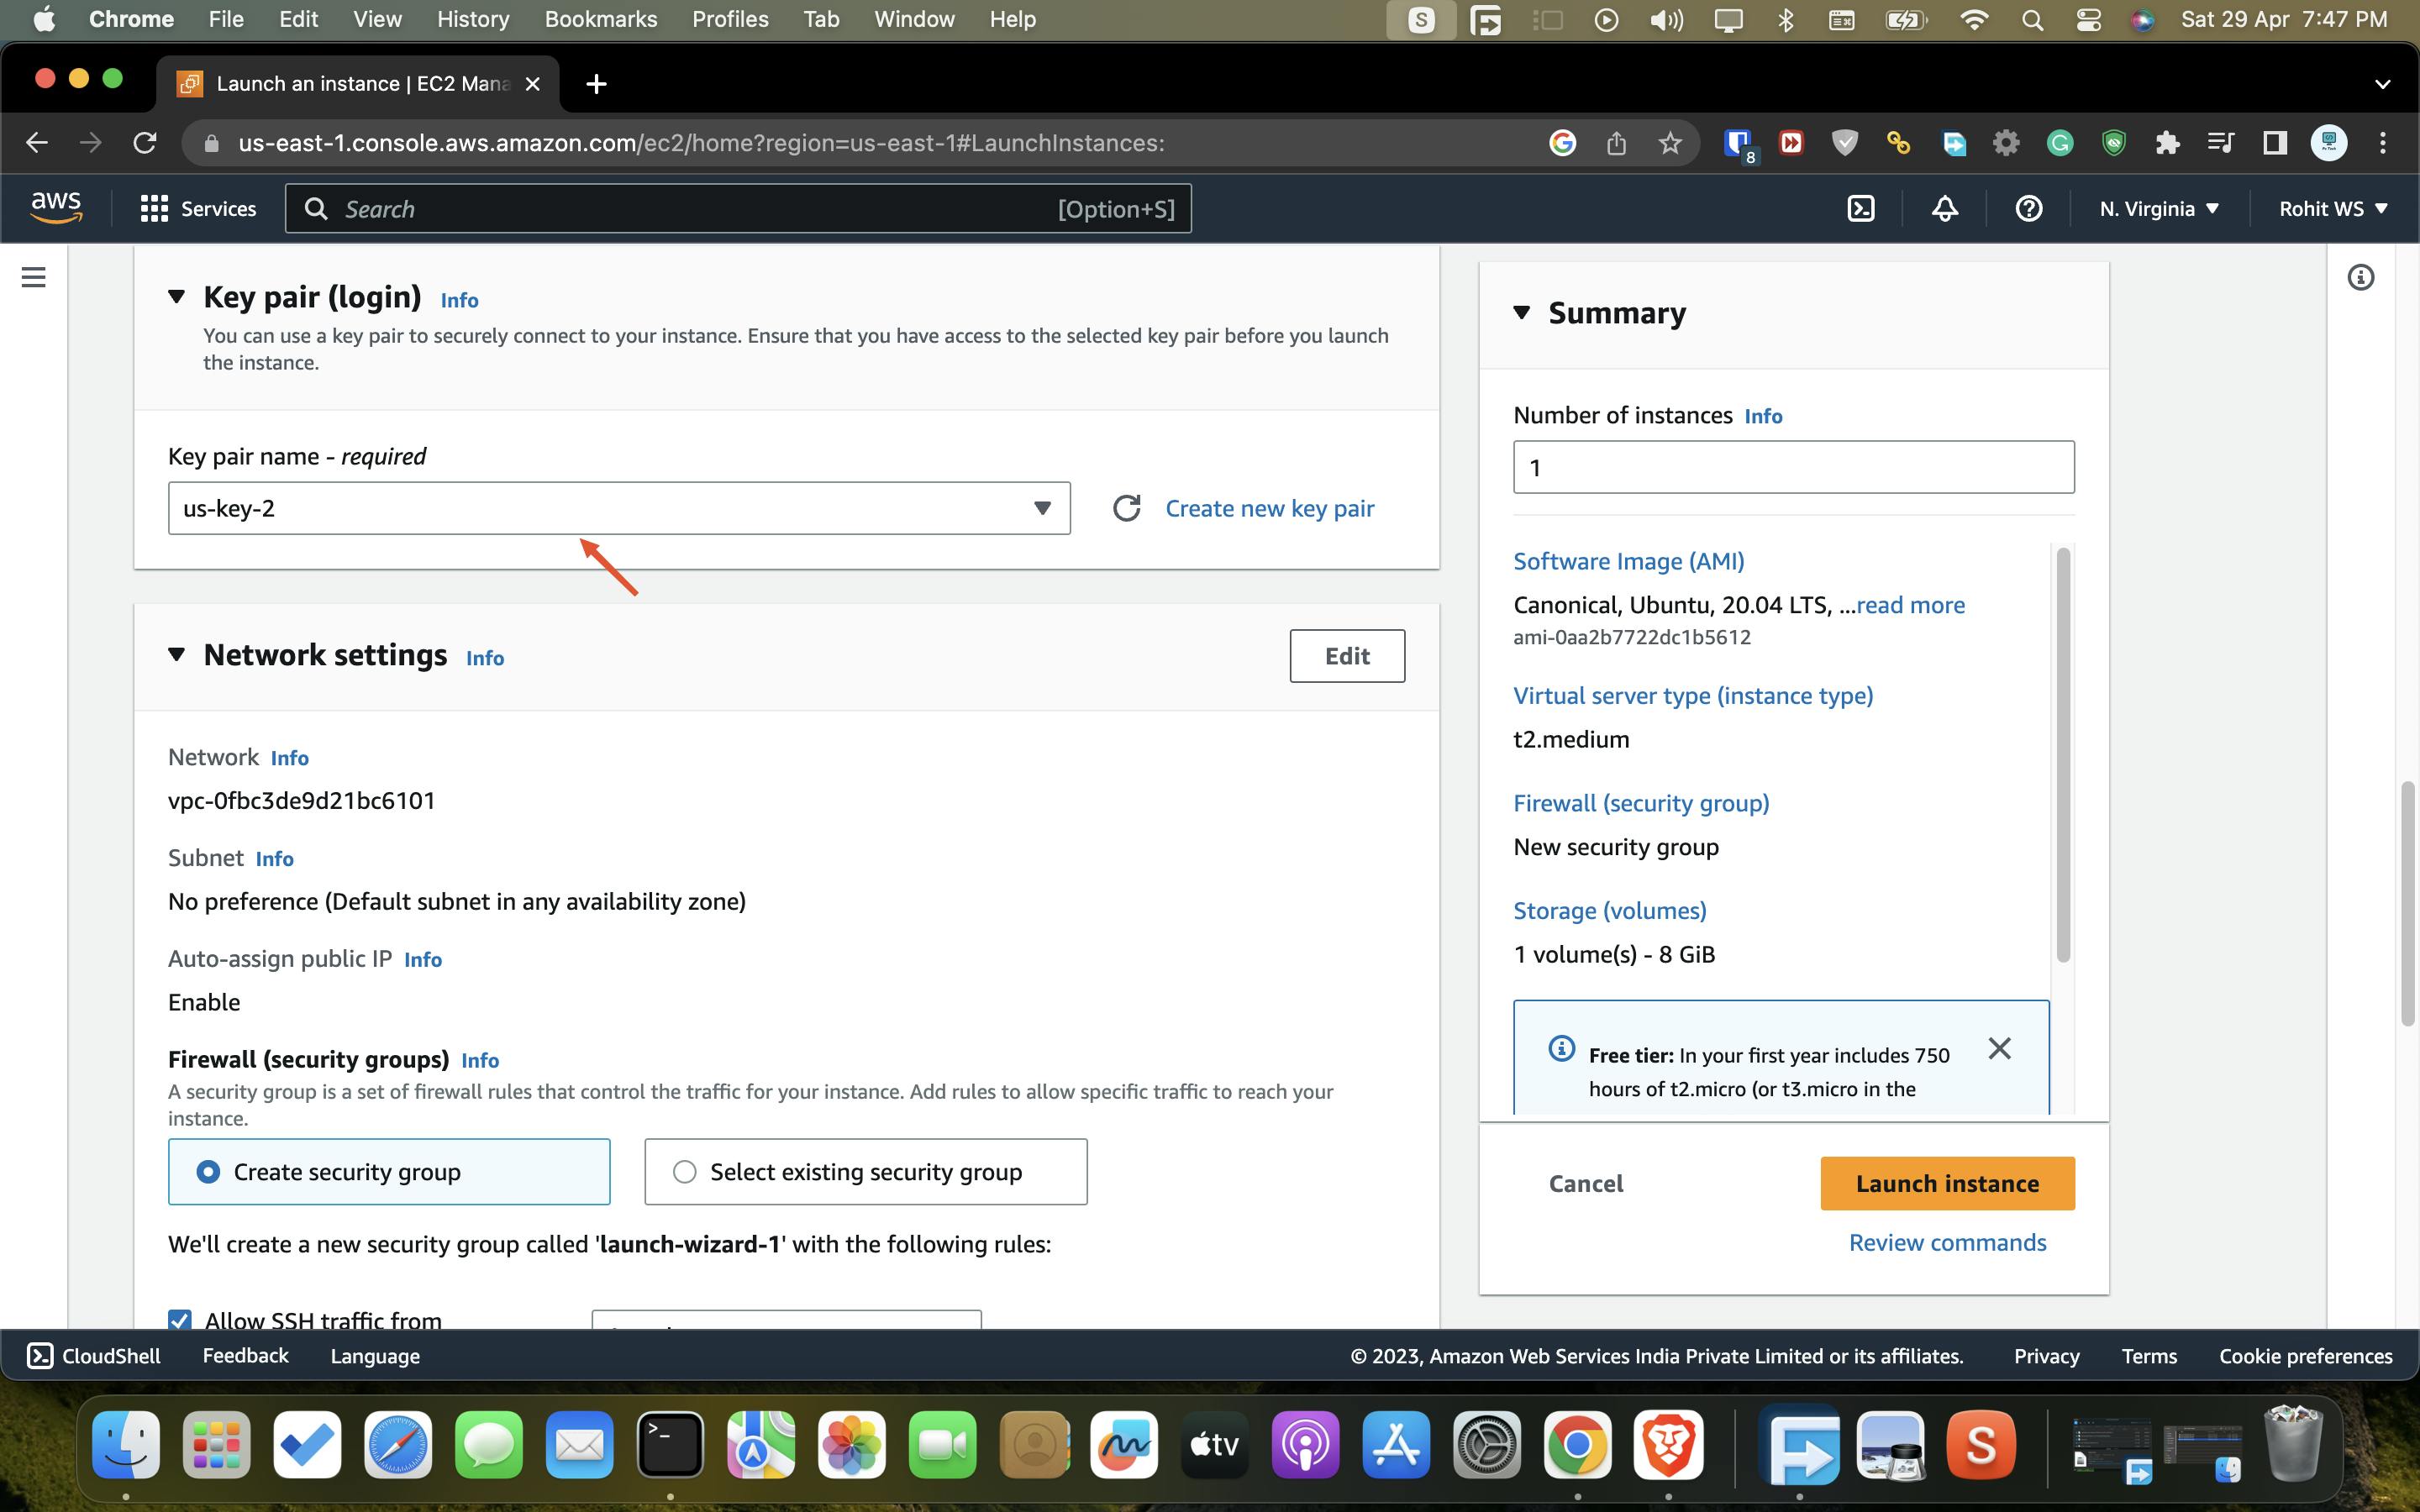
Now from the key pair section you have to select the key pair or if you don't have key pair, you can create easily using the "create new pair key pair" option.
Step - 6
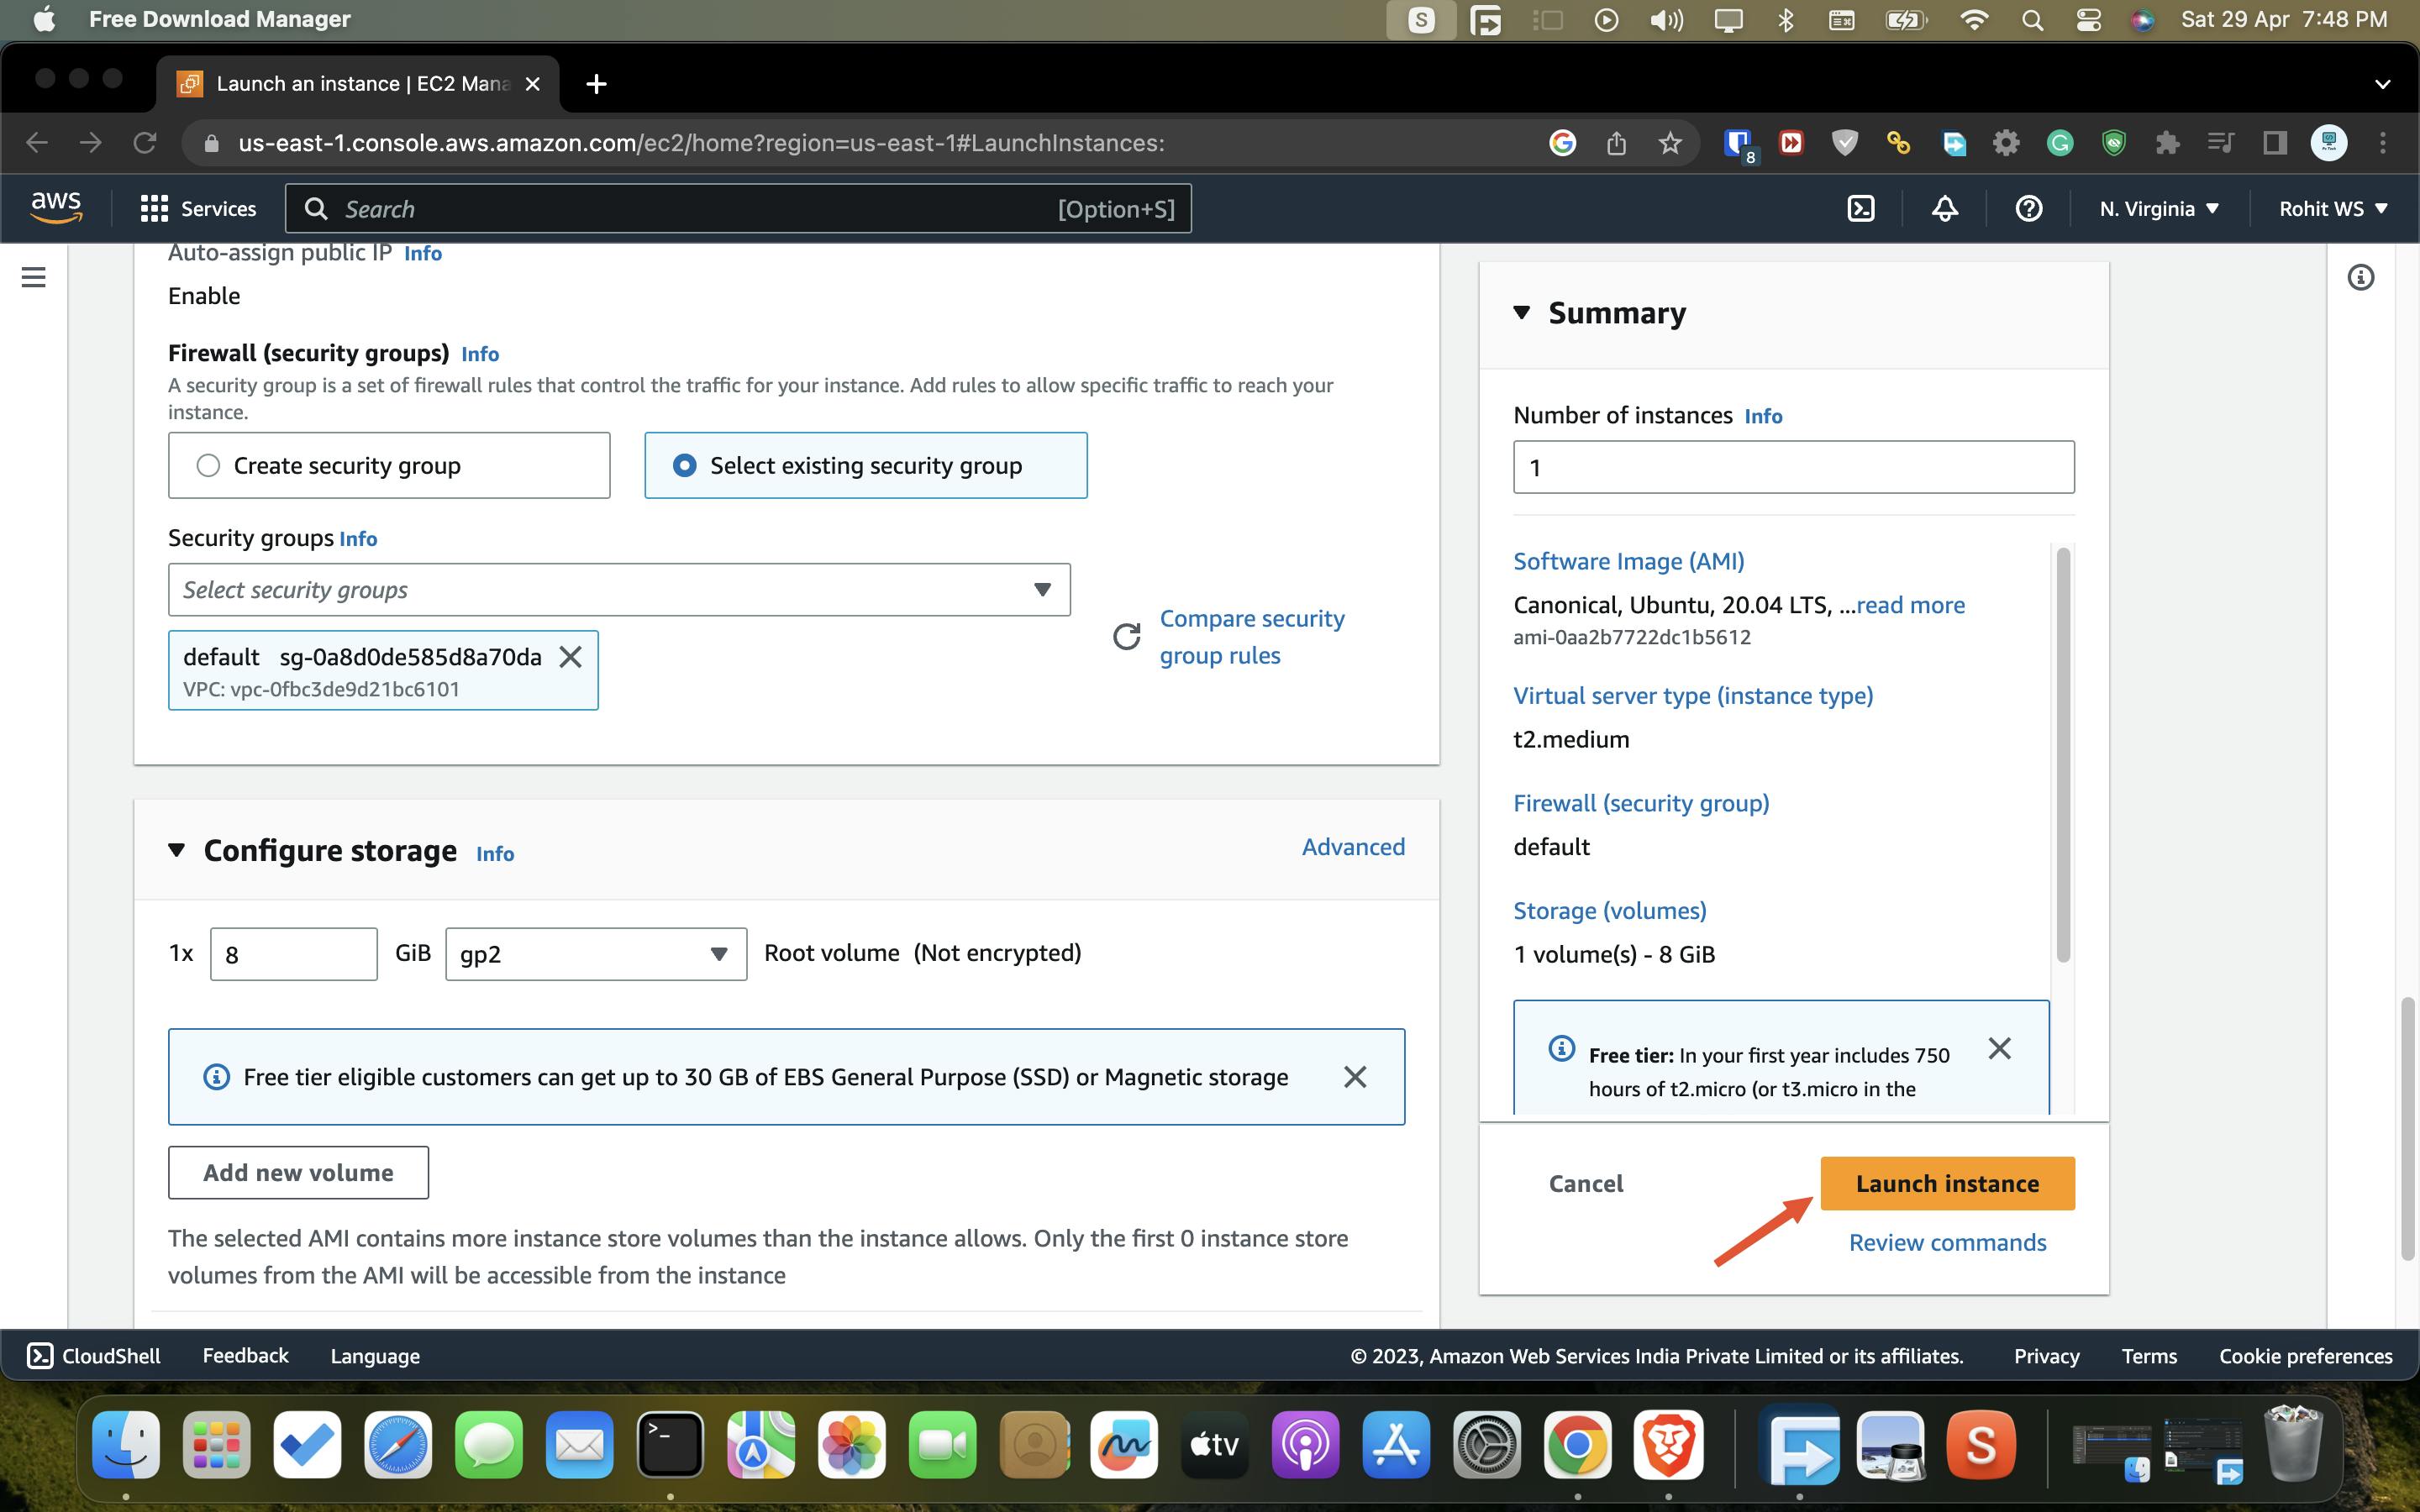
From the network setting, we are going to select the default security group or either you can create your own security group as well.

Step - 7
Now you can add the extra storage if you want but I am going to leave it once you are done with all the things then click on the launch instance.
Step - 8
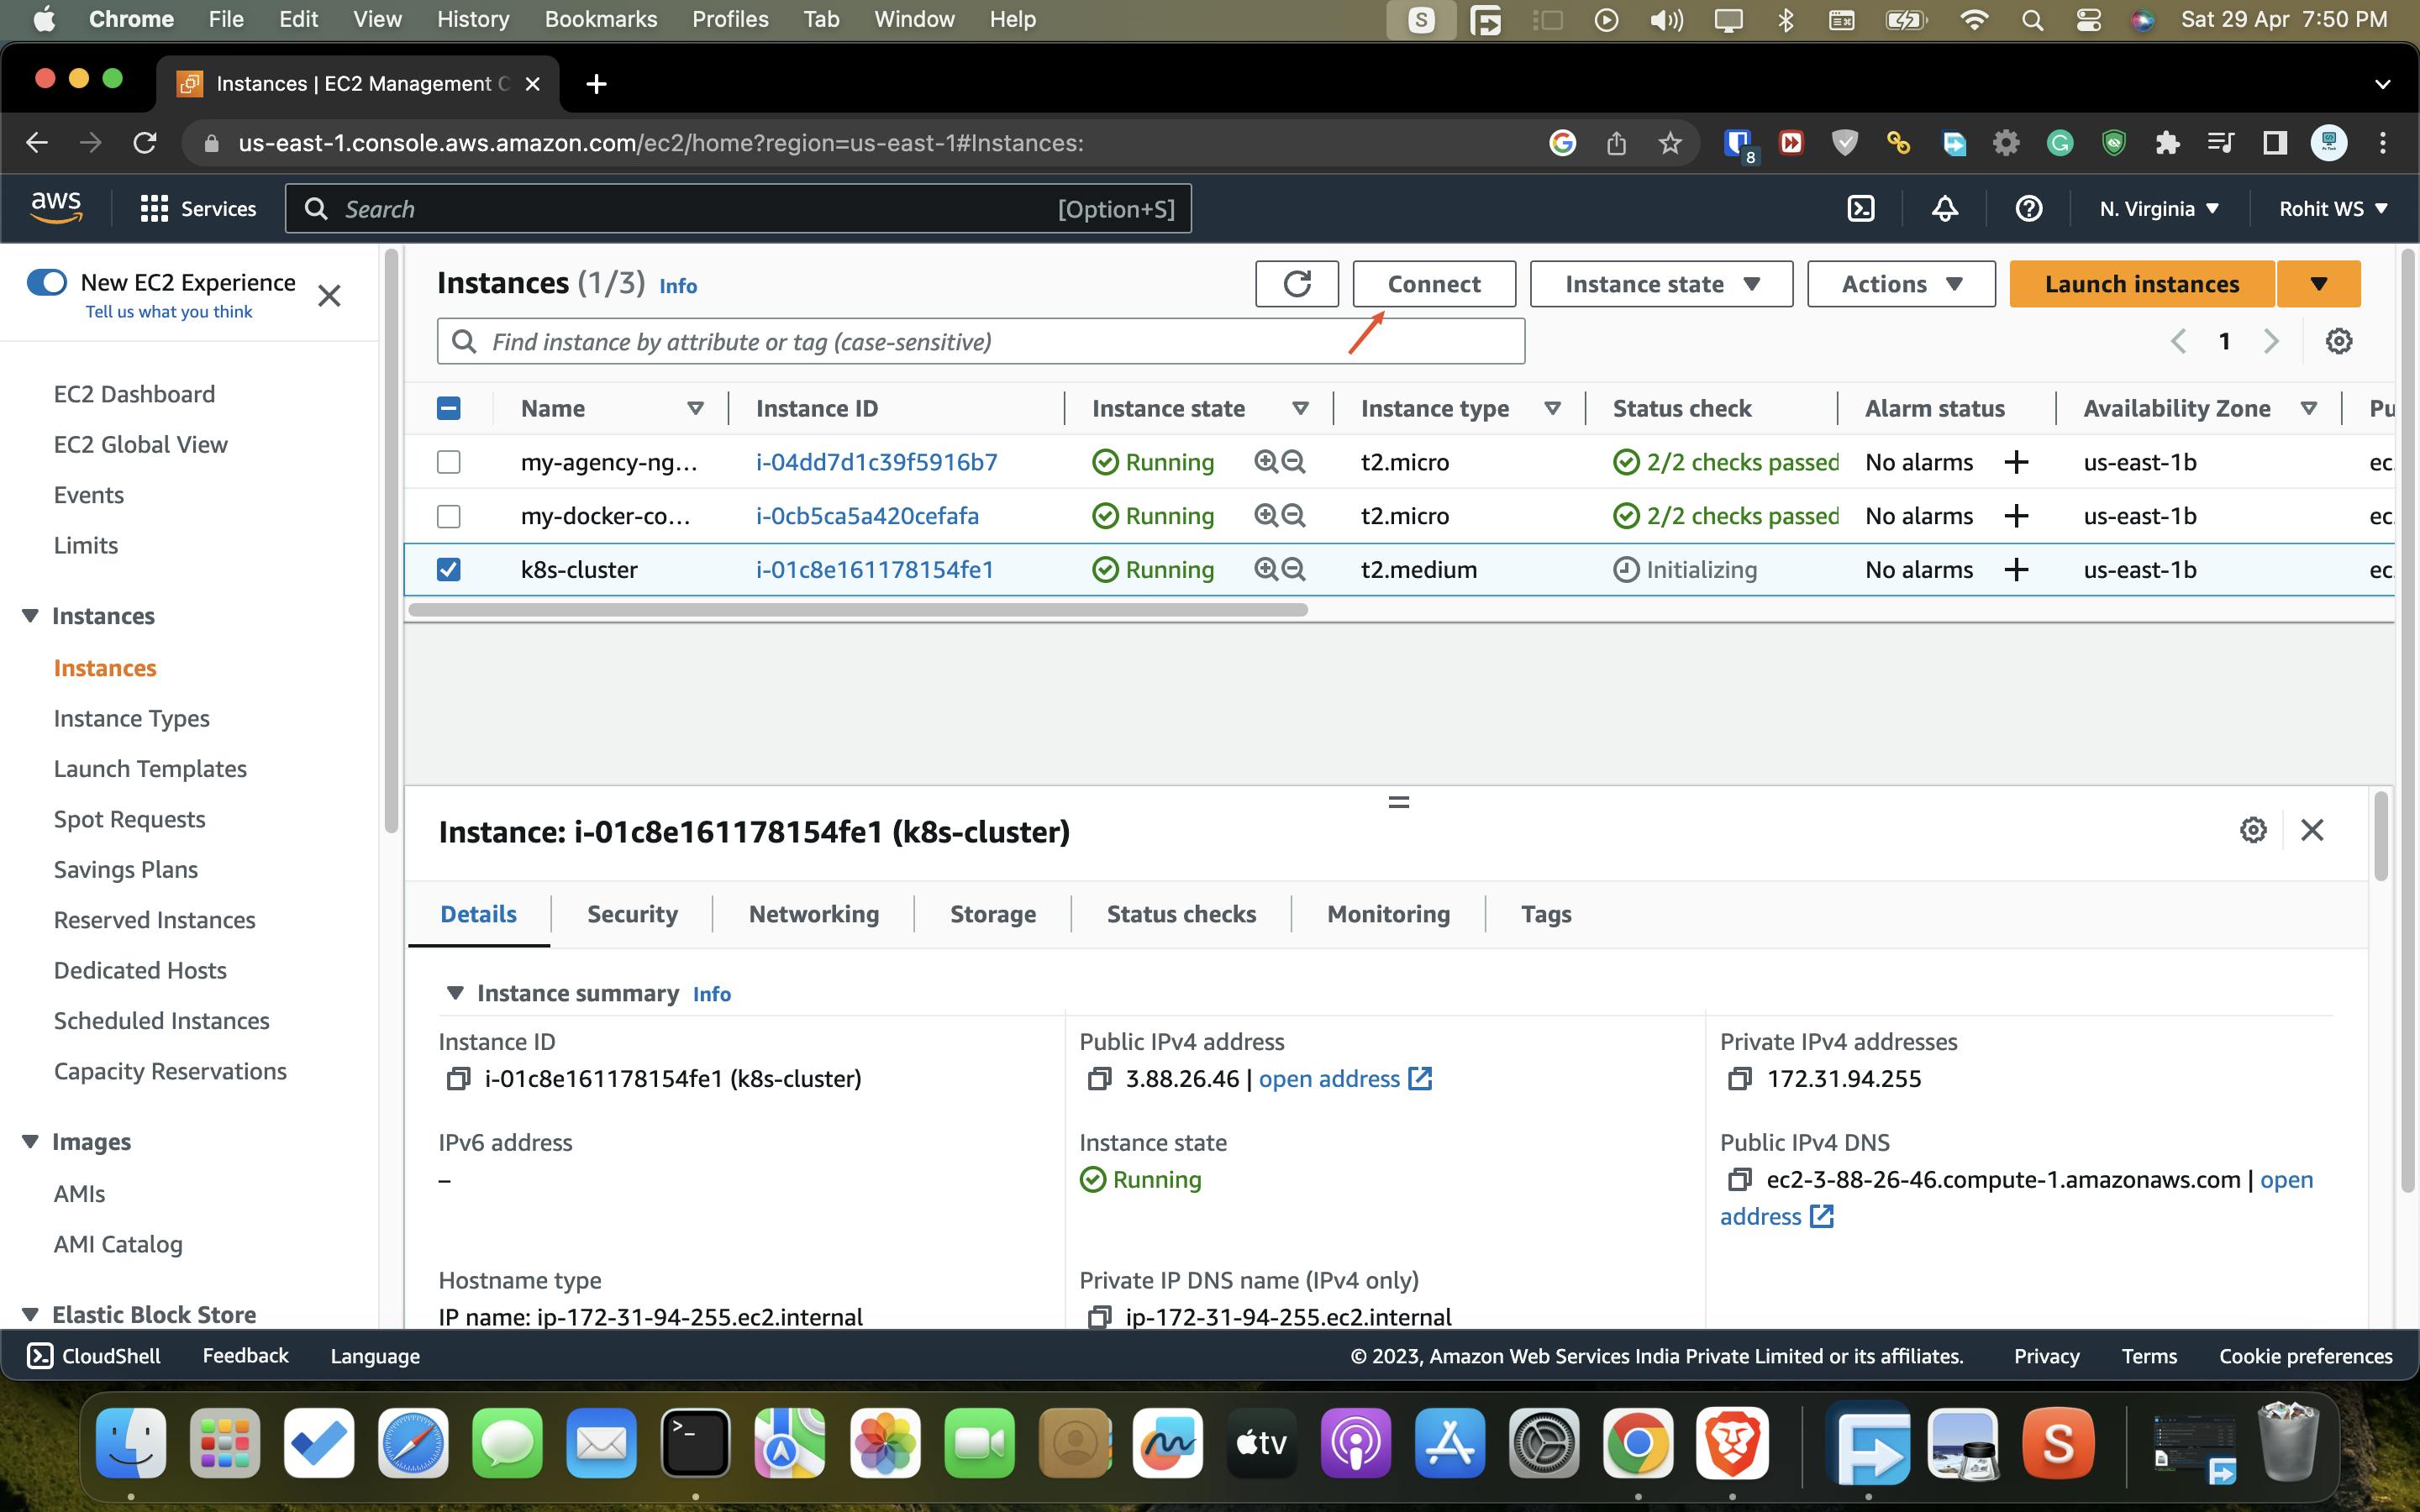
Once your instance is get into the running mode then select the instance and click on the connect.
Step - 9
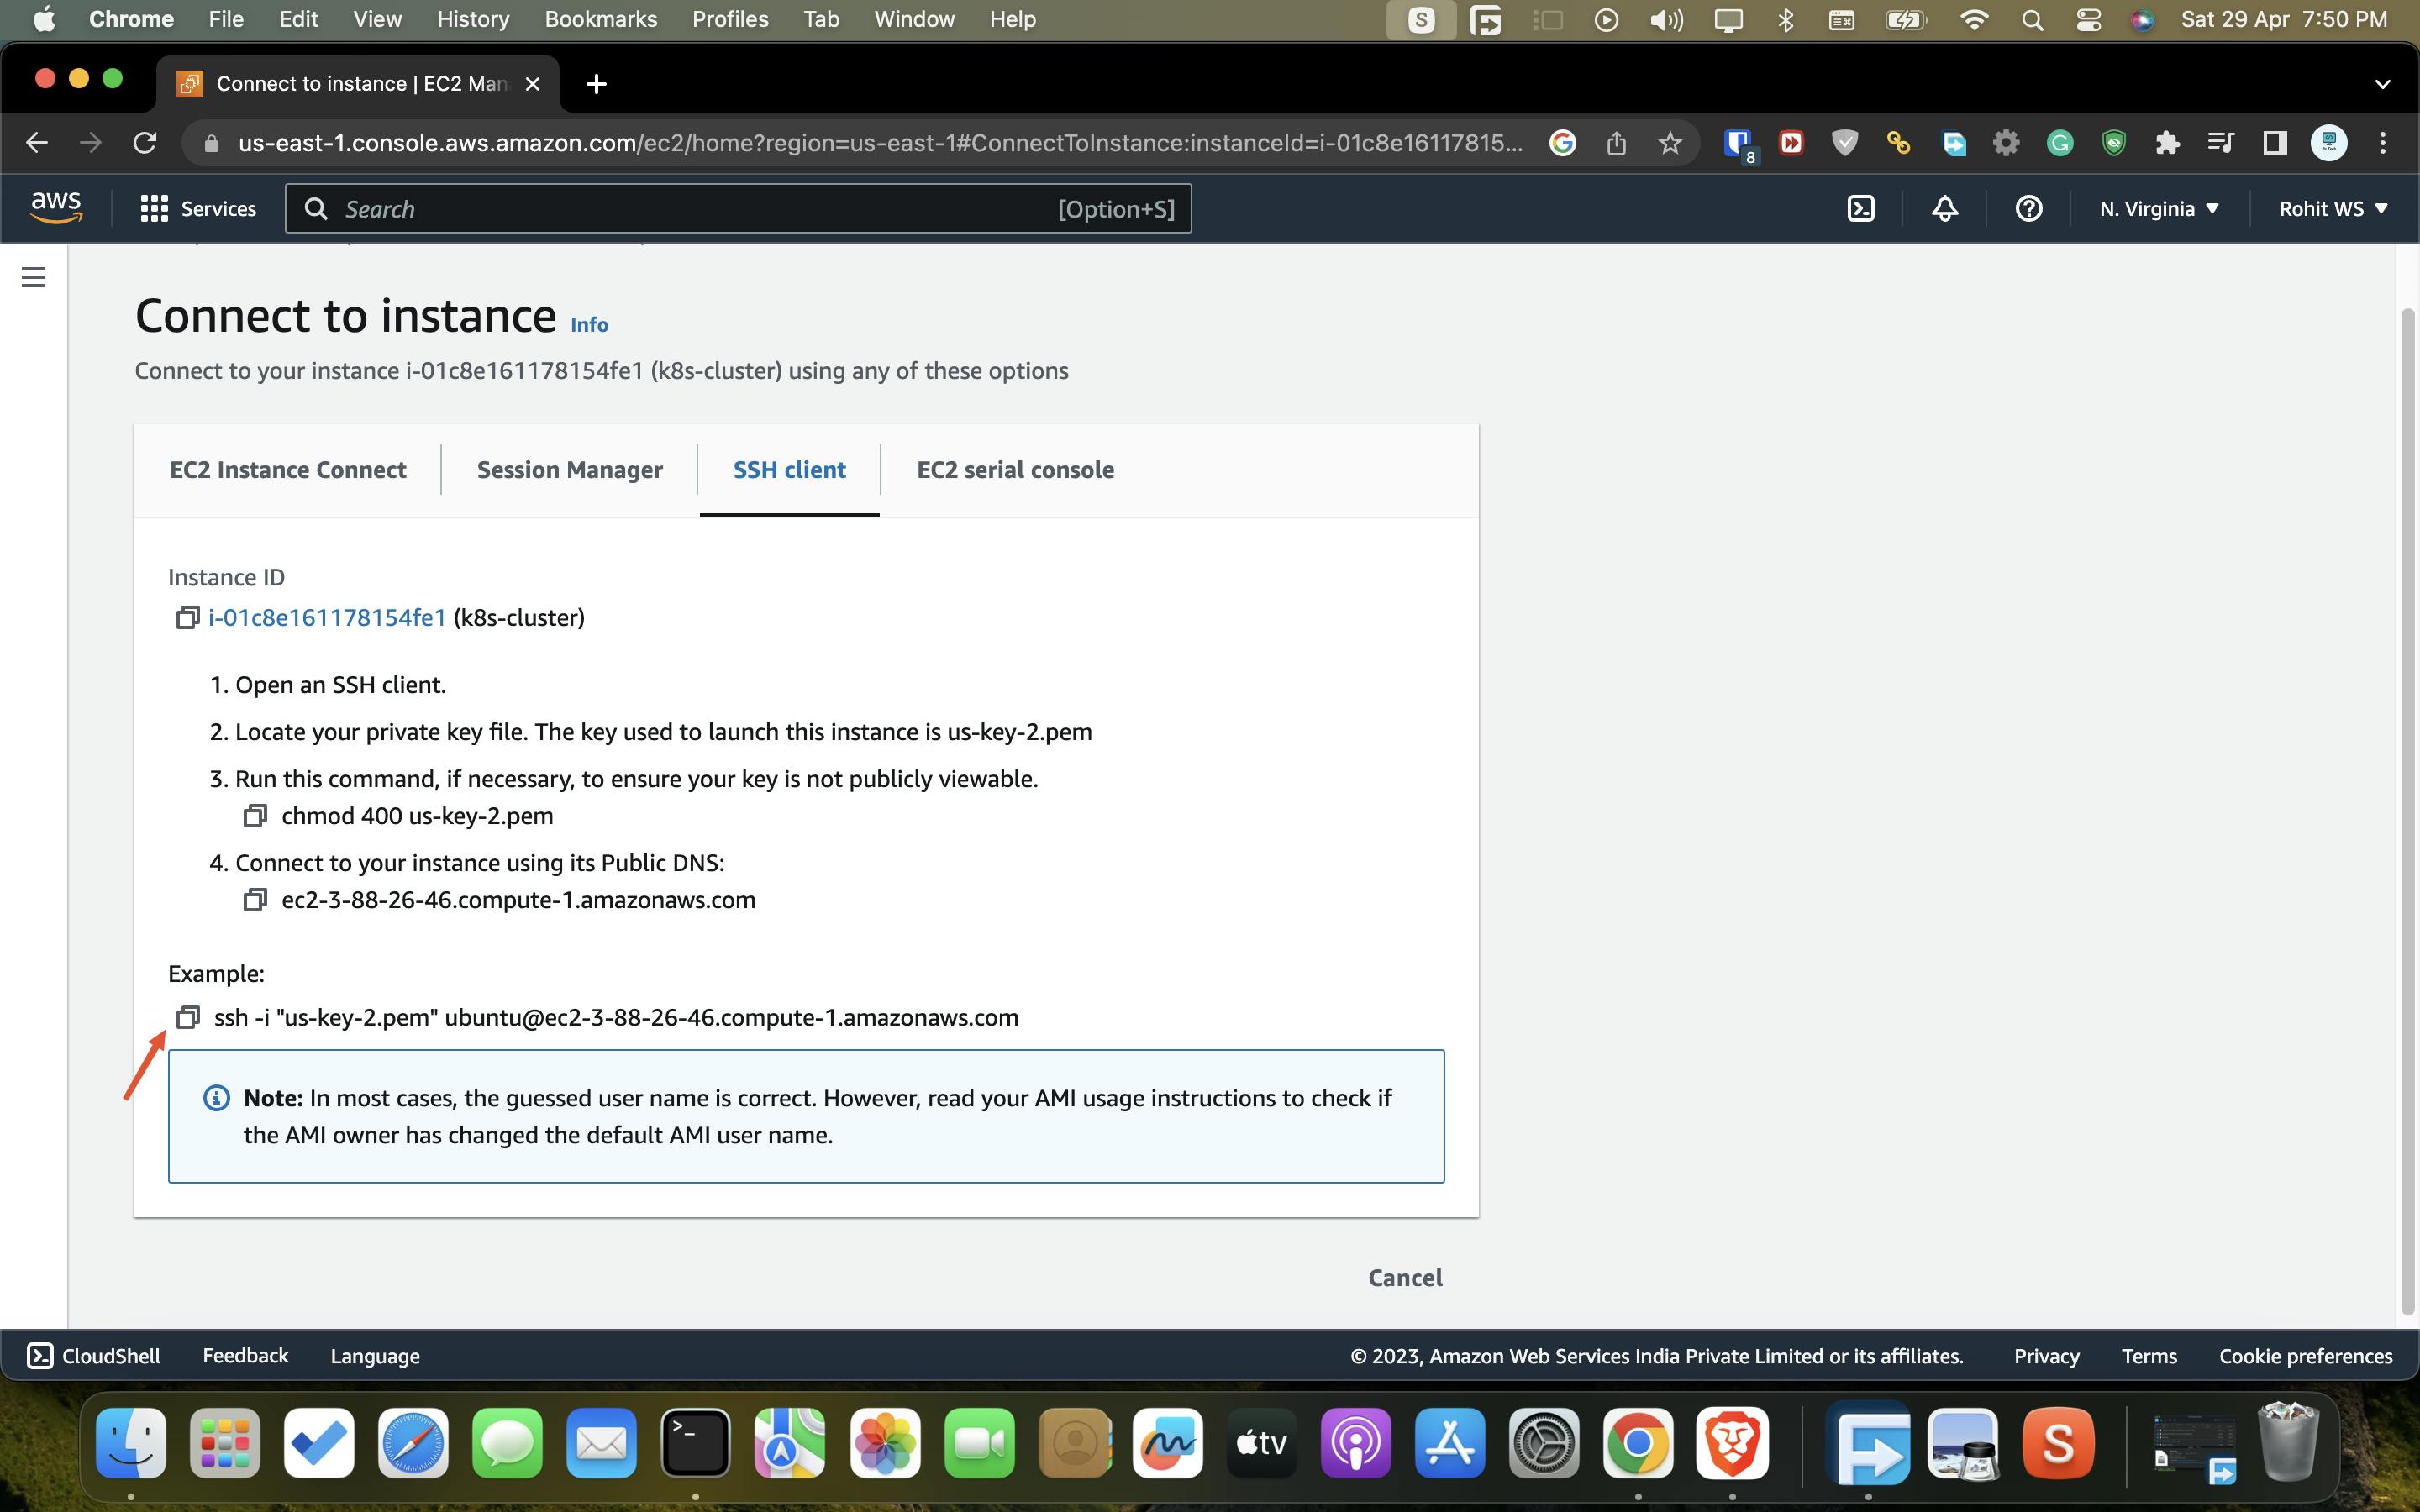
From the " SSH Client " section copy the ssh command
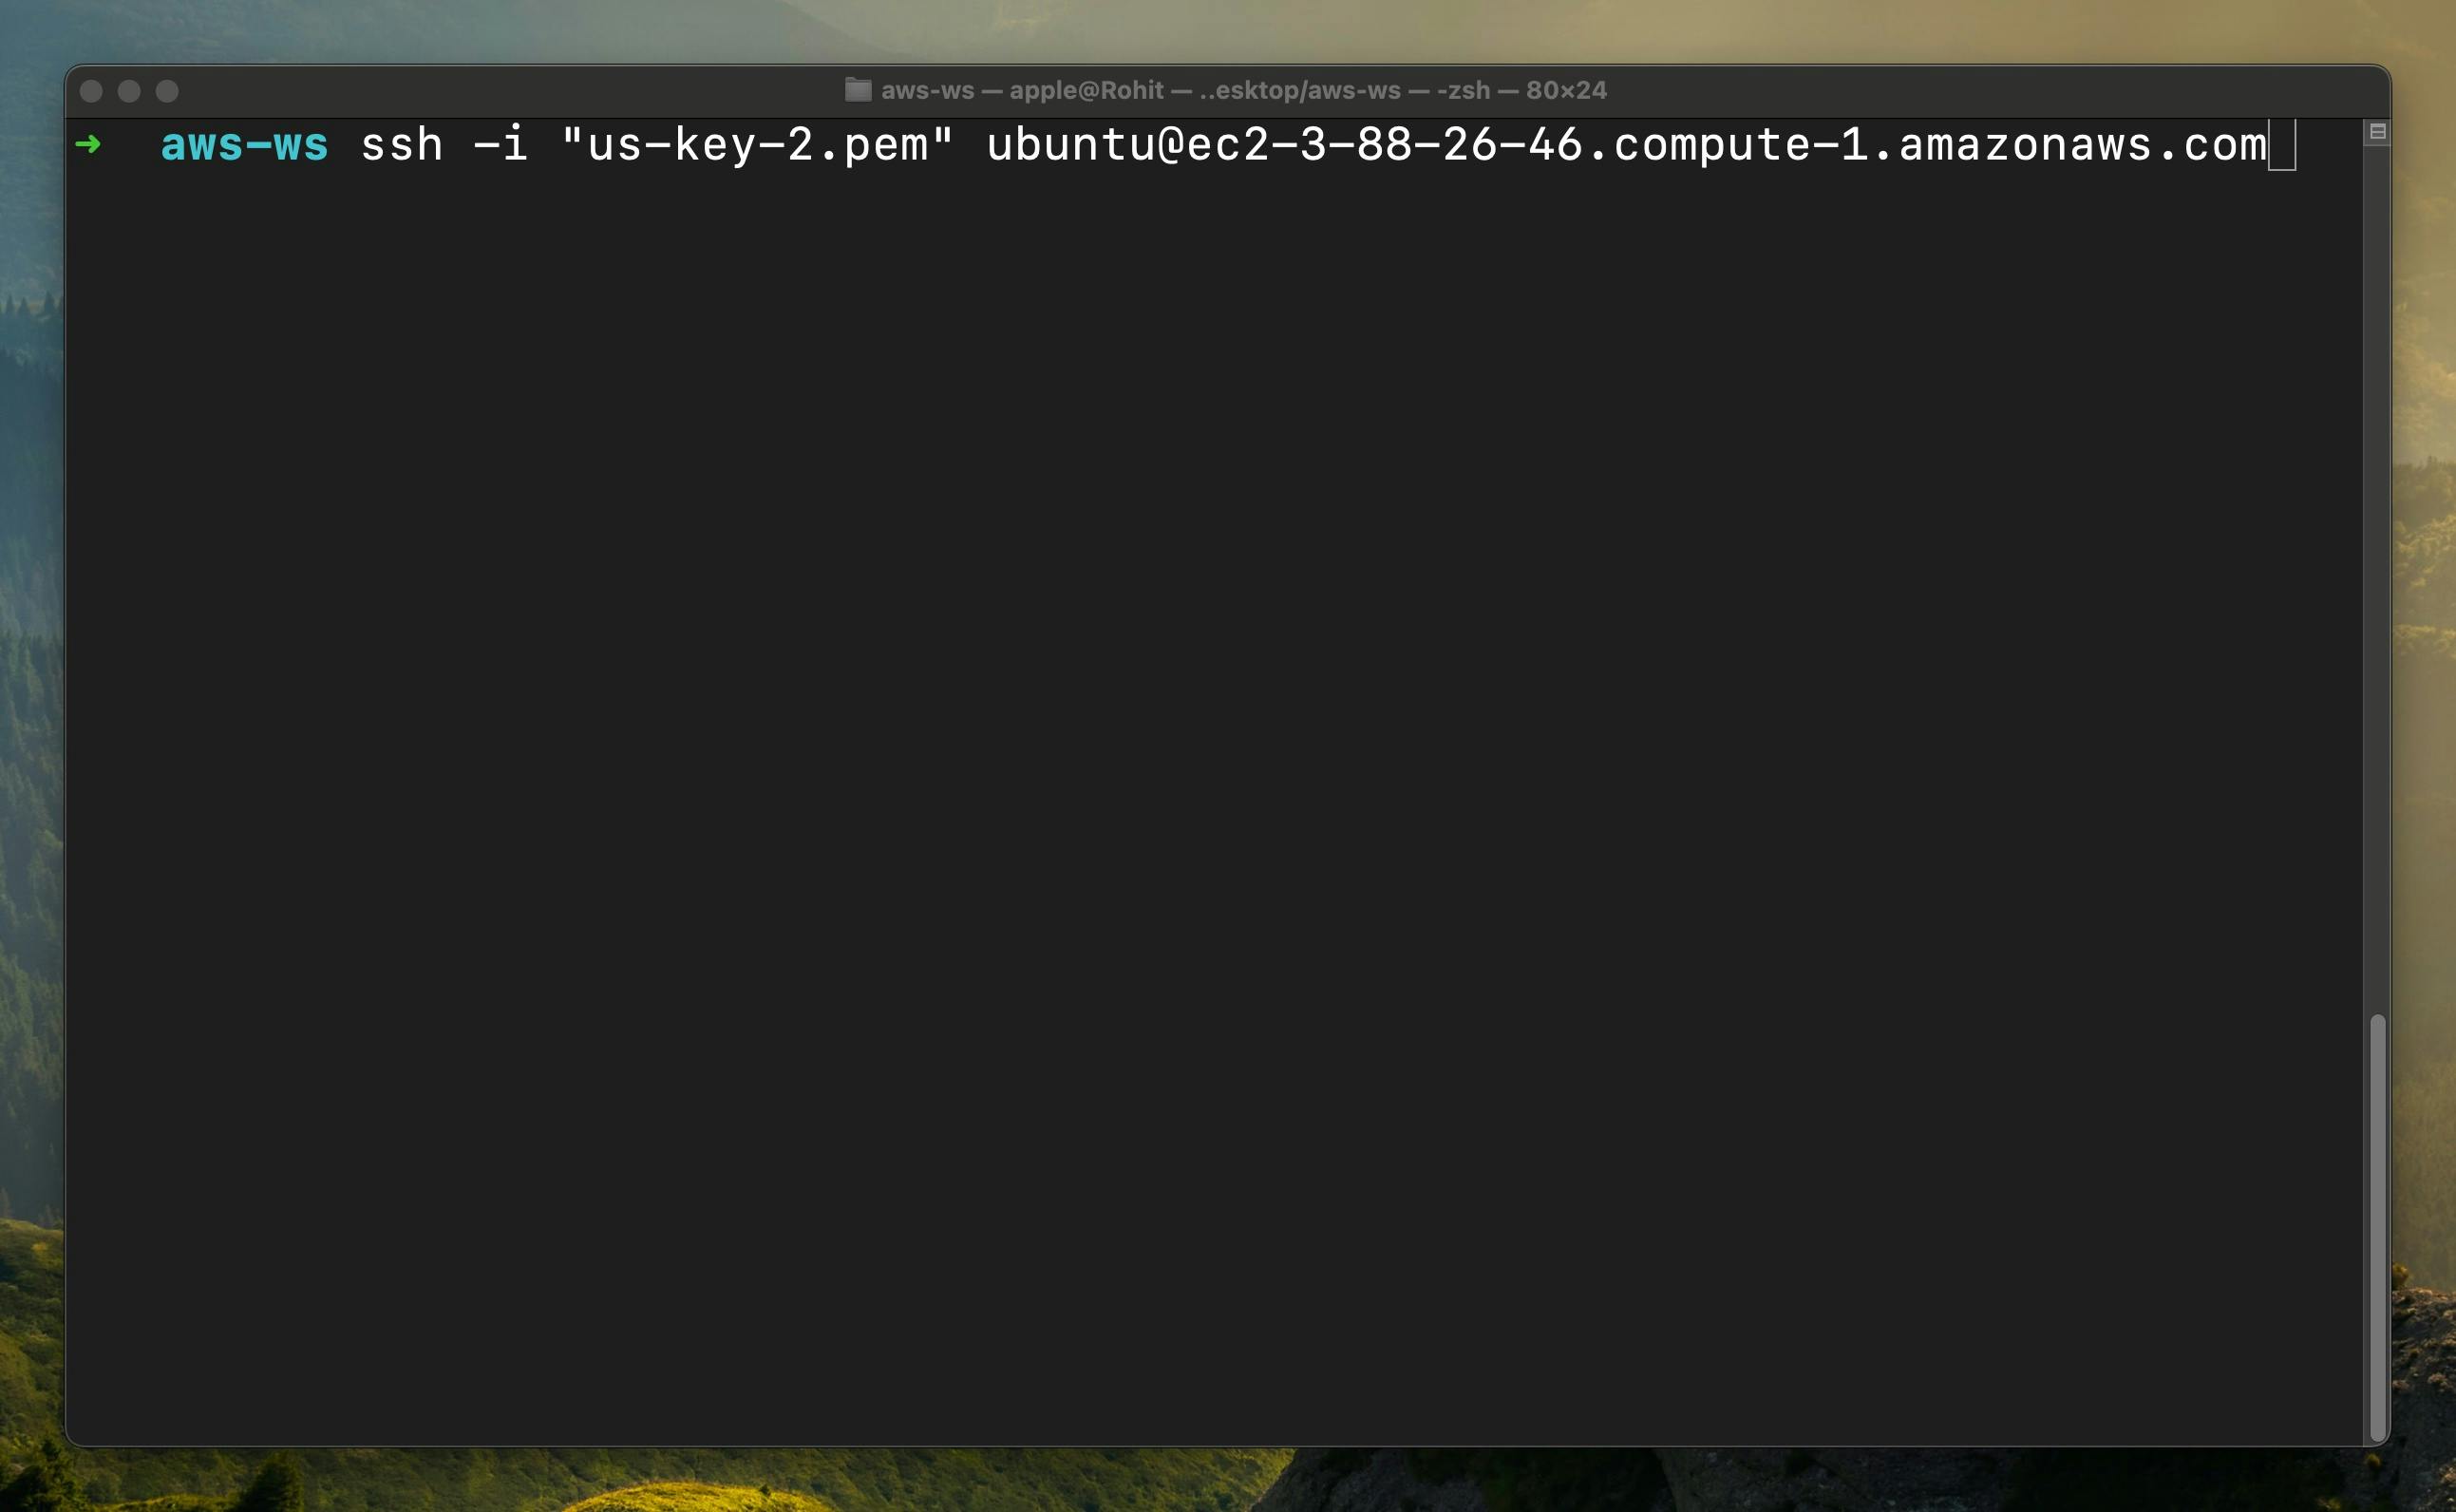
Step - 10
Open the terminal and paste the command where you have your key pair and so I have my key pair in the same directory so I am going to paste this command.
Step - 11
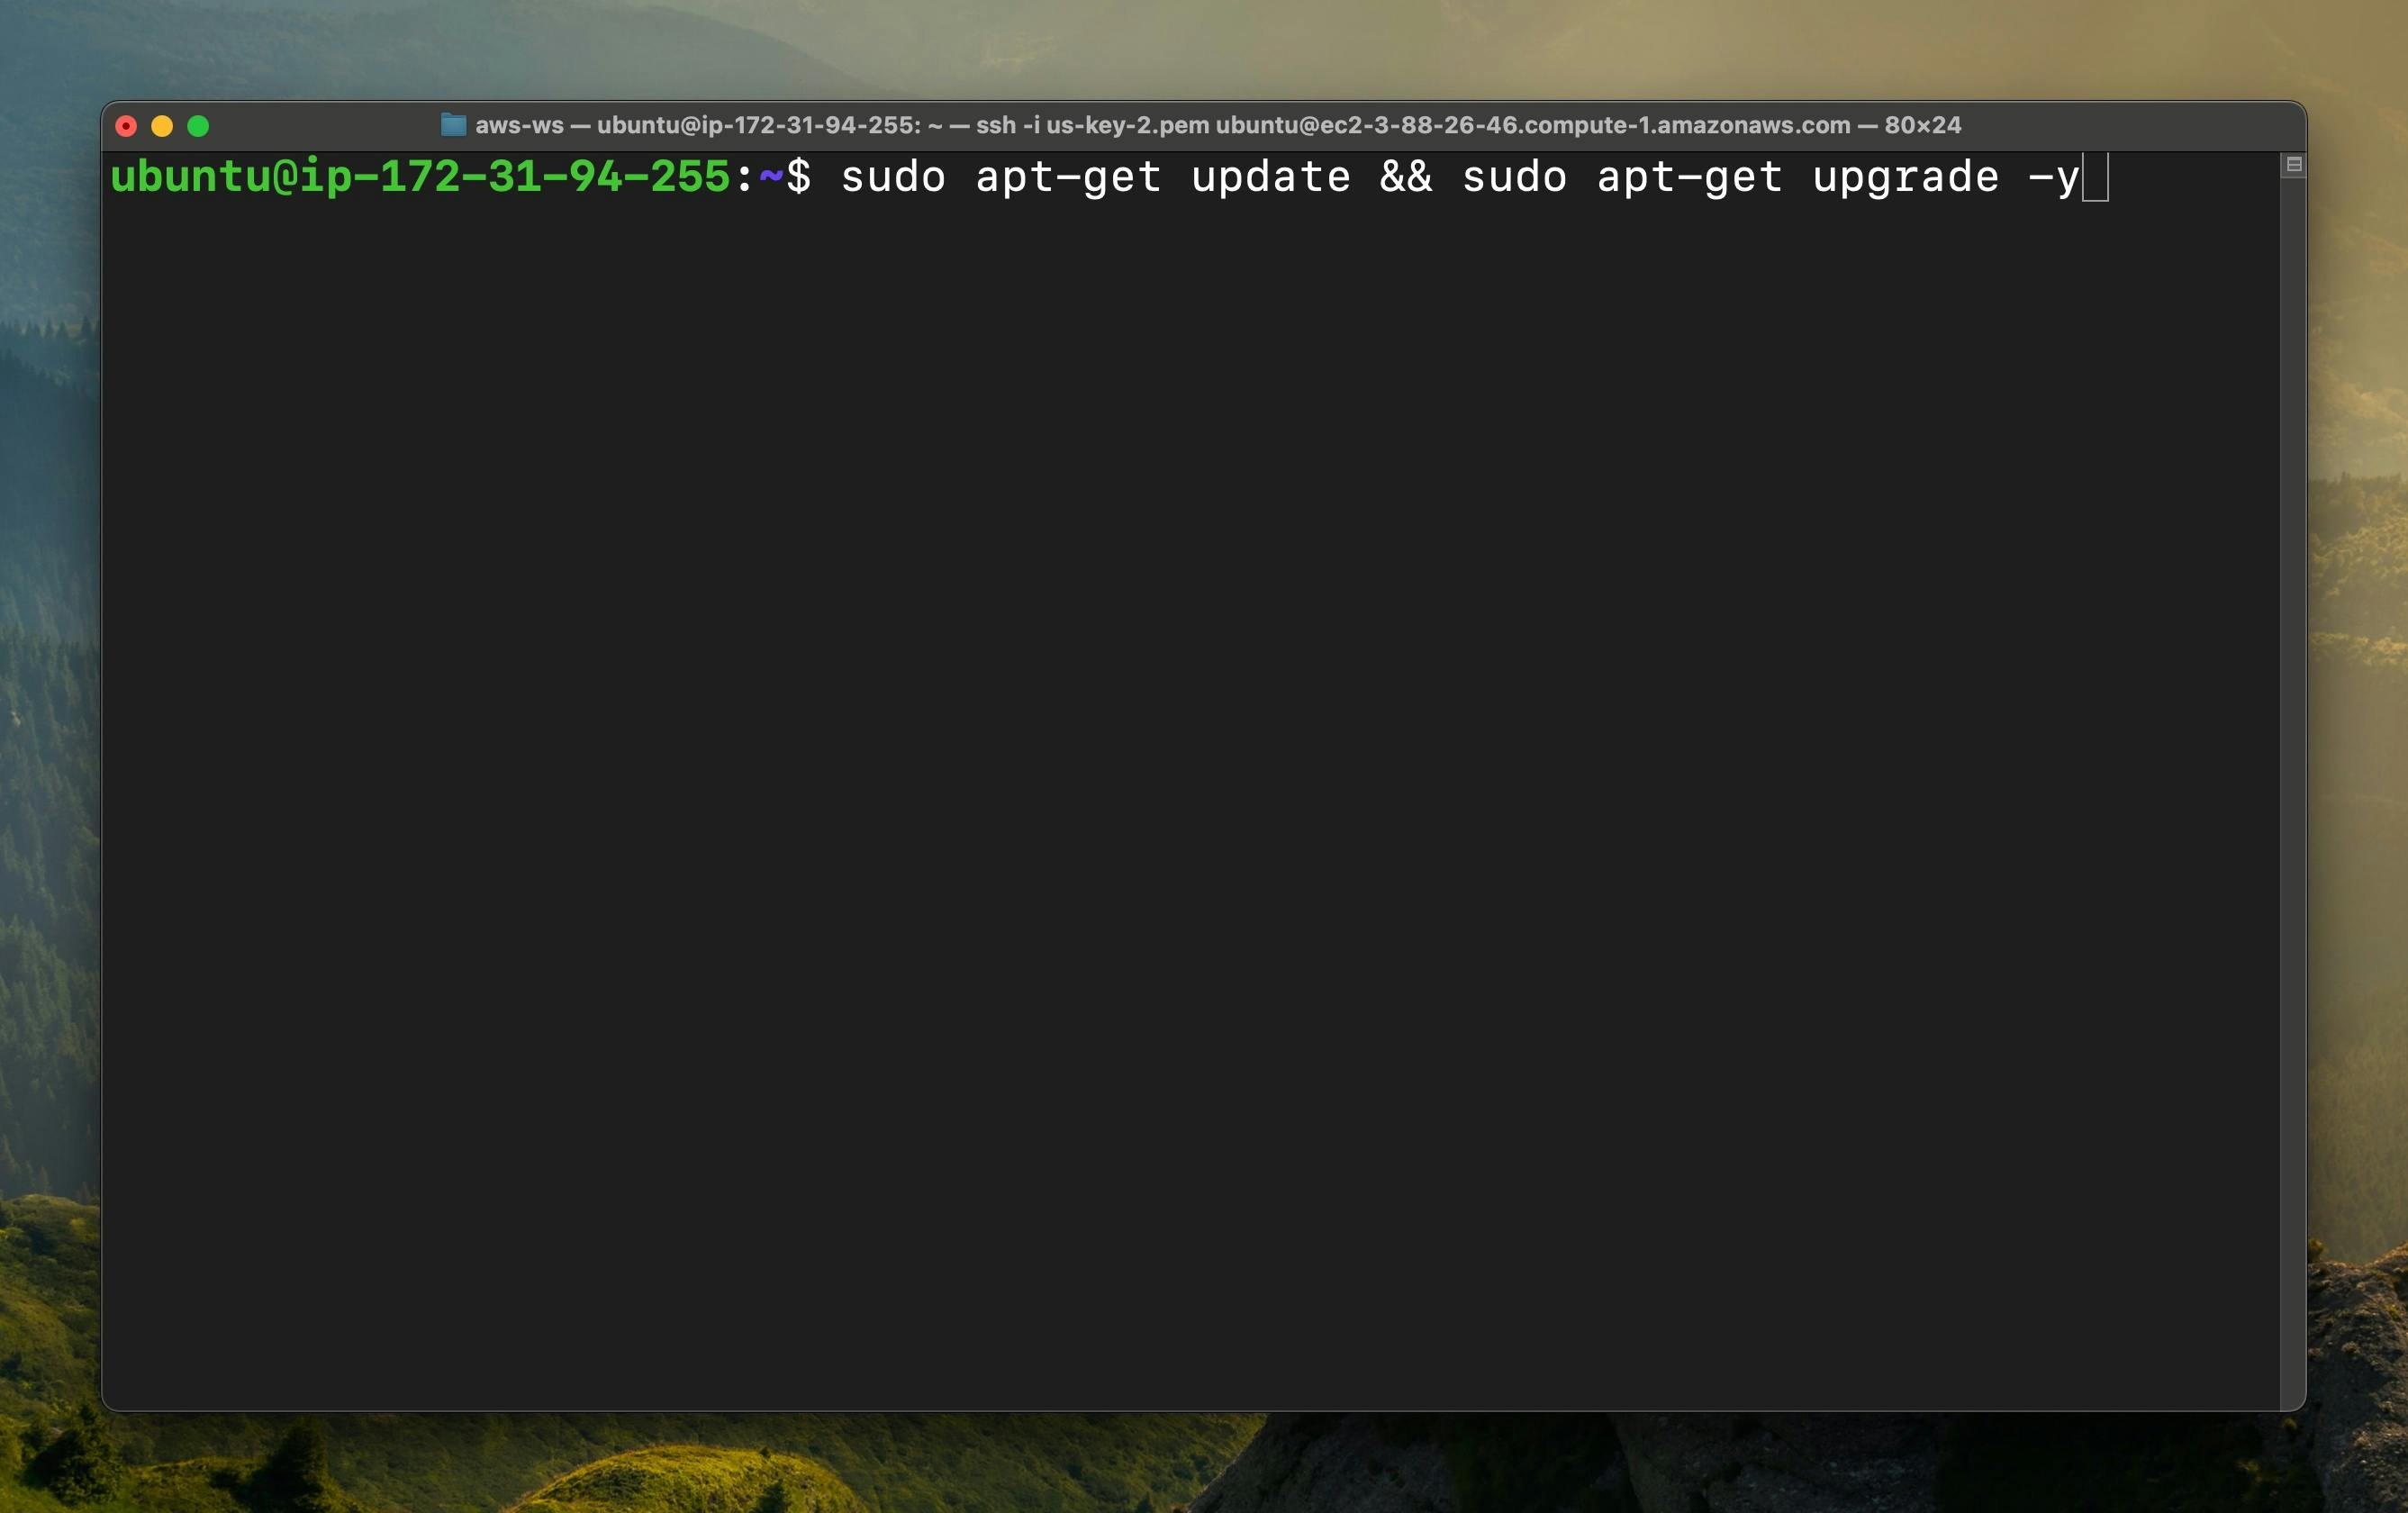
Once you successfully get in the machine so now we are going to update & upgrade the packages
sudo apt-get update && sudo apt-get upgrade -y
Step - 12
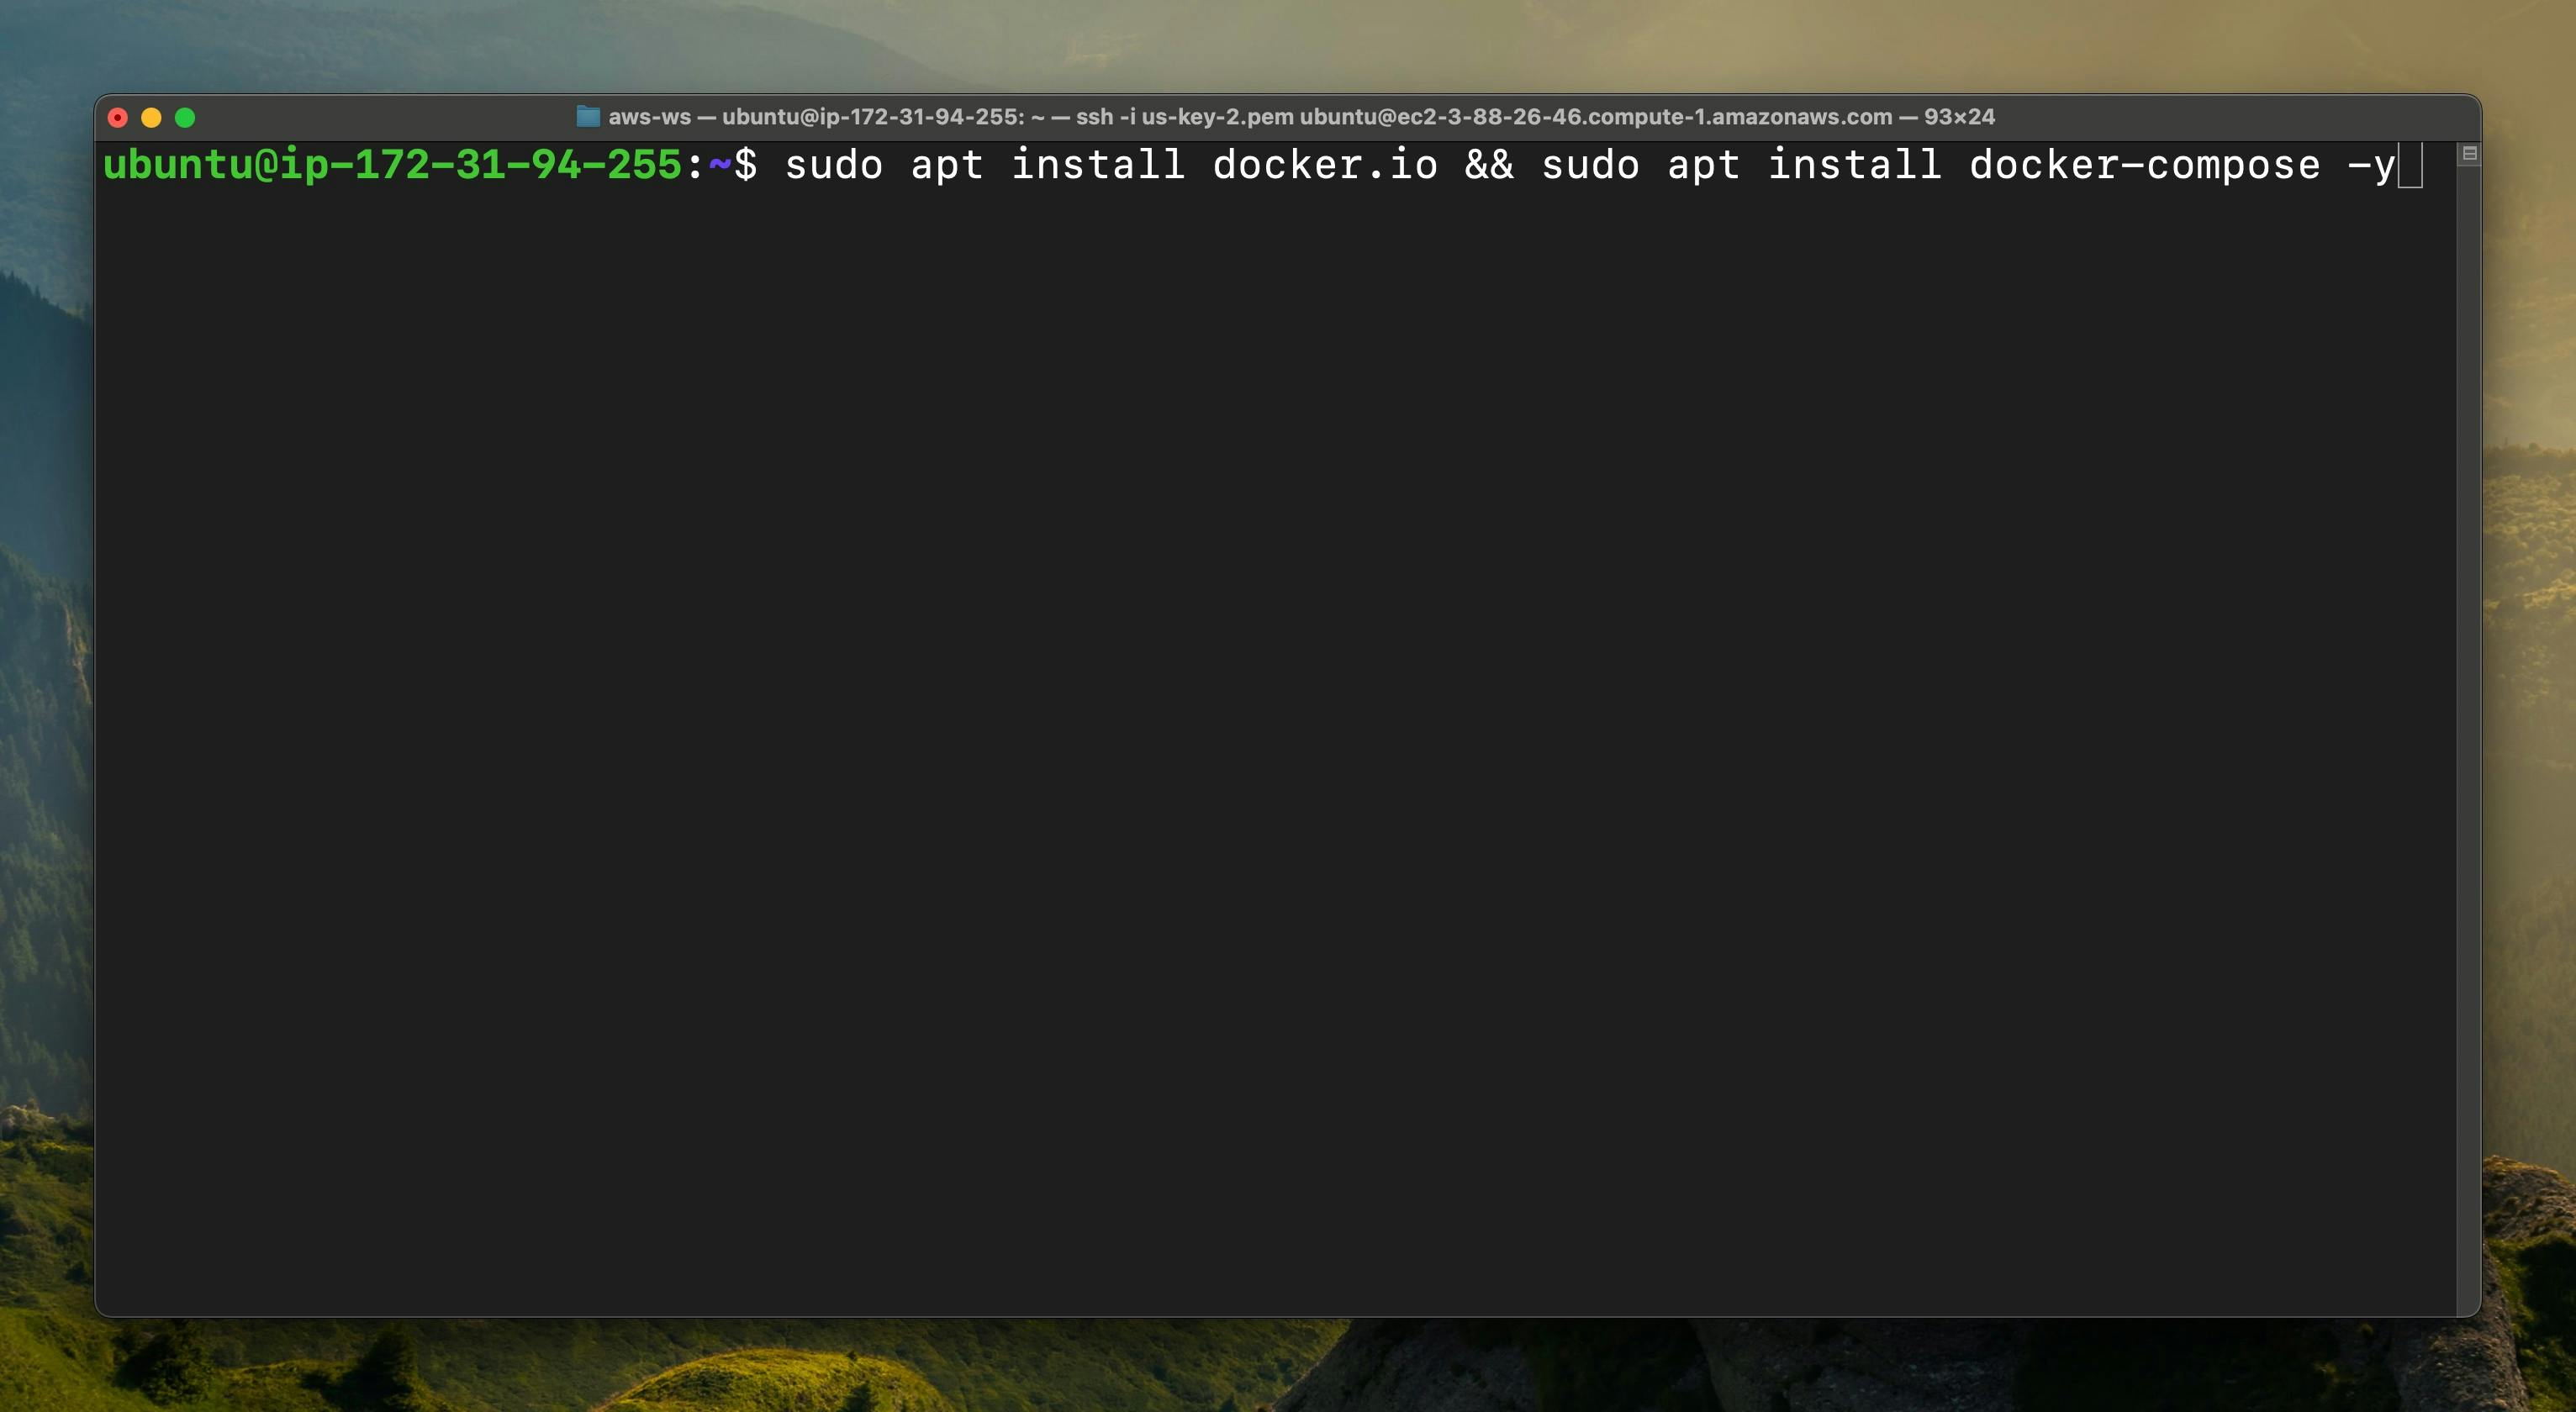
Once you are done with the above process then we are going to install docker & docker compose
sudo apt install docker.io -y && sudo apt install docker-compose -y
if the docker.io command is not working then you can follow this command
sudo apt install docker -y && sudo apt install docker-compose -y
Step - 13
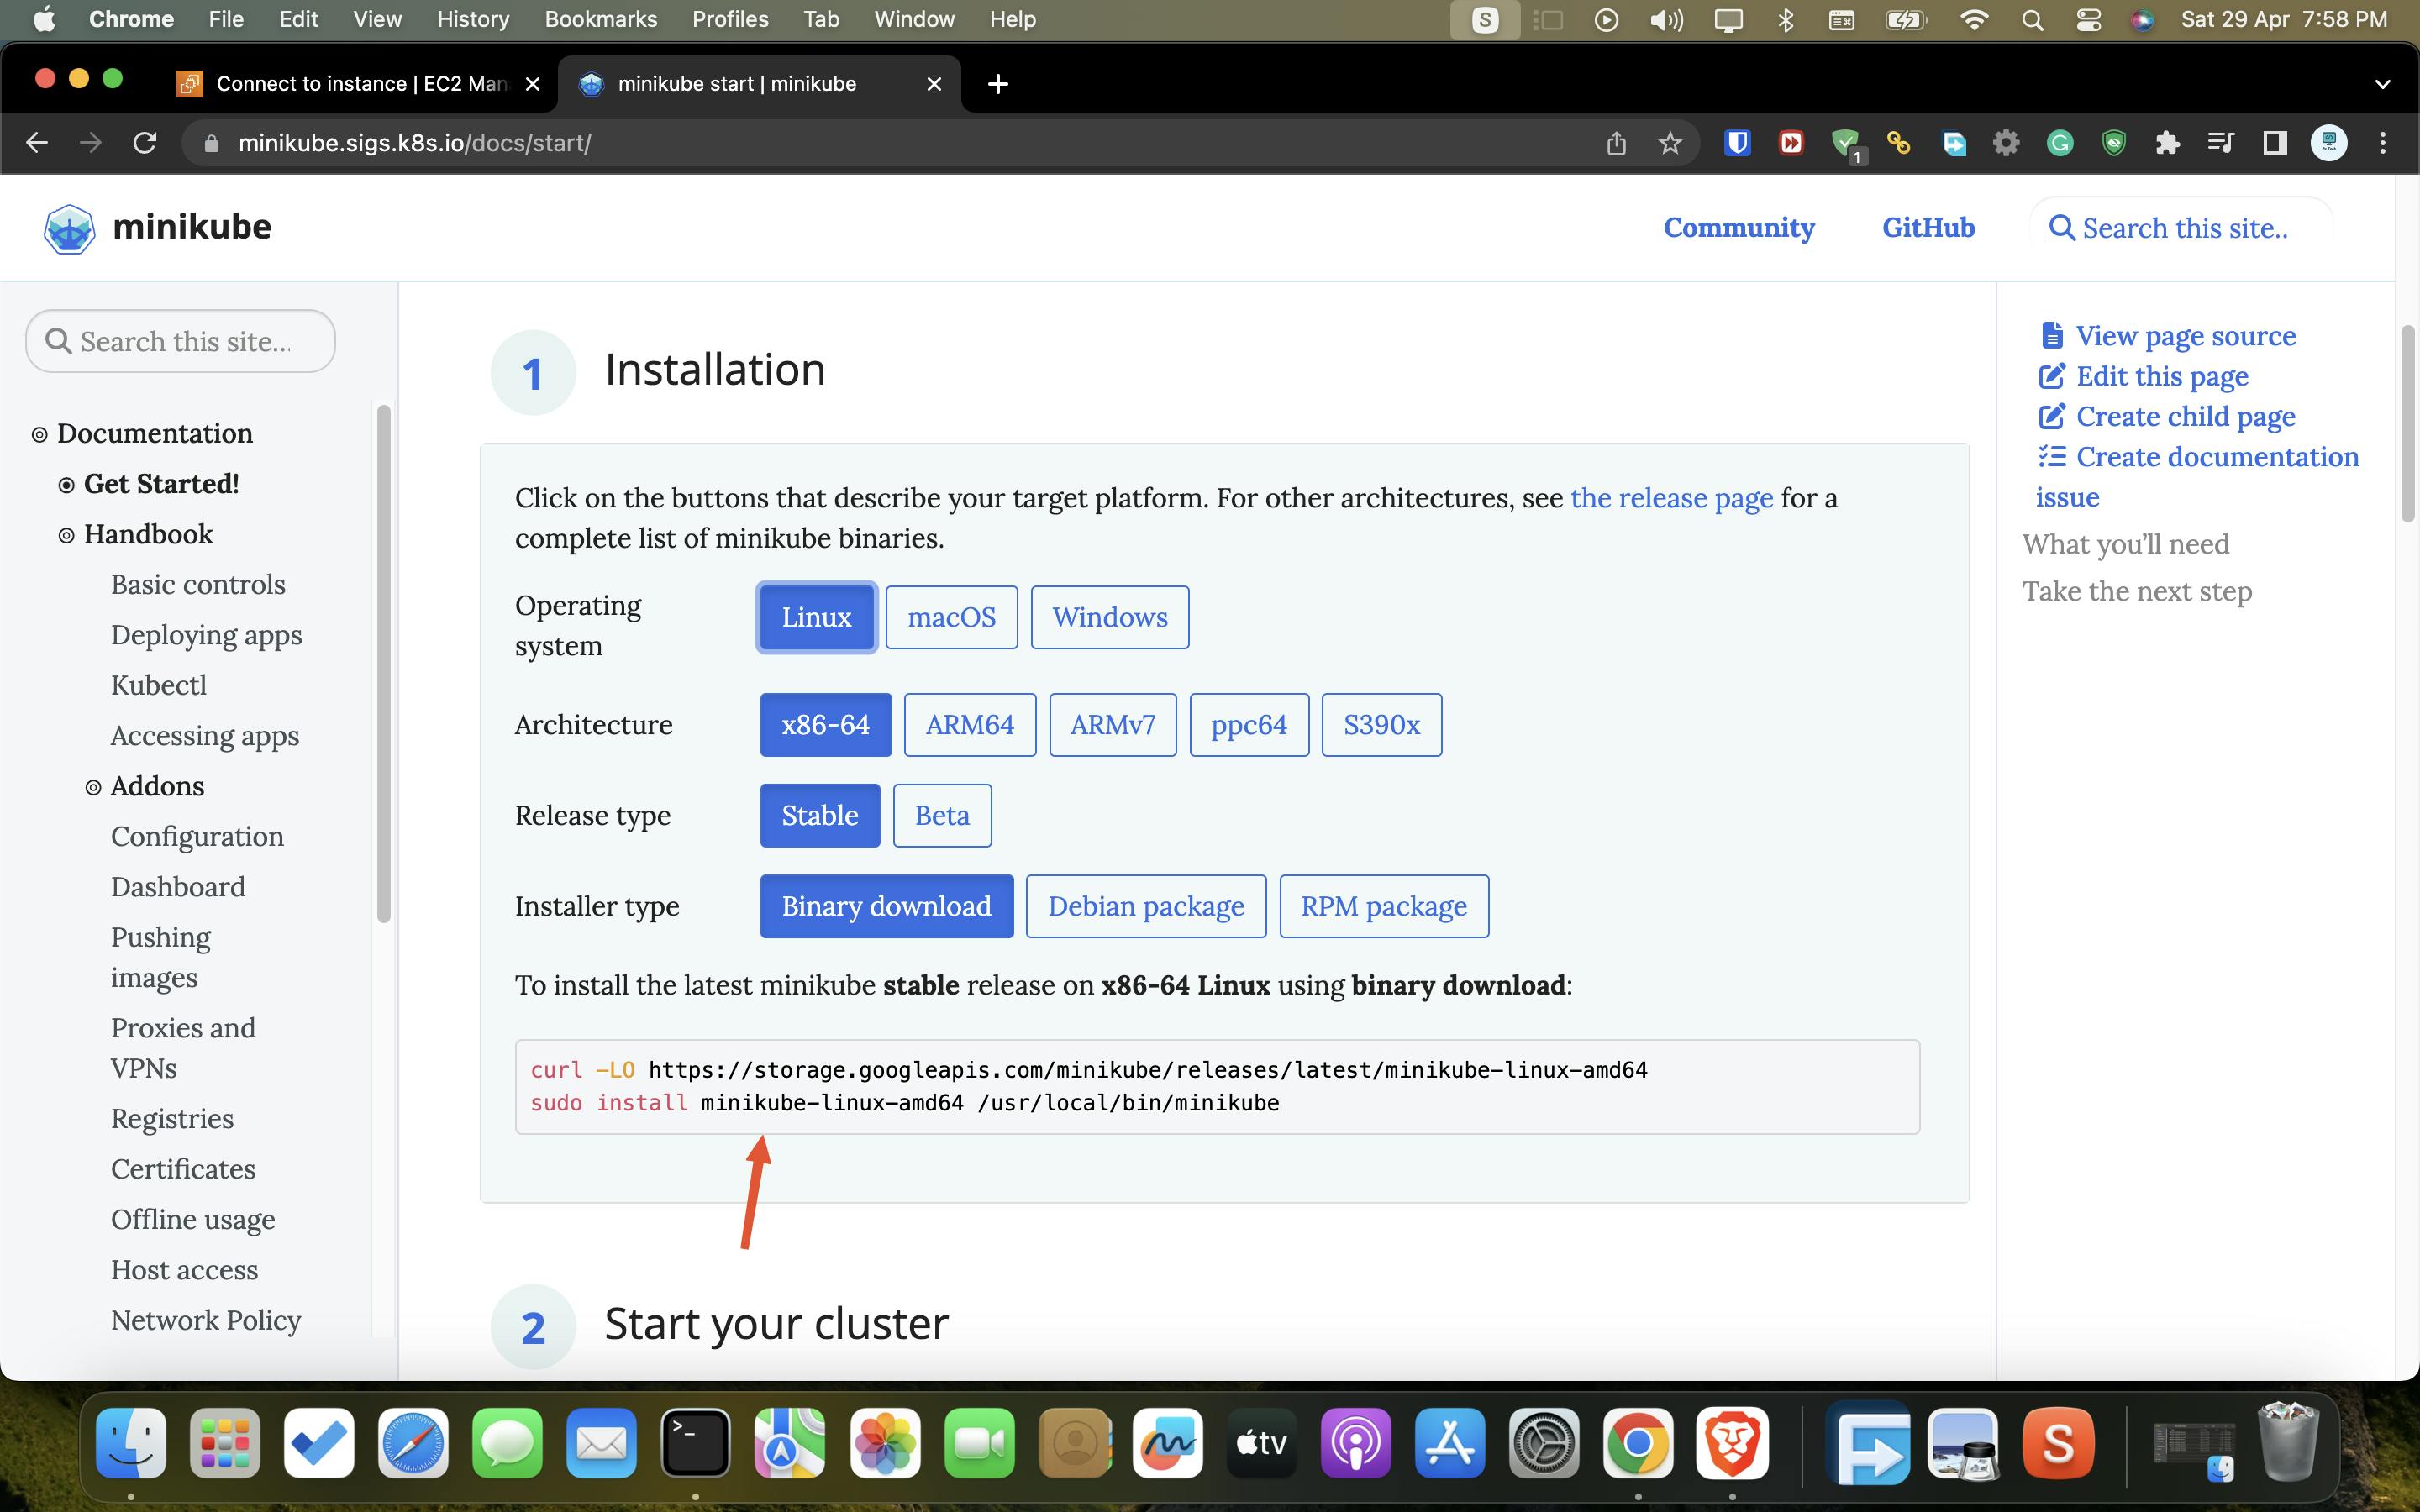
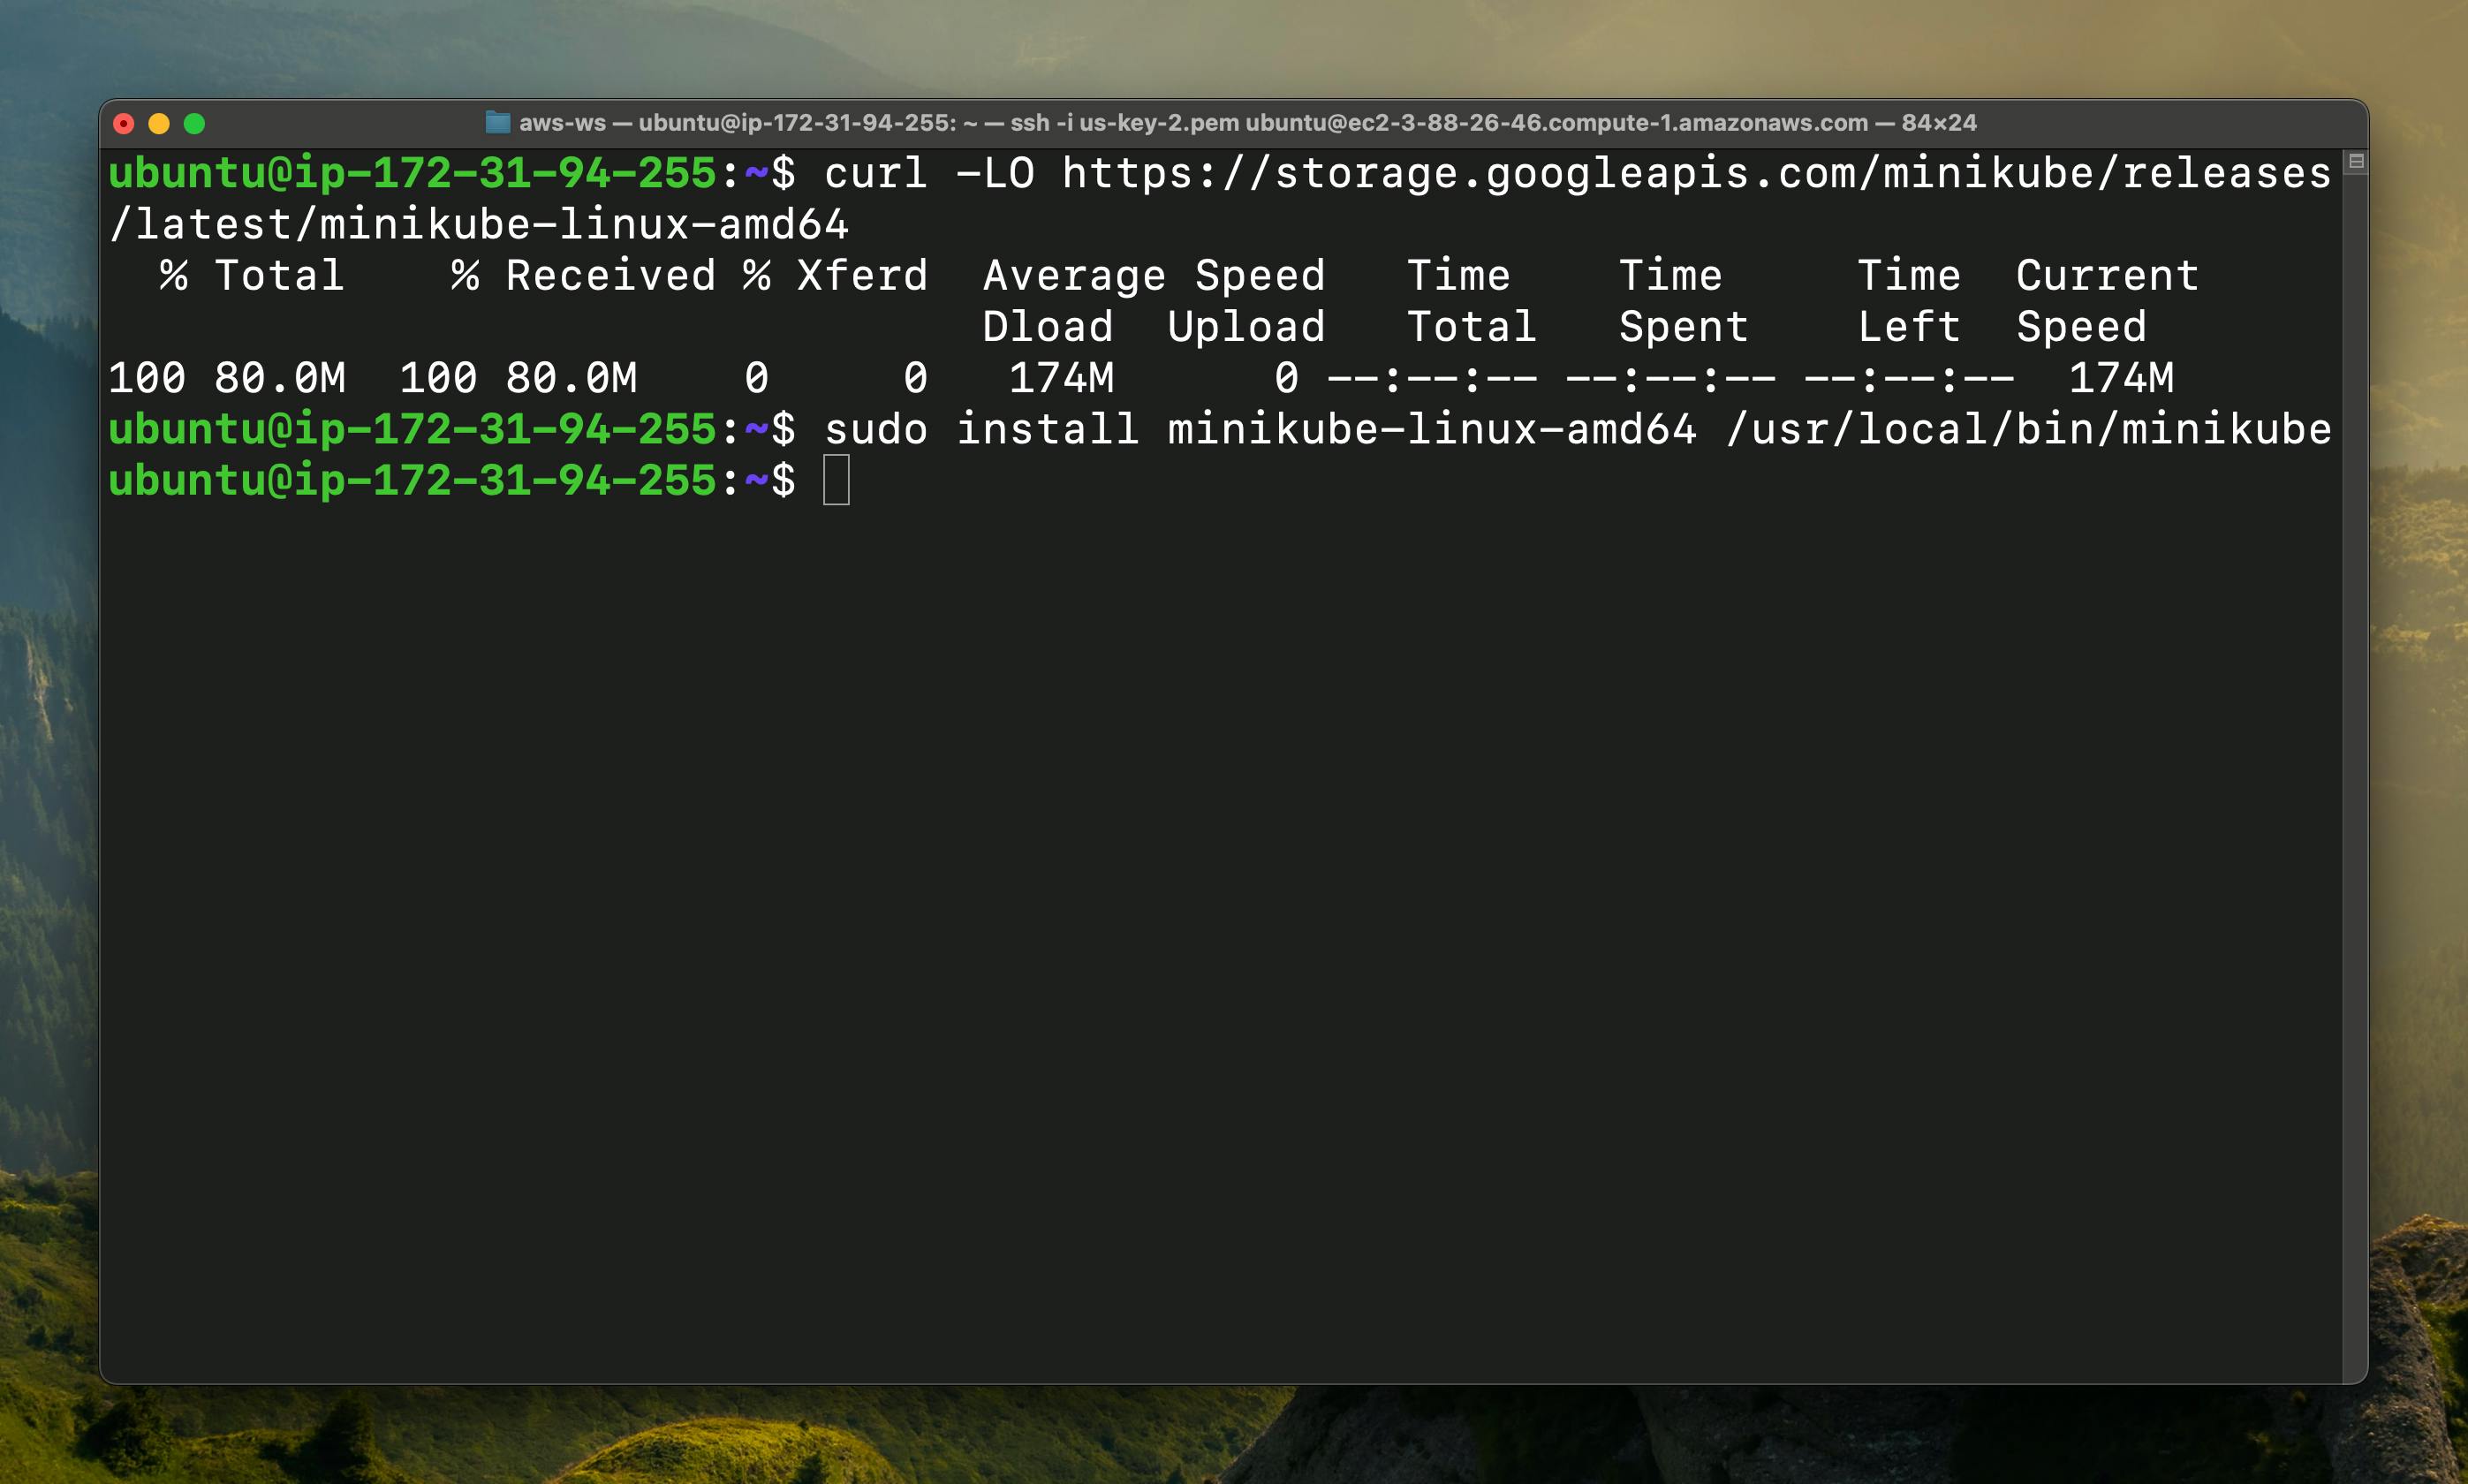
Now we going to install the minikube into our machine so you have to select this option for Ubuntu & copy the command
curl -LO https://storage.googleapis.com/minikube/releases/latest/minikube-linux-amd64
sudo install minikube-linux-amd64 /usr/local/bin/minikube
Step - 14
Now paste the command & it will install minikube into your machine.
Step - 15
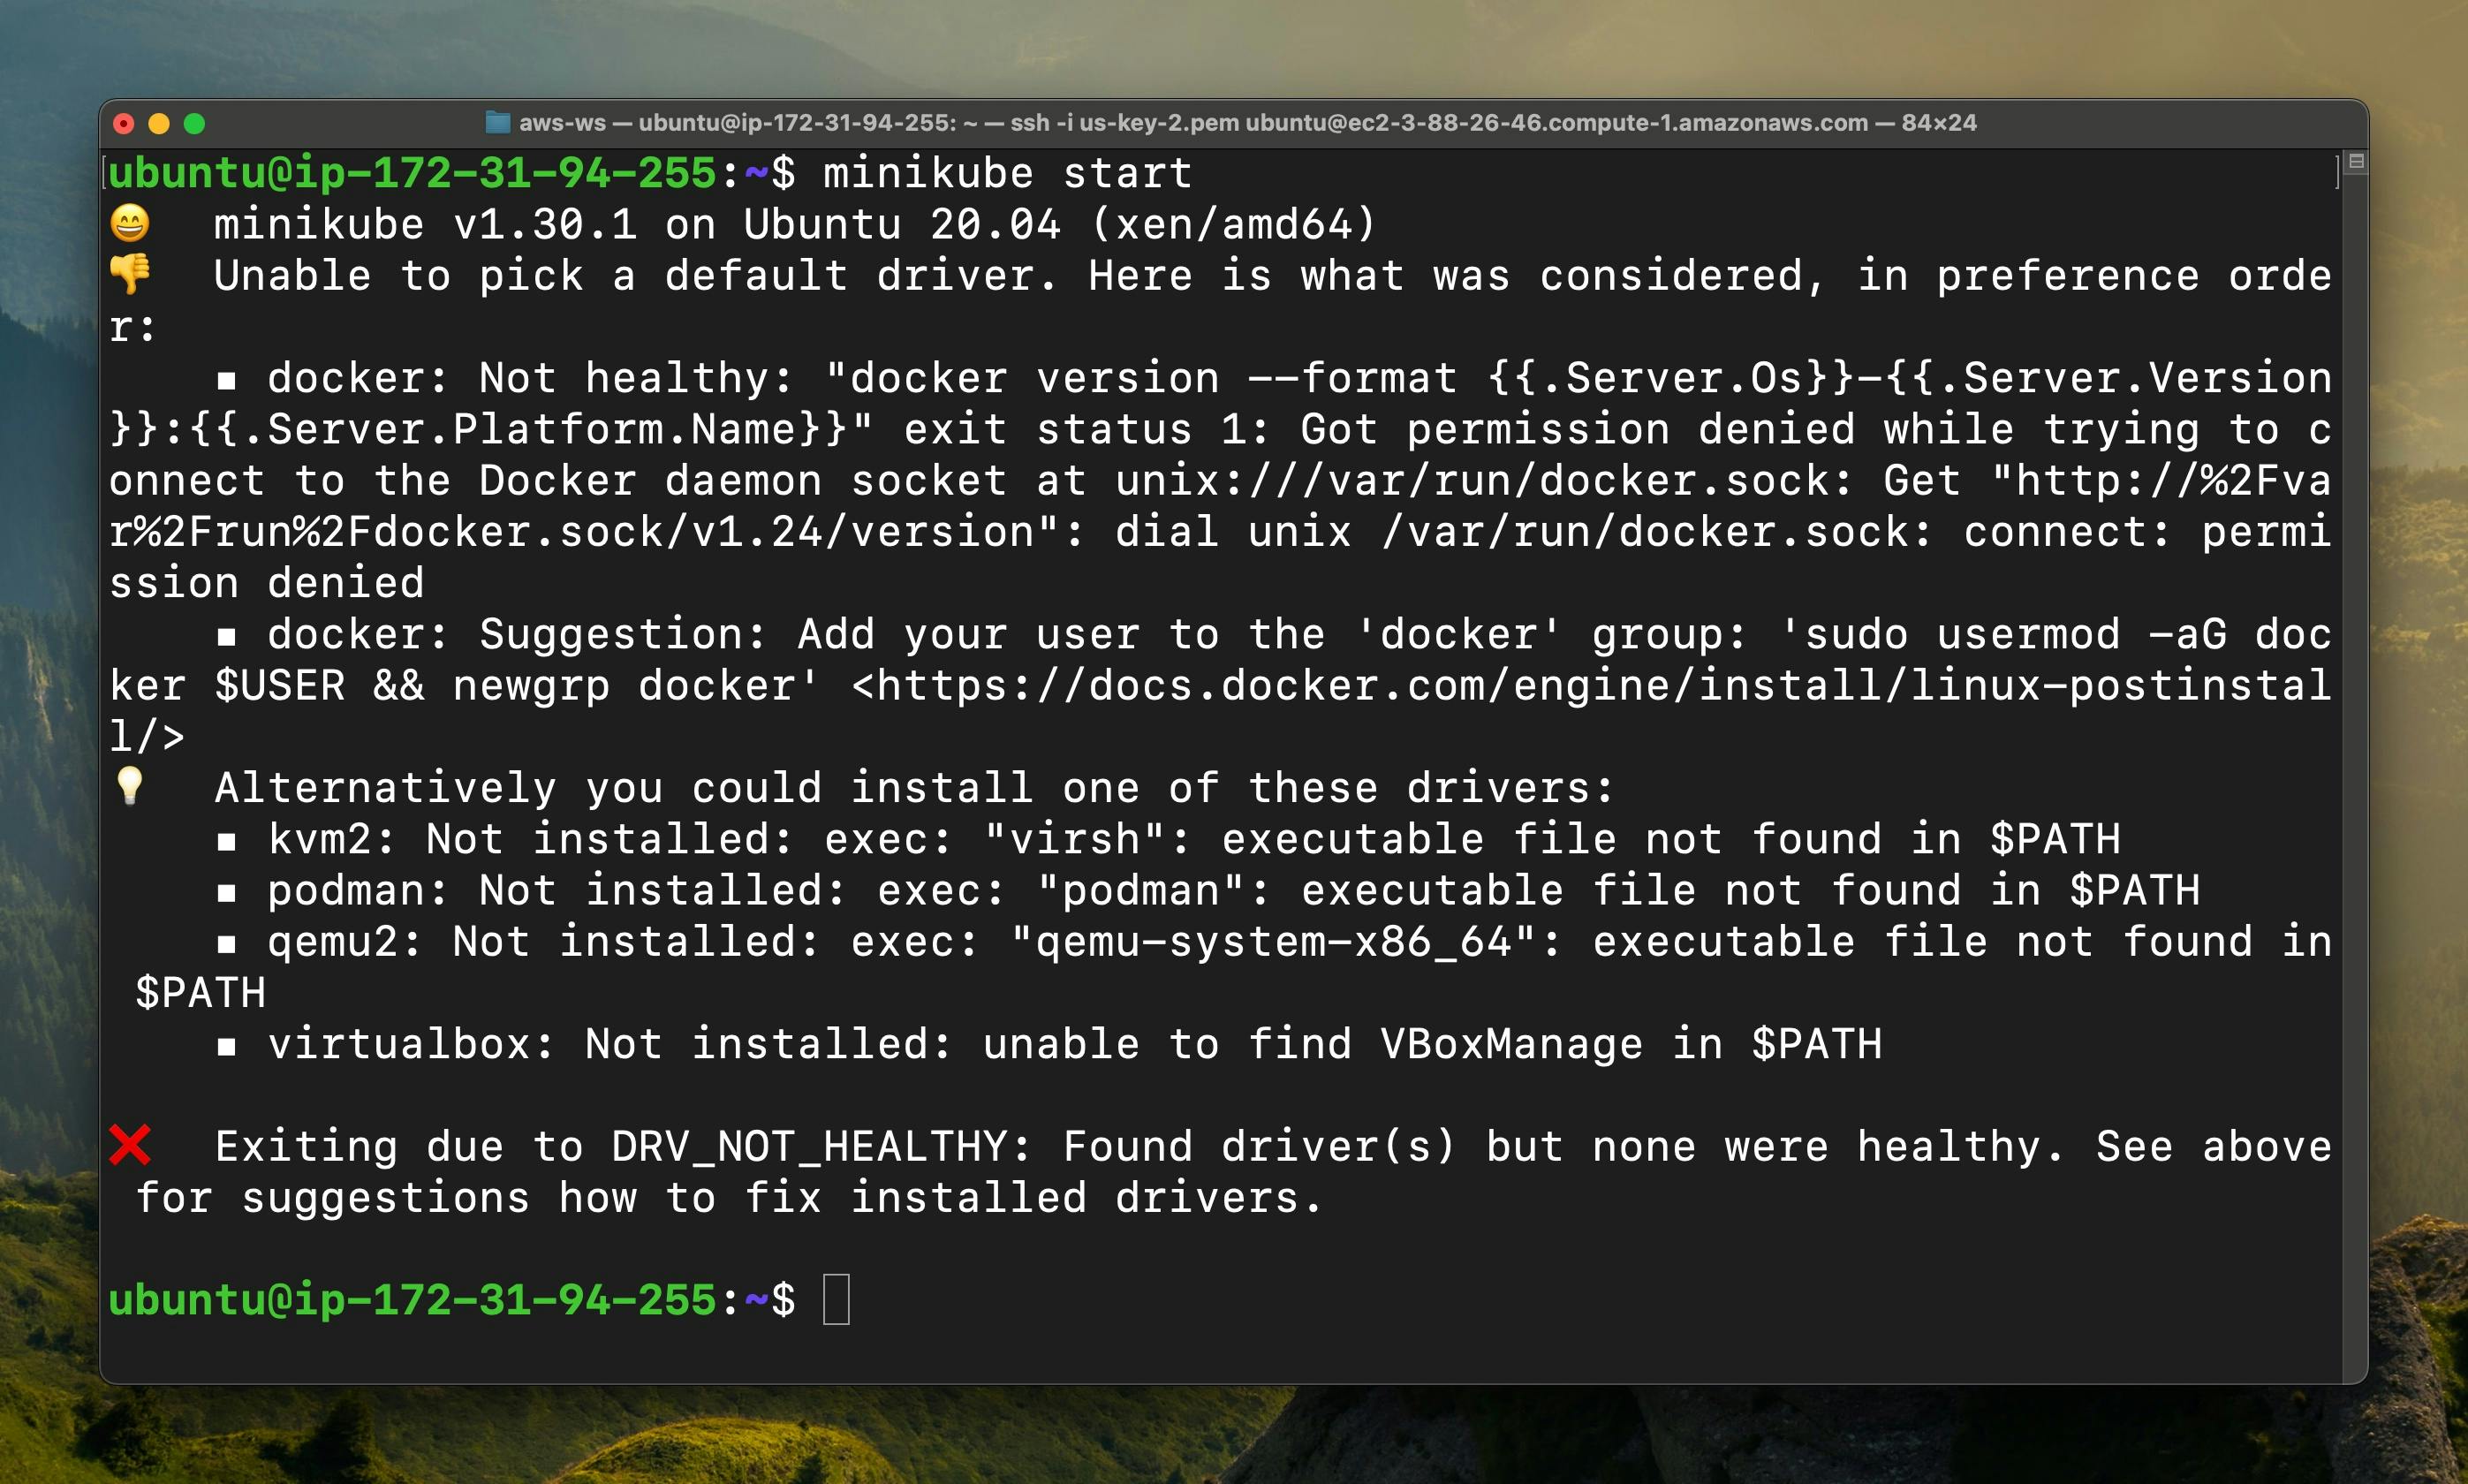
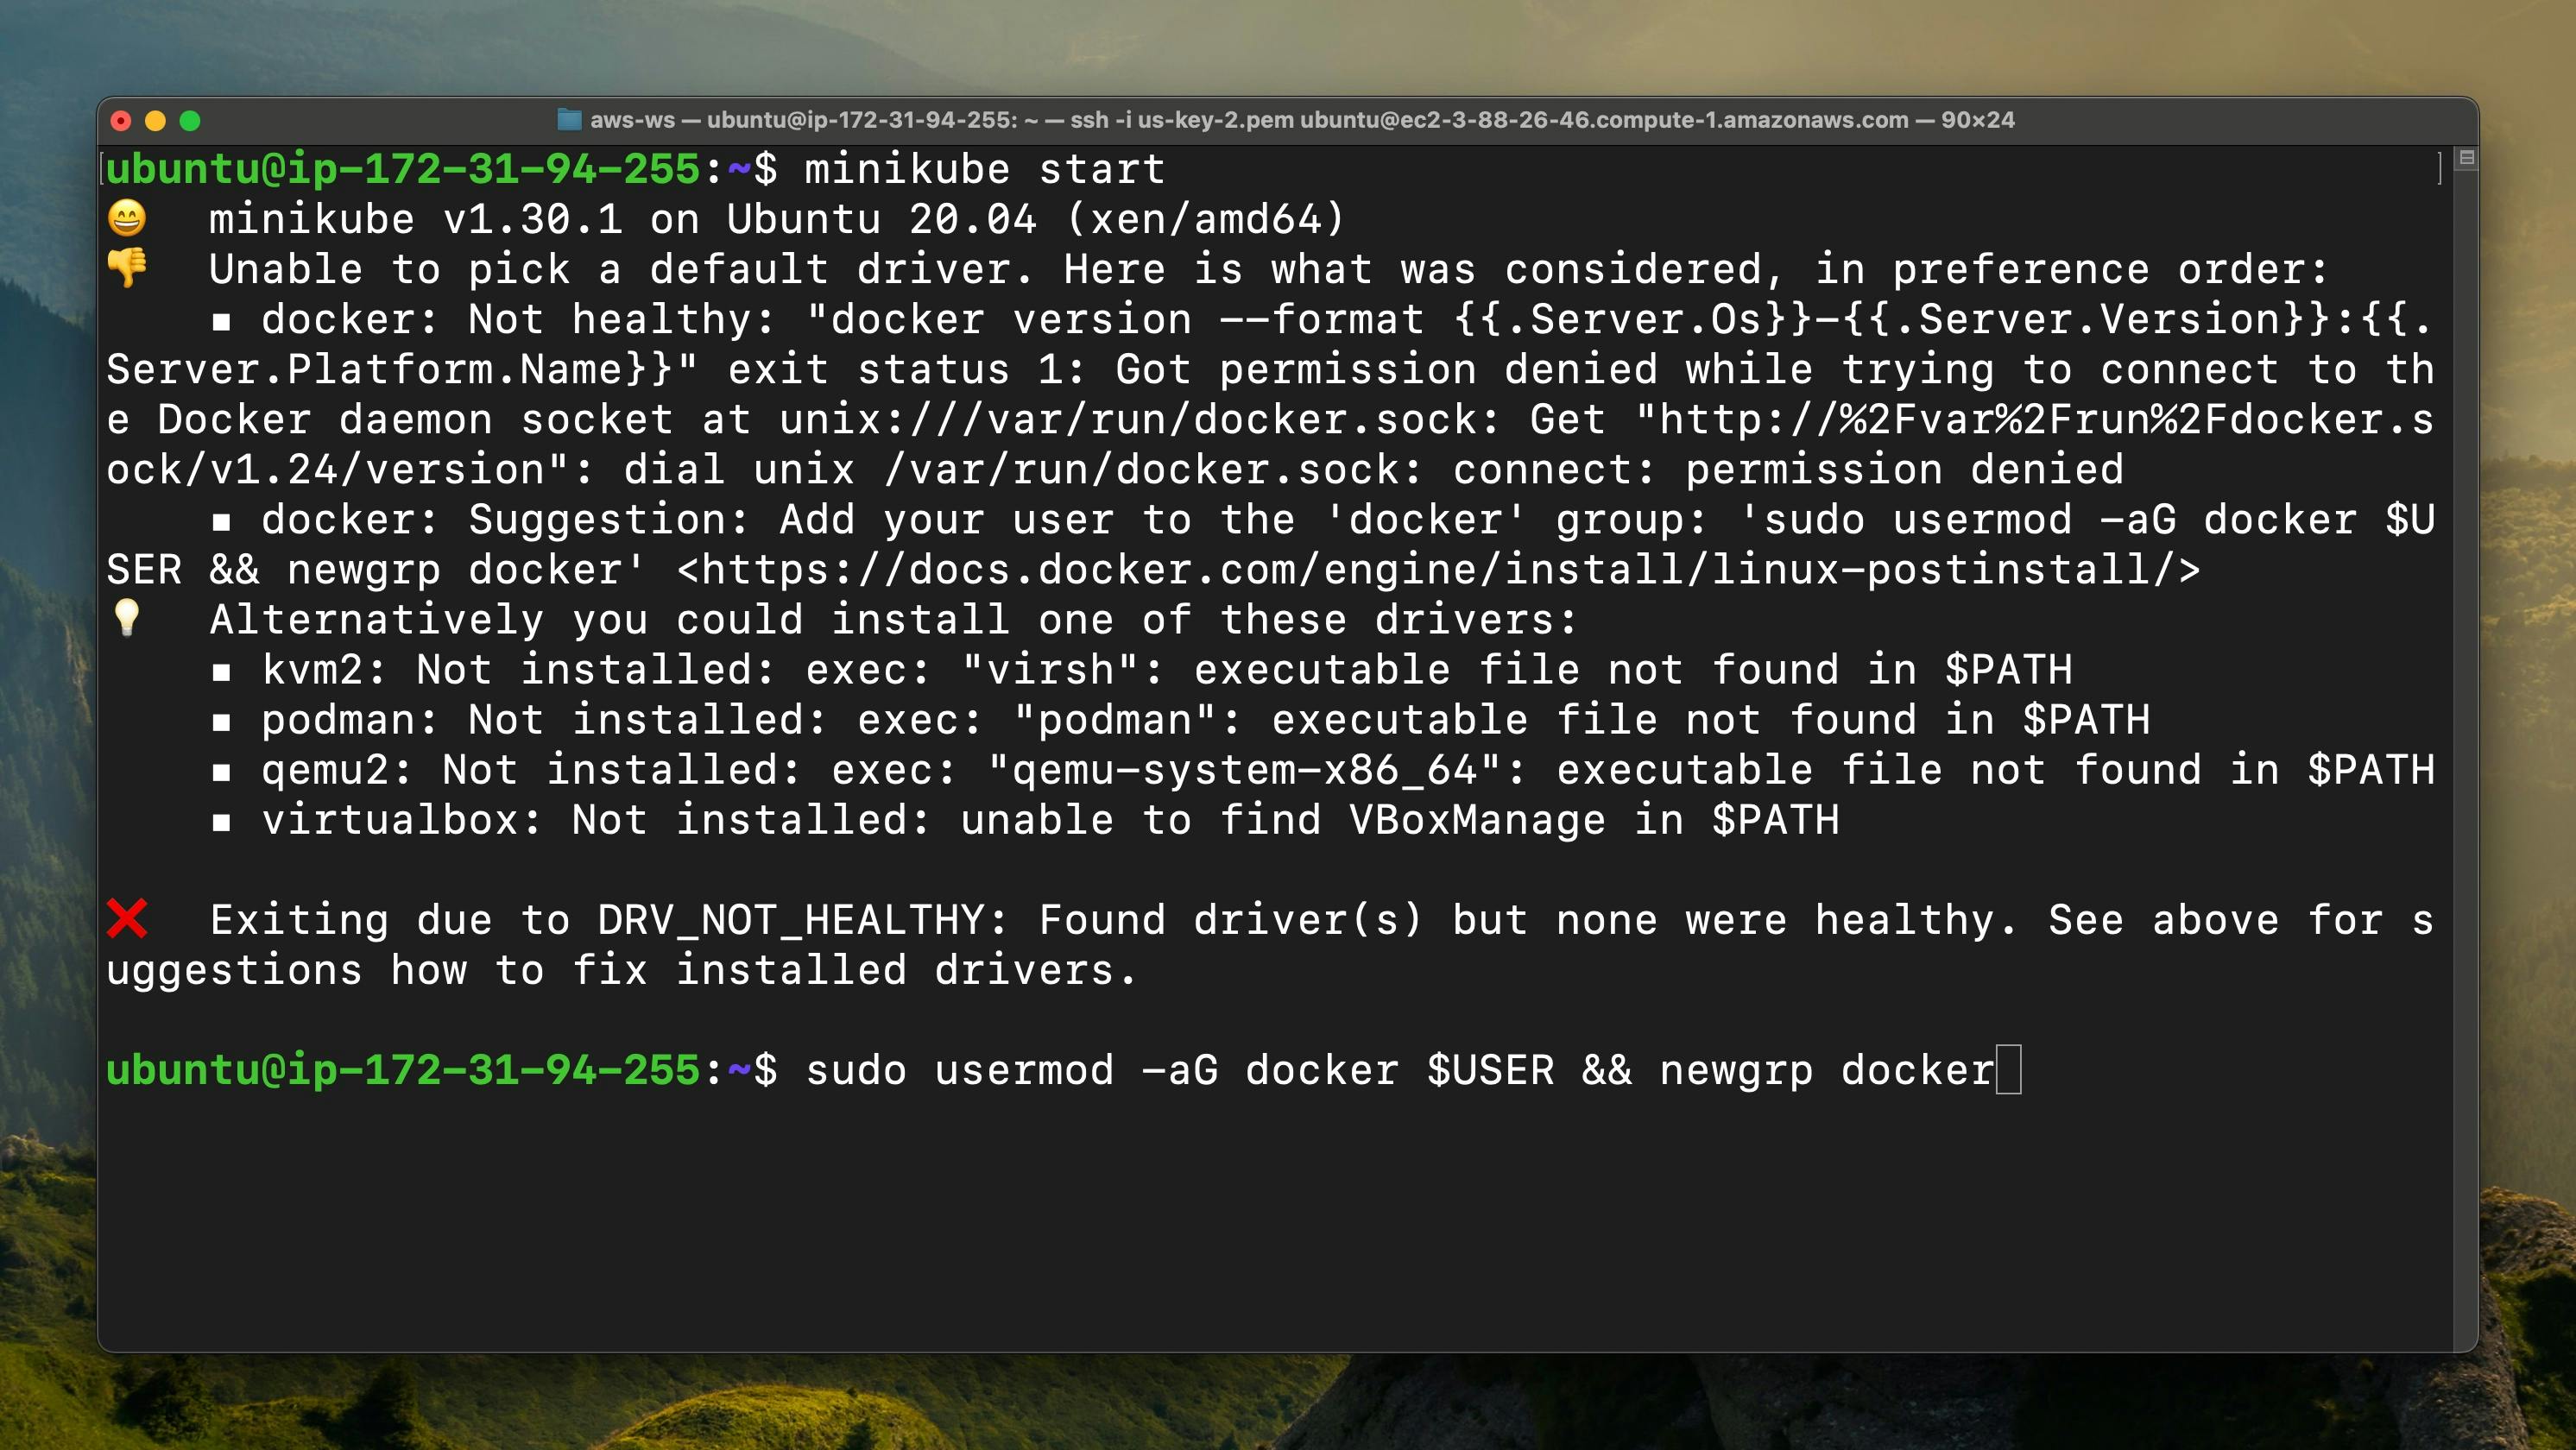
When you start the minikube then as you can see that we got the error We haven't added the user to the docker group
Step - 16
Now paste the following command to add the user to the docker group
sudo usermod -aG docker $USER &8 newgrp docker
Step - 17
Once you added the user to the docker group then start the minikube
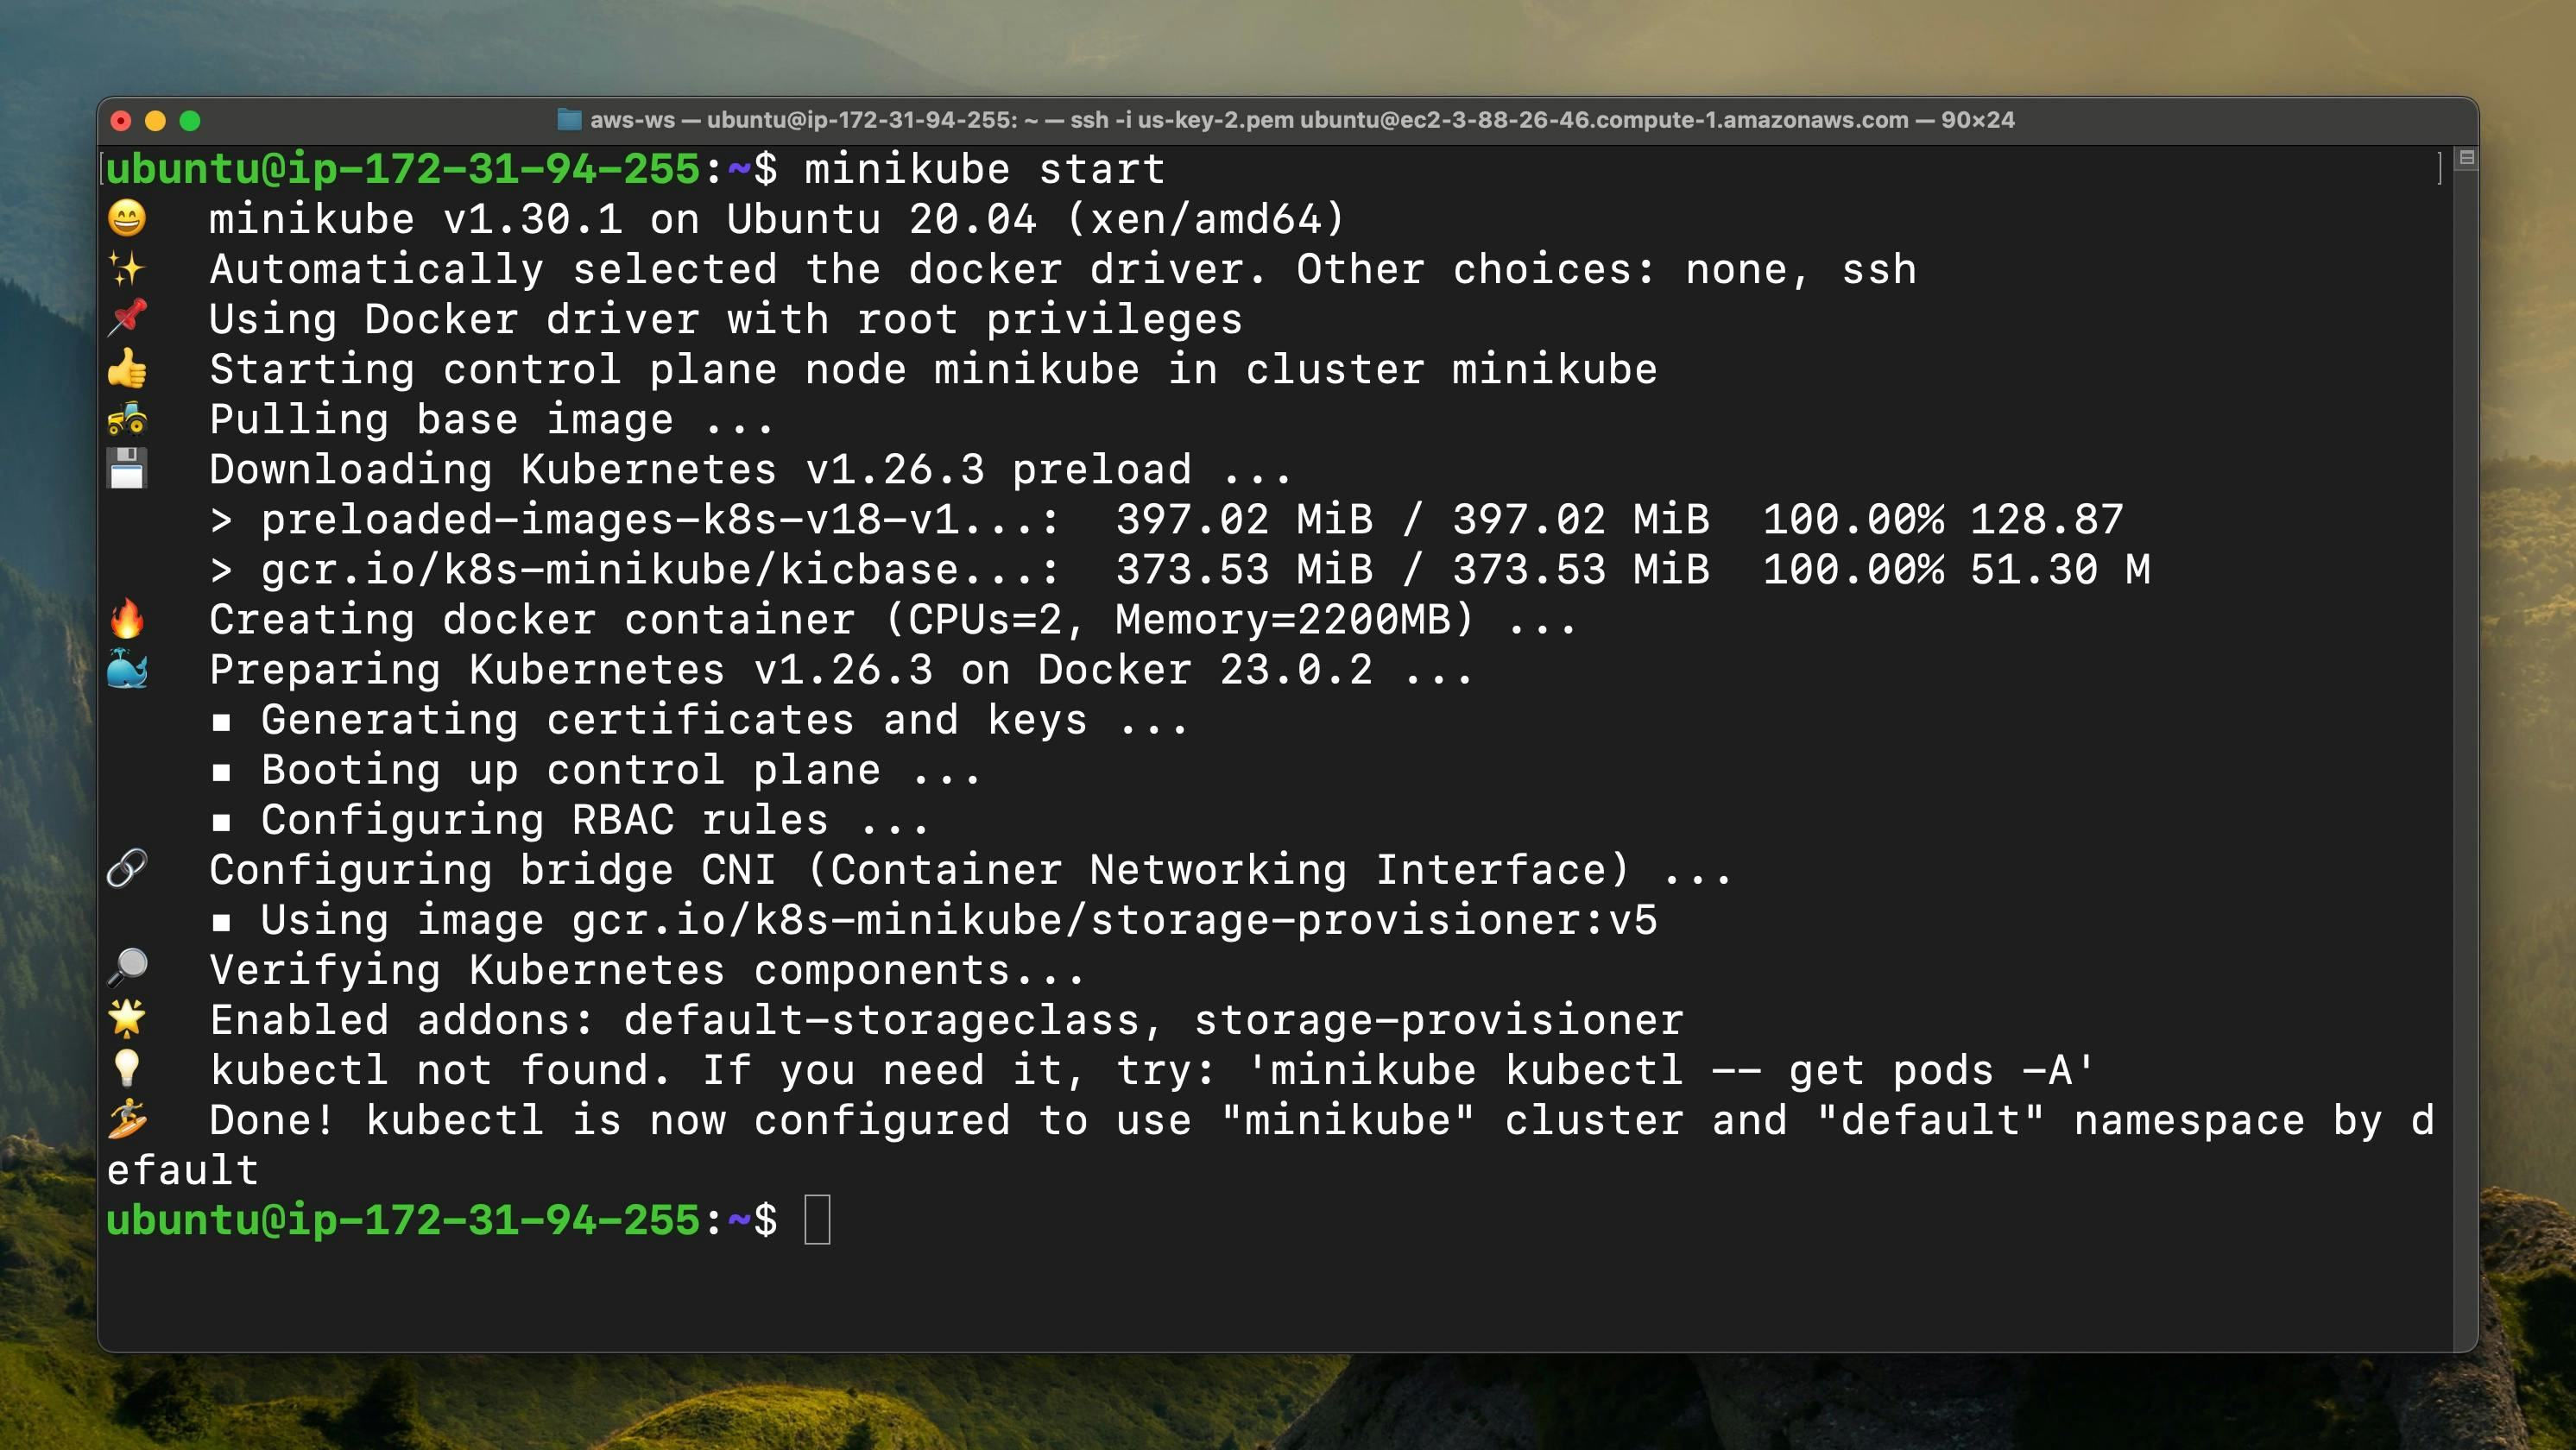
Step - 18
As you can see that minikube automatically selects the docker as a driver and it is downloading the Kubernetes.
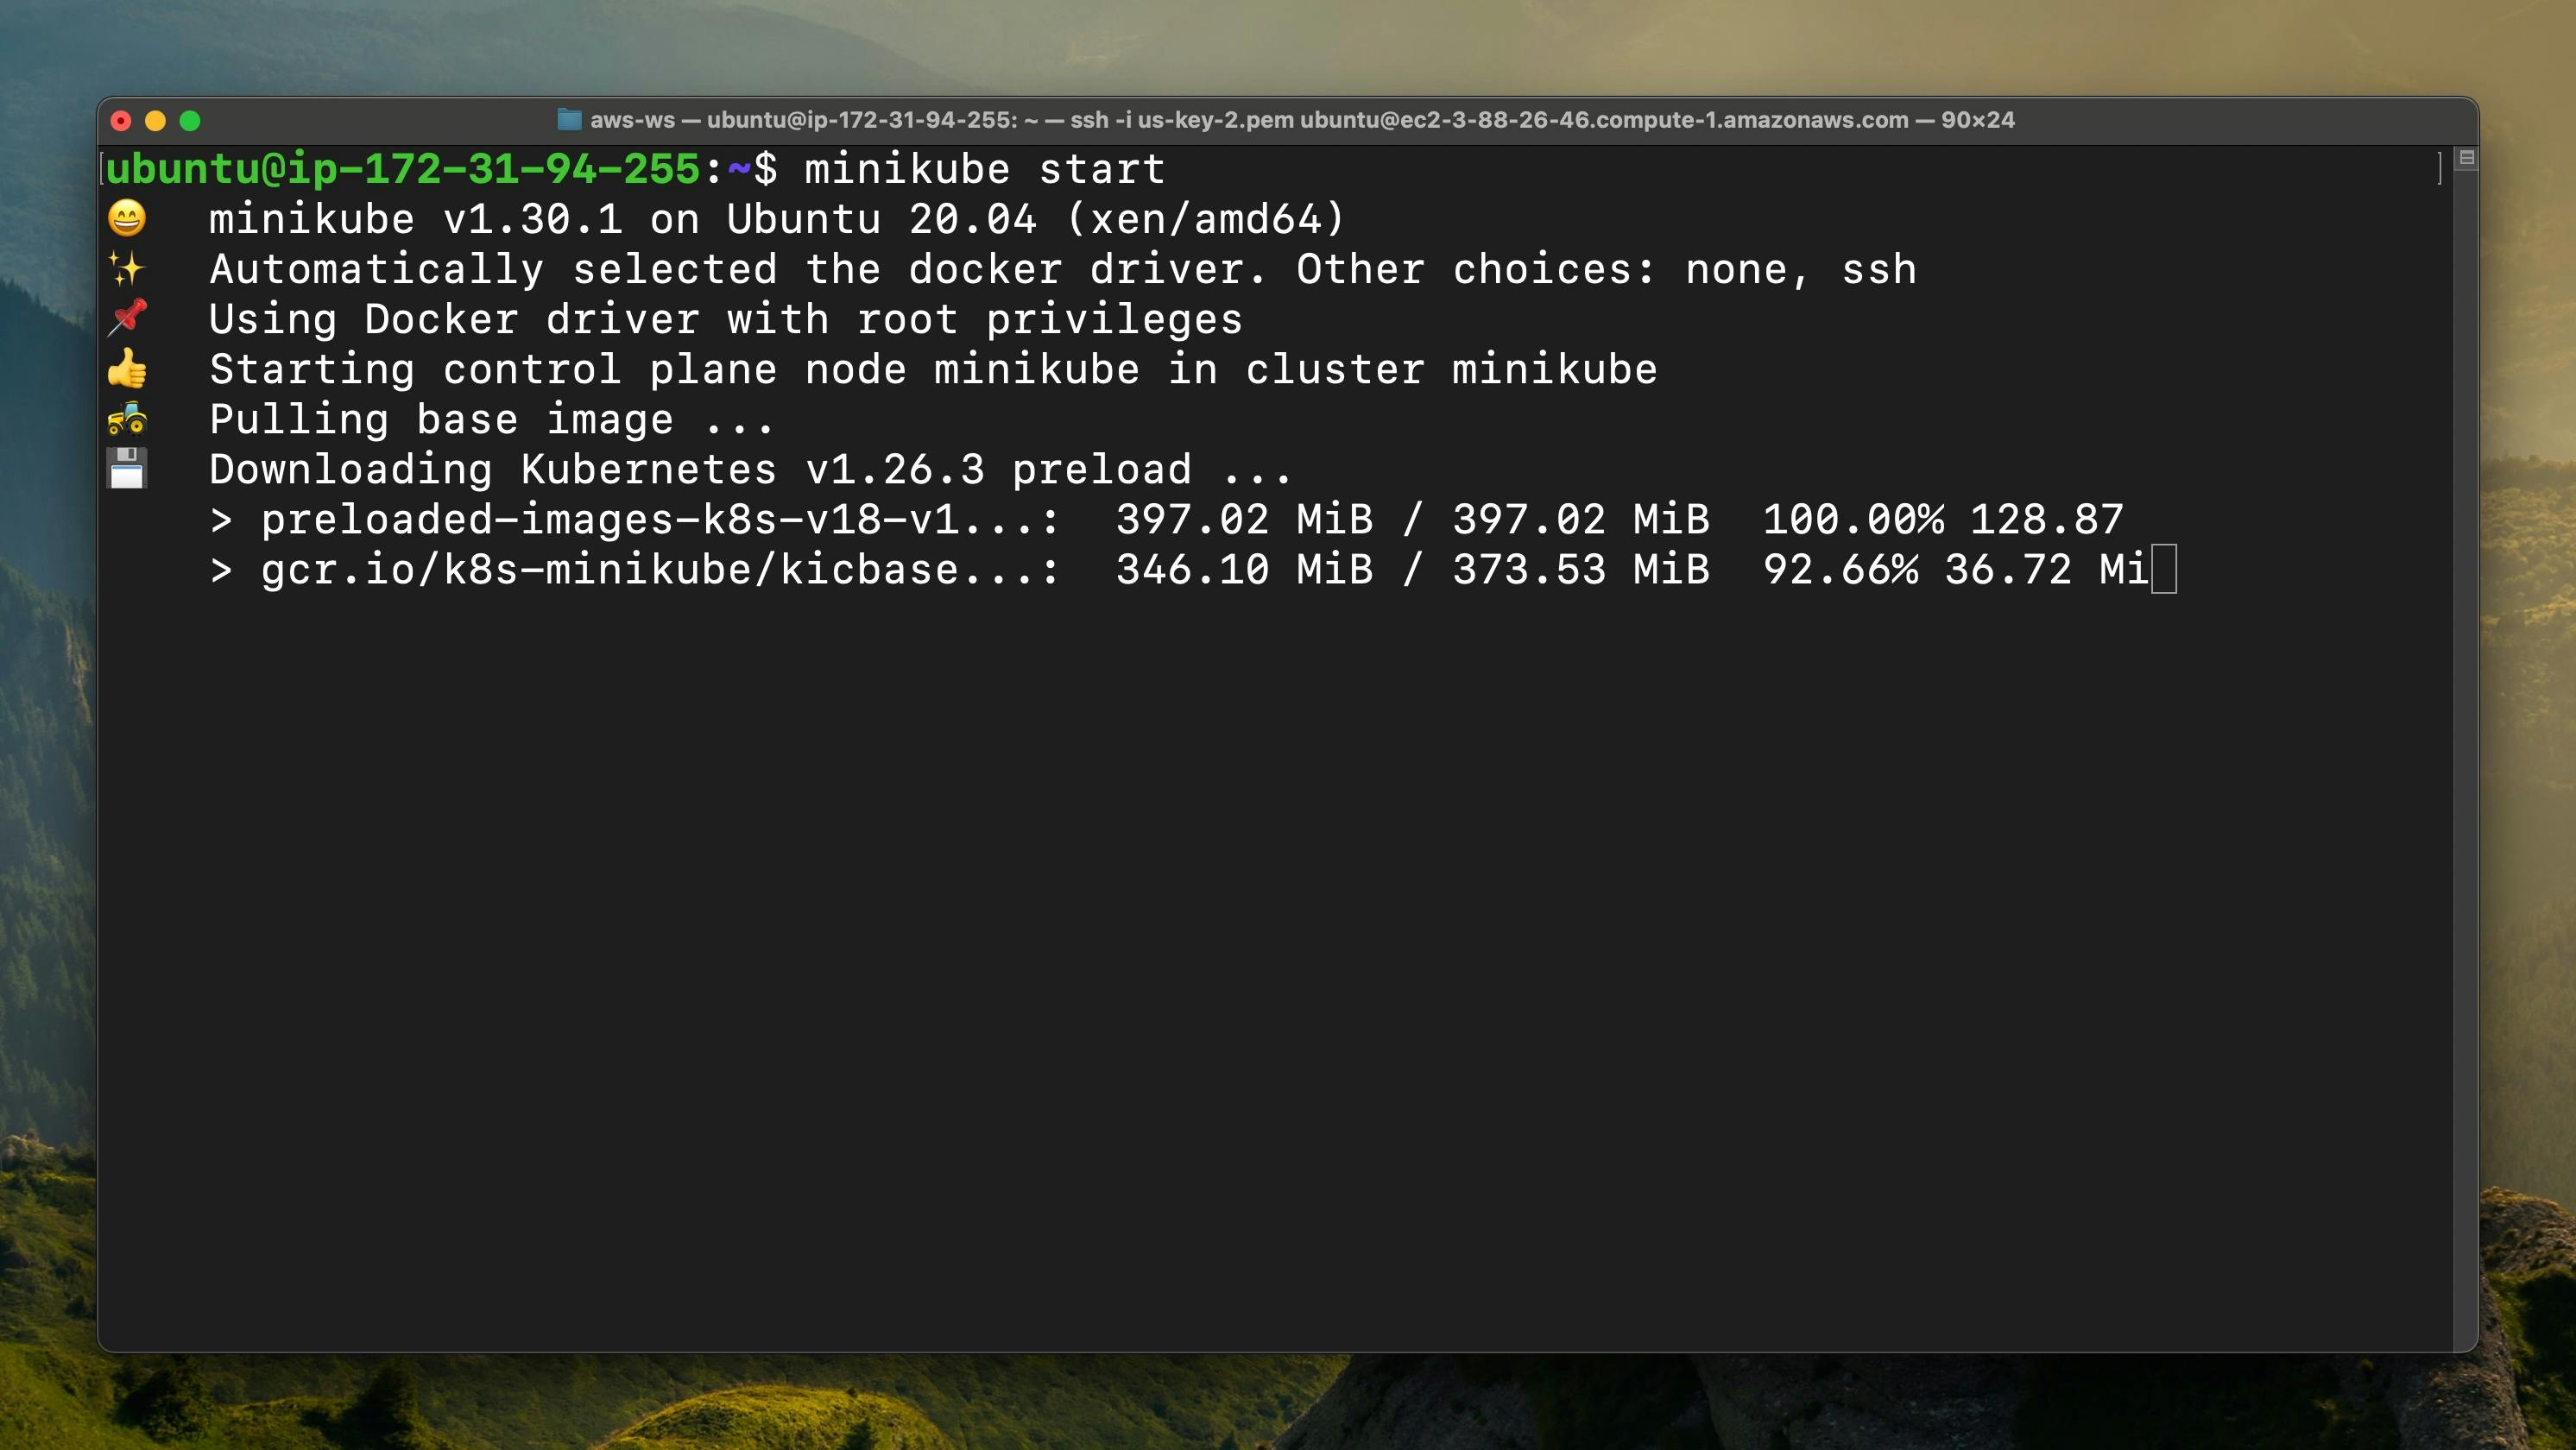
As you can see that it downloaded successfully
Step - 19
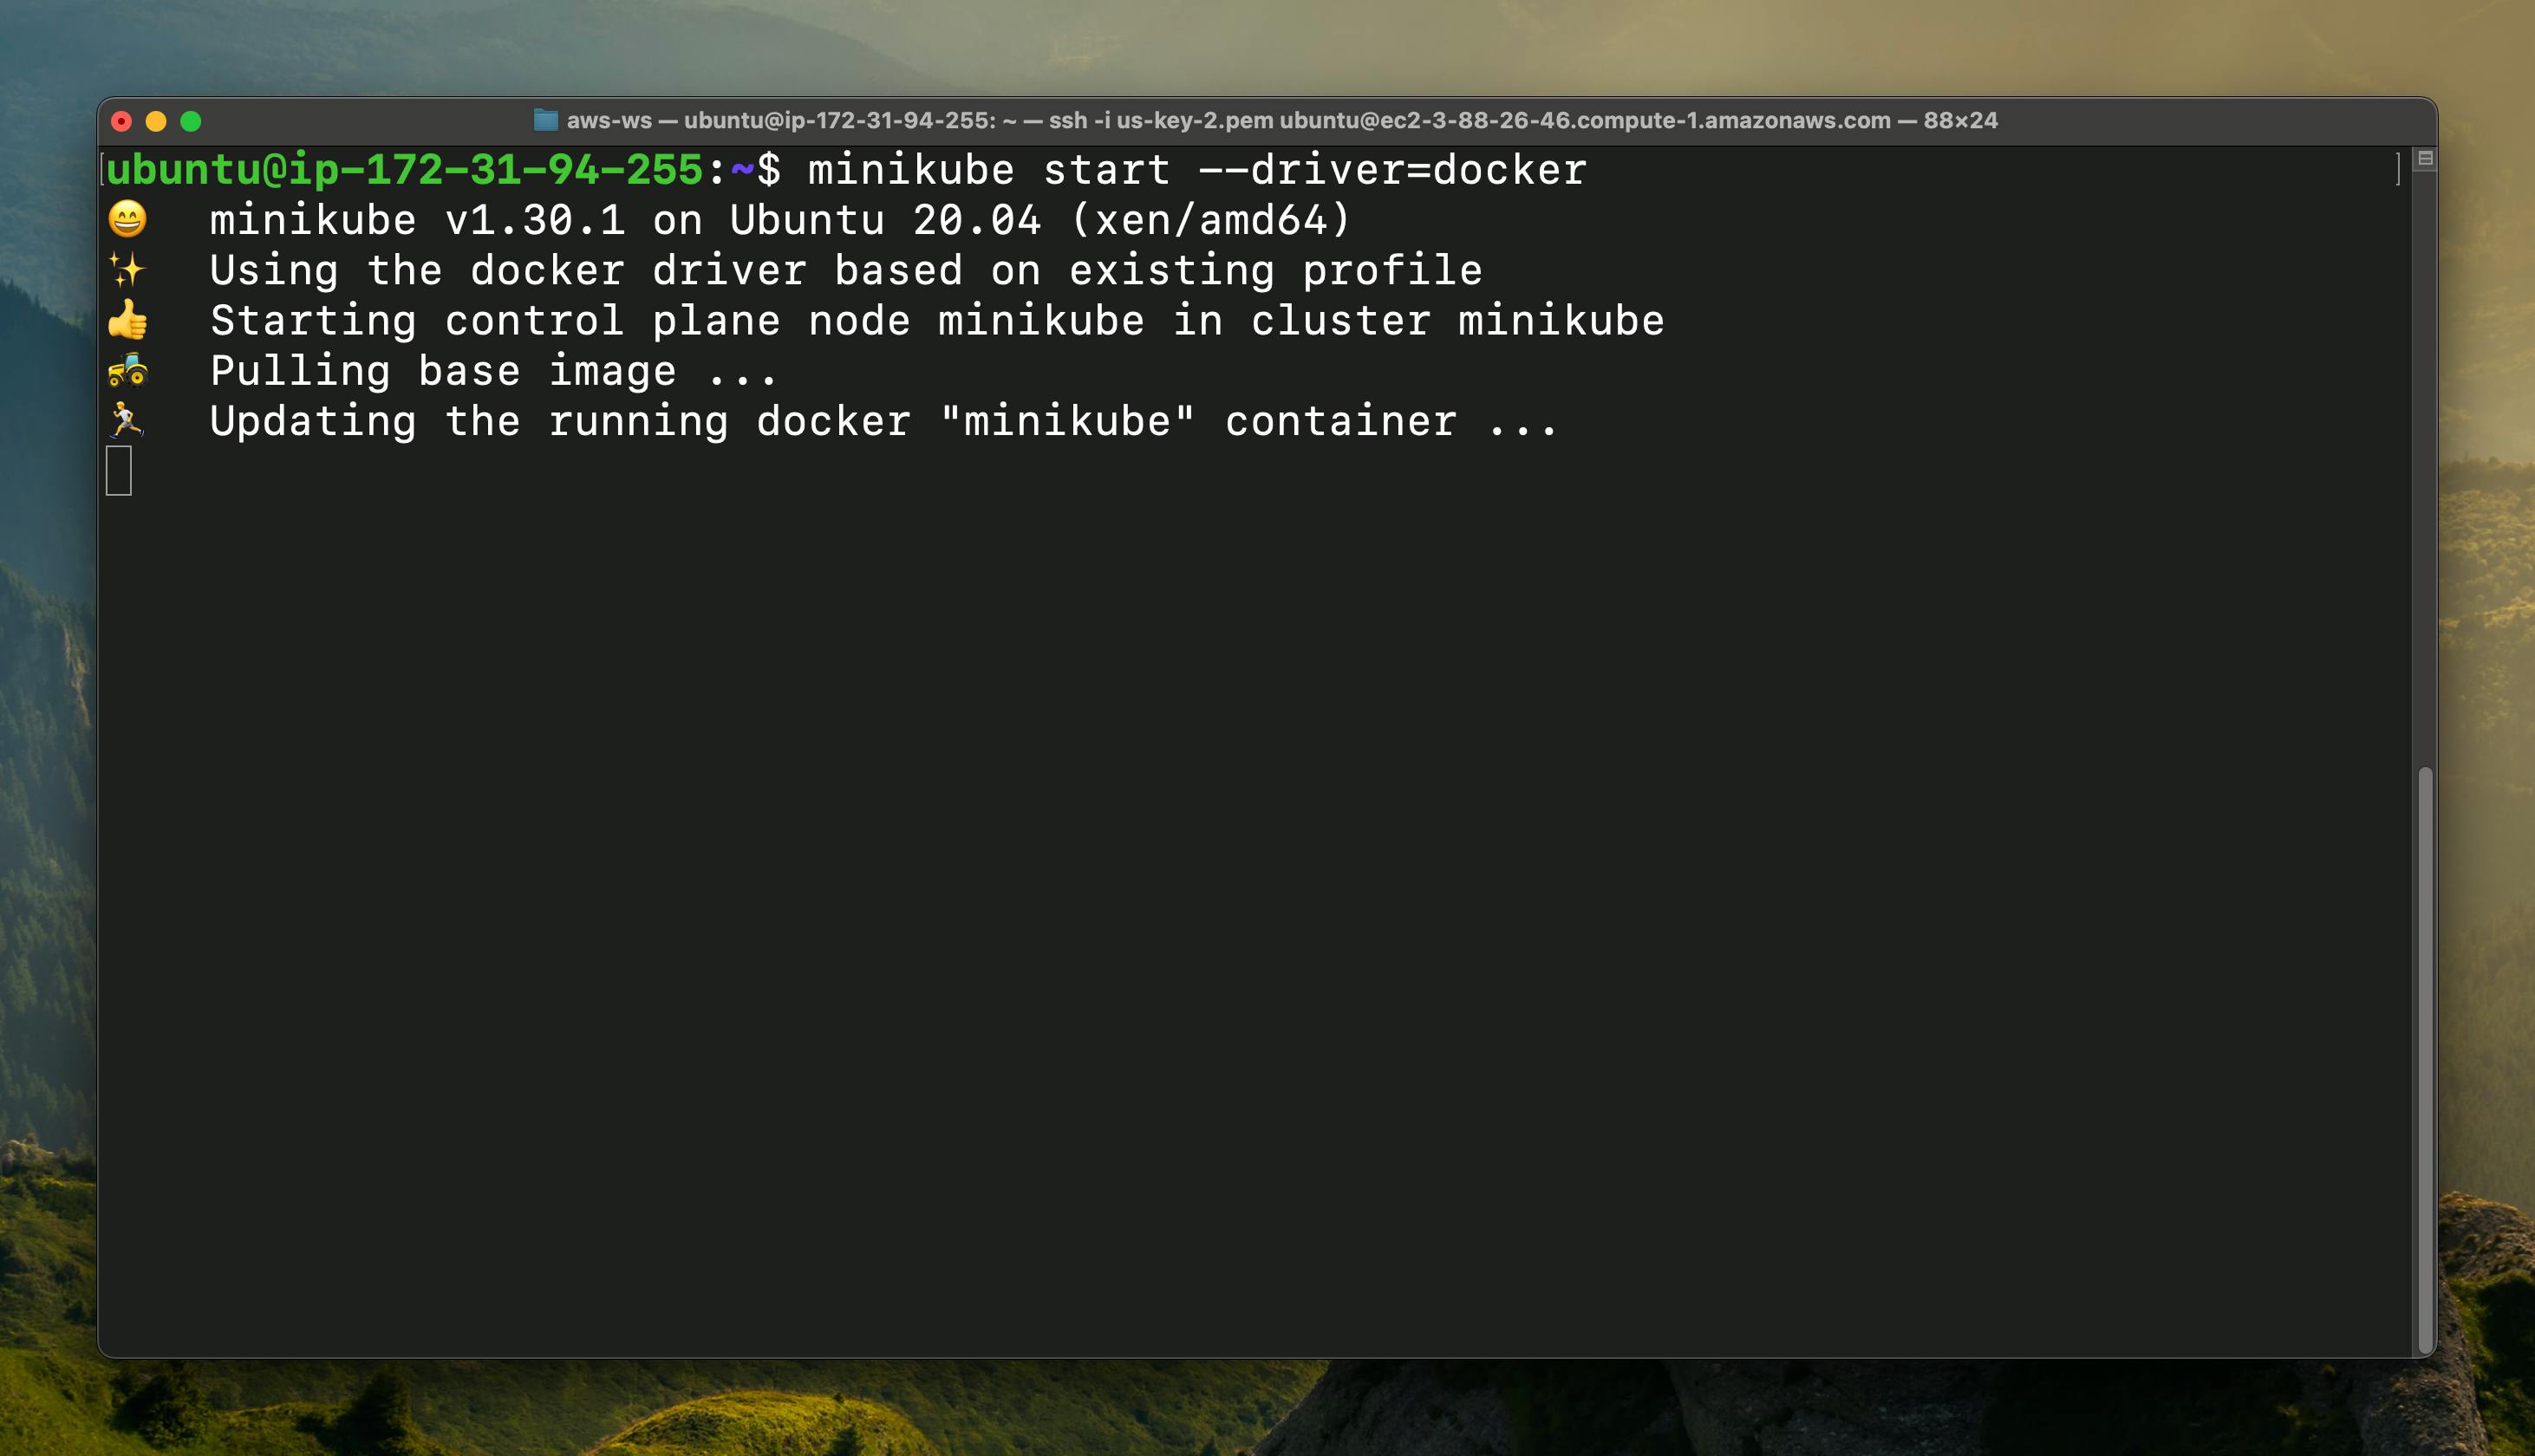
But If in your case the minikube is failed to start then paste this command in the terminal & minikube will select the docker as a driver
minikube start --driver=docker

As you can see that it start downloading the Kubernetes
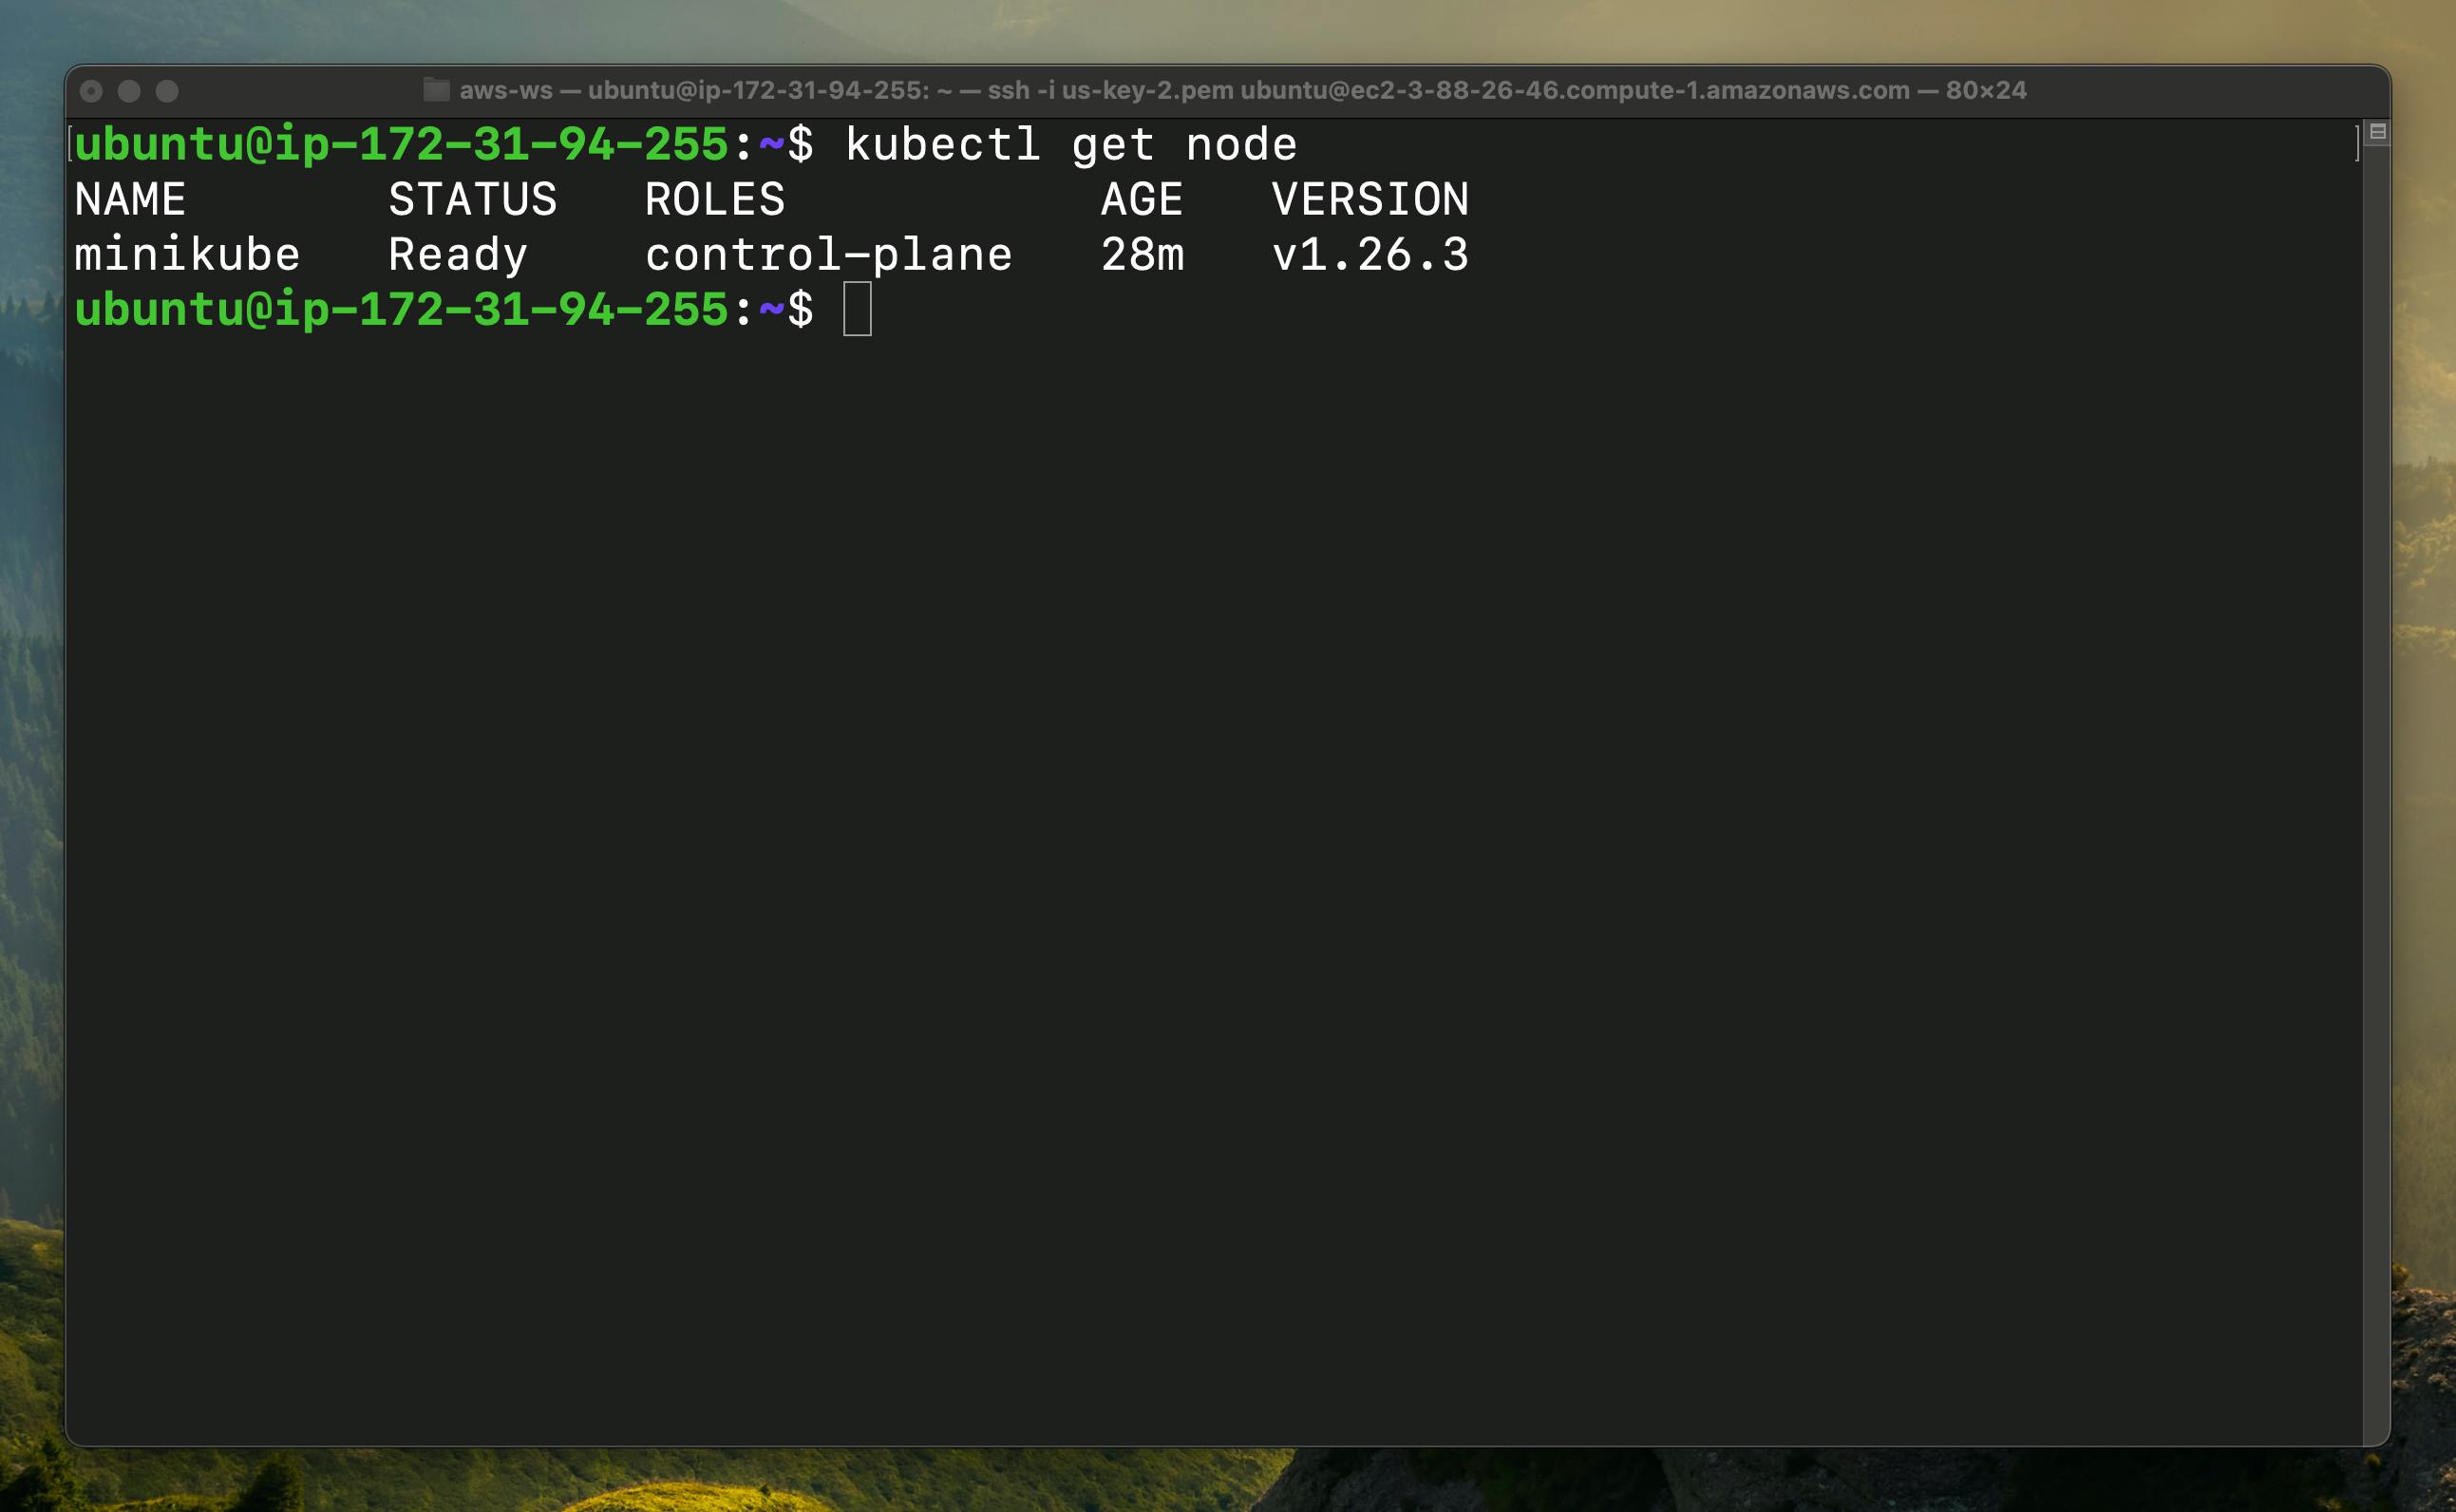
Step - 20
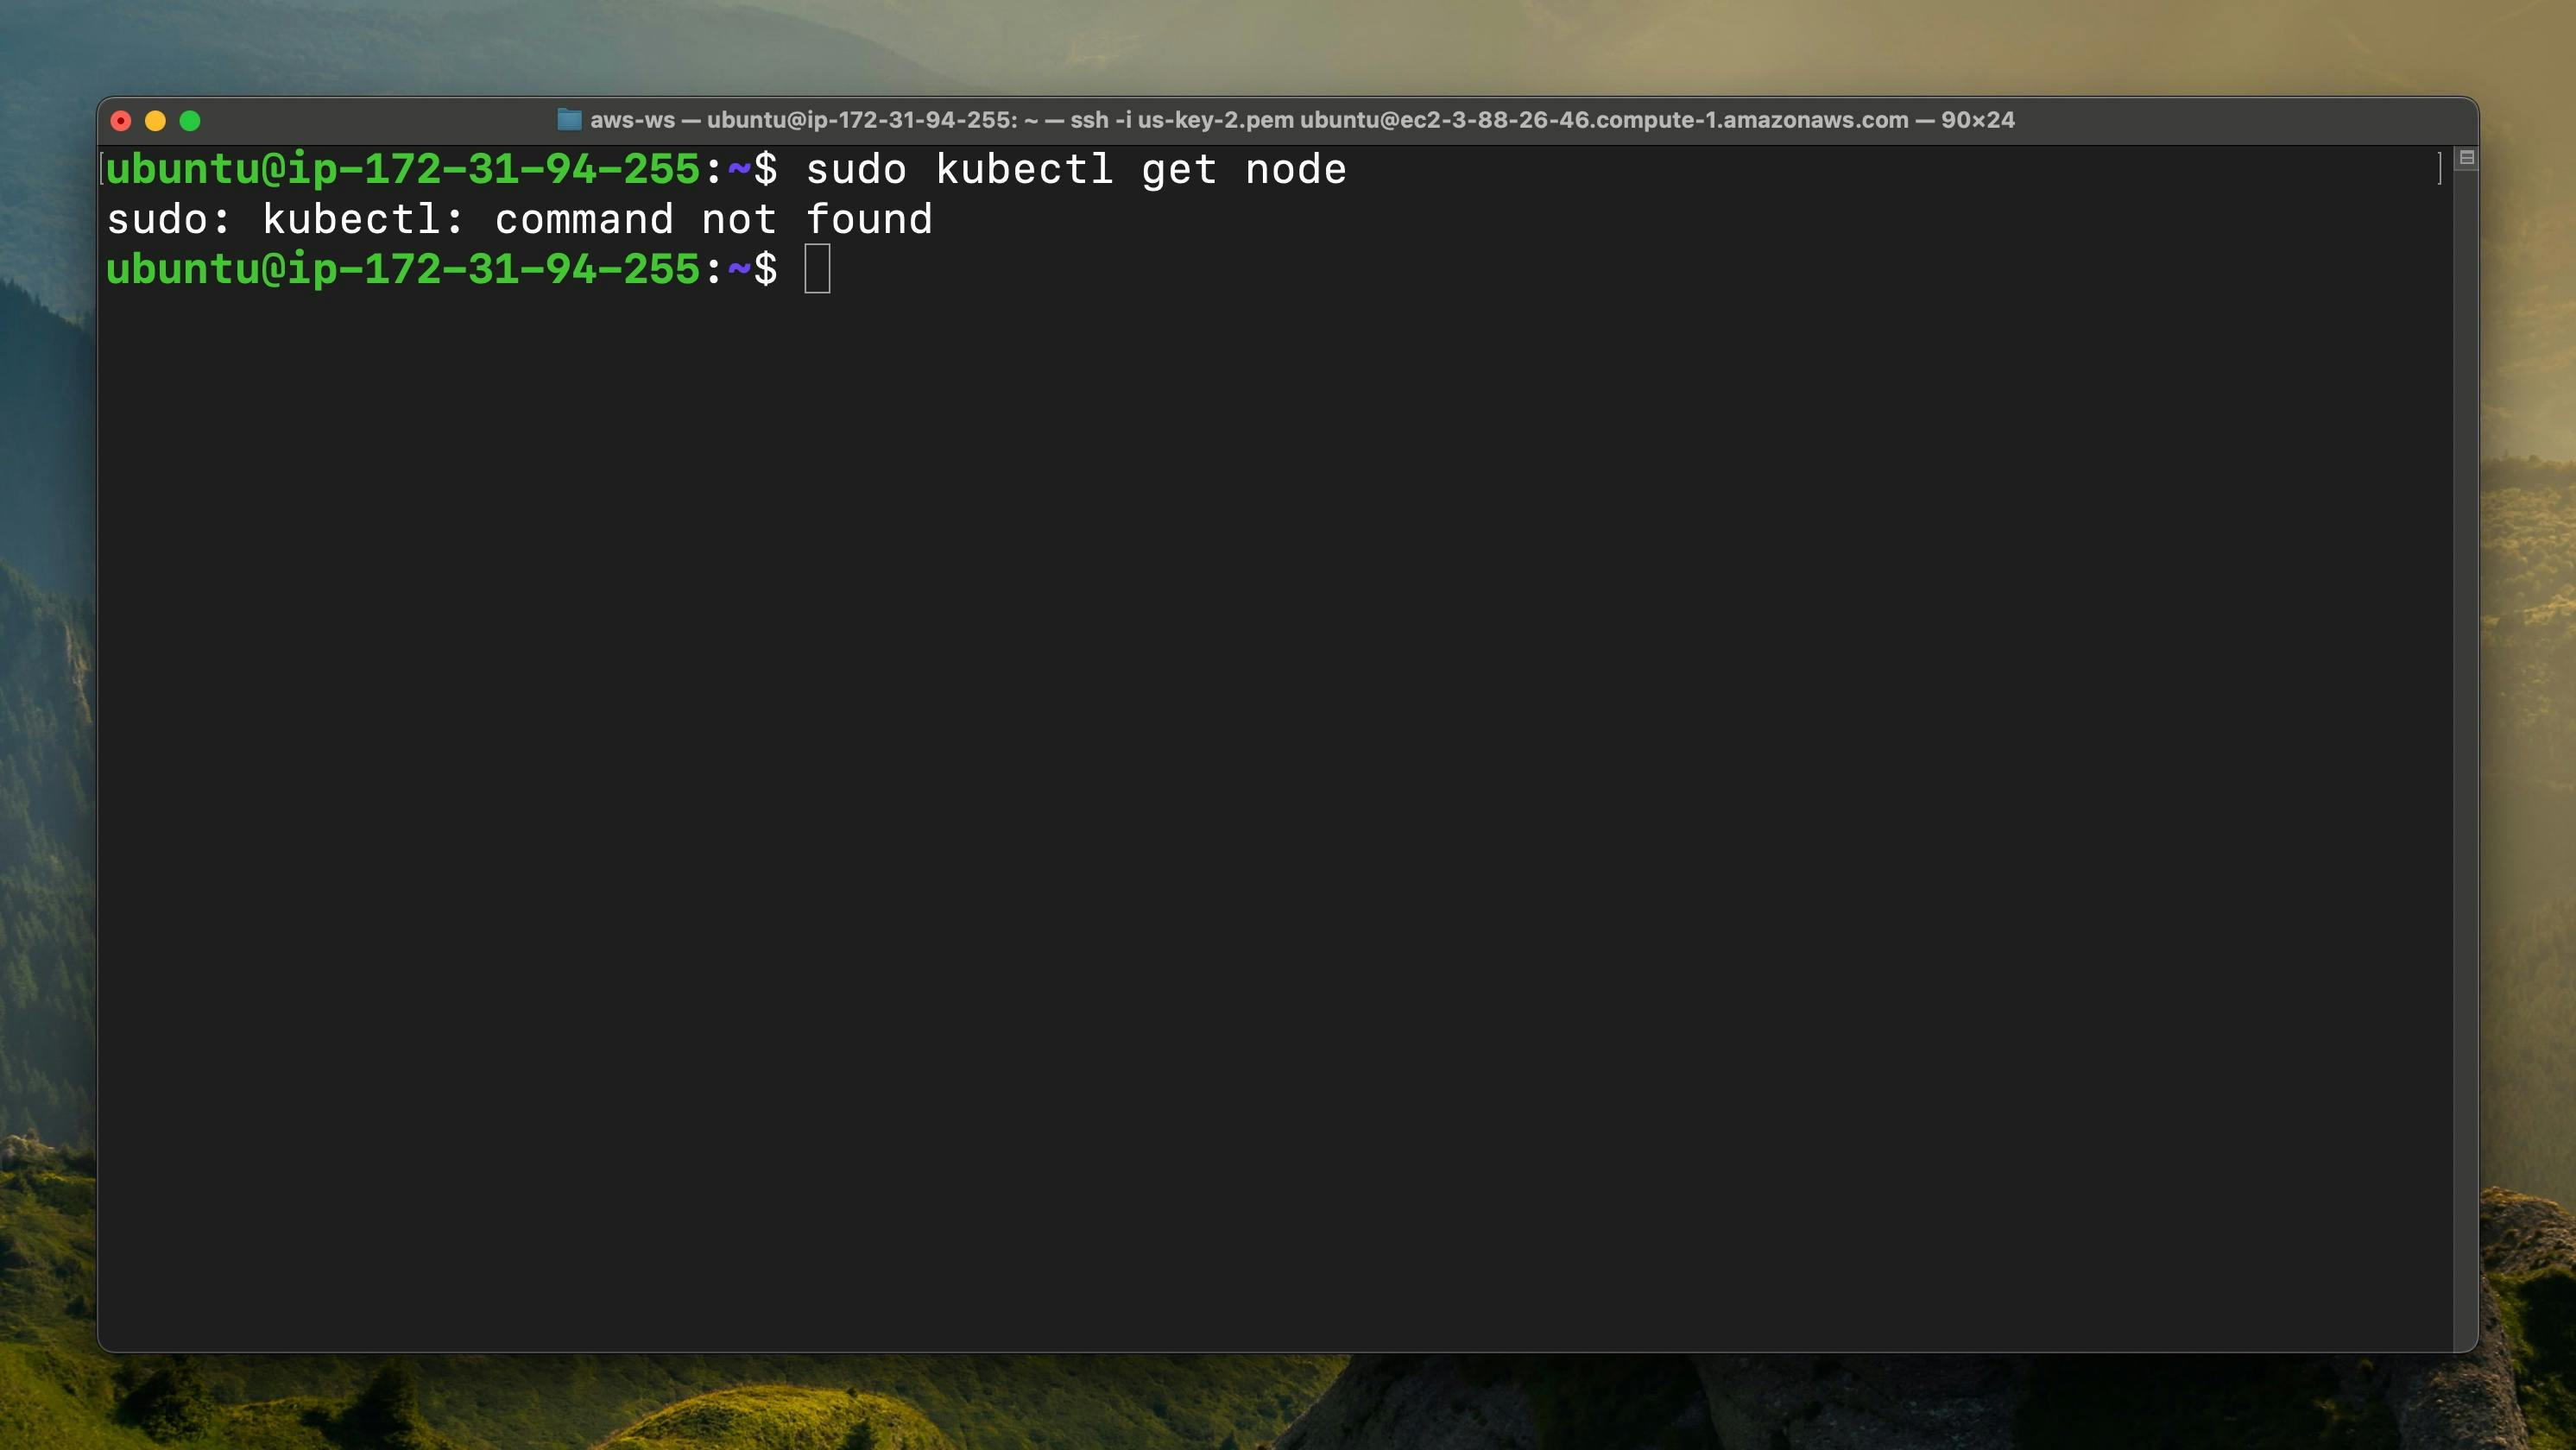
Now we are trying to check the node using this command " kubectl get node " As you can see that we haven't installed "kubectl"
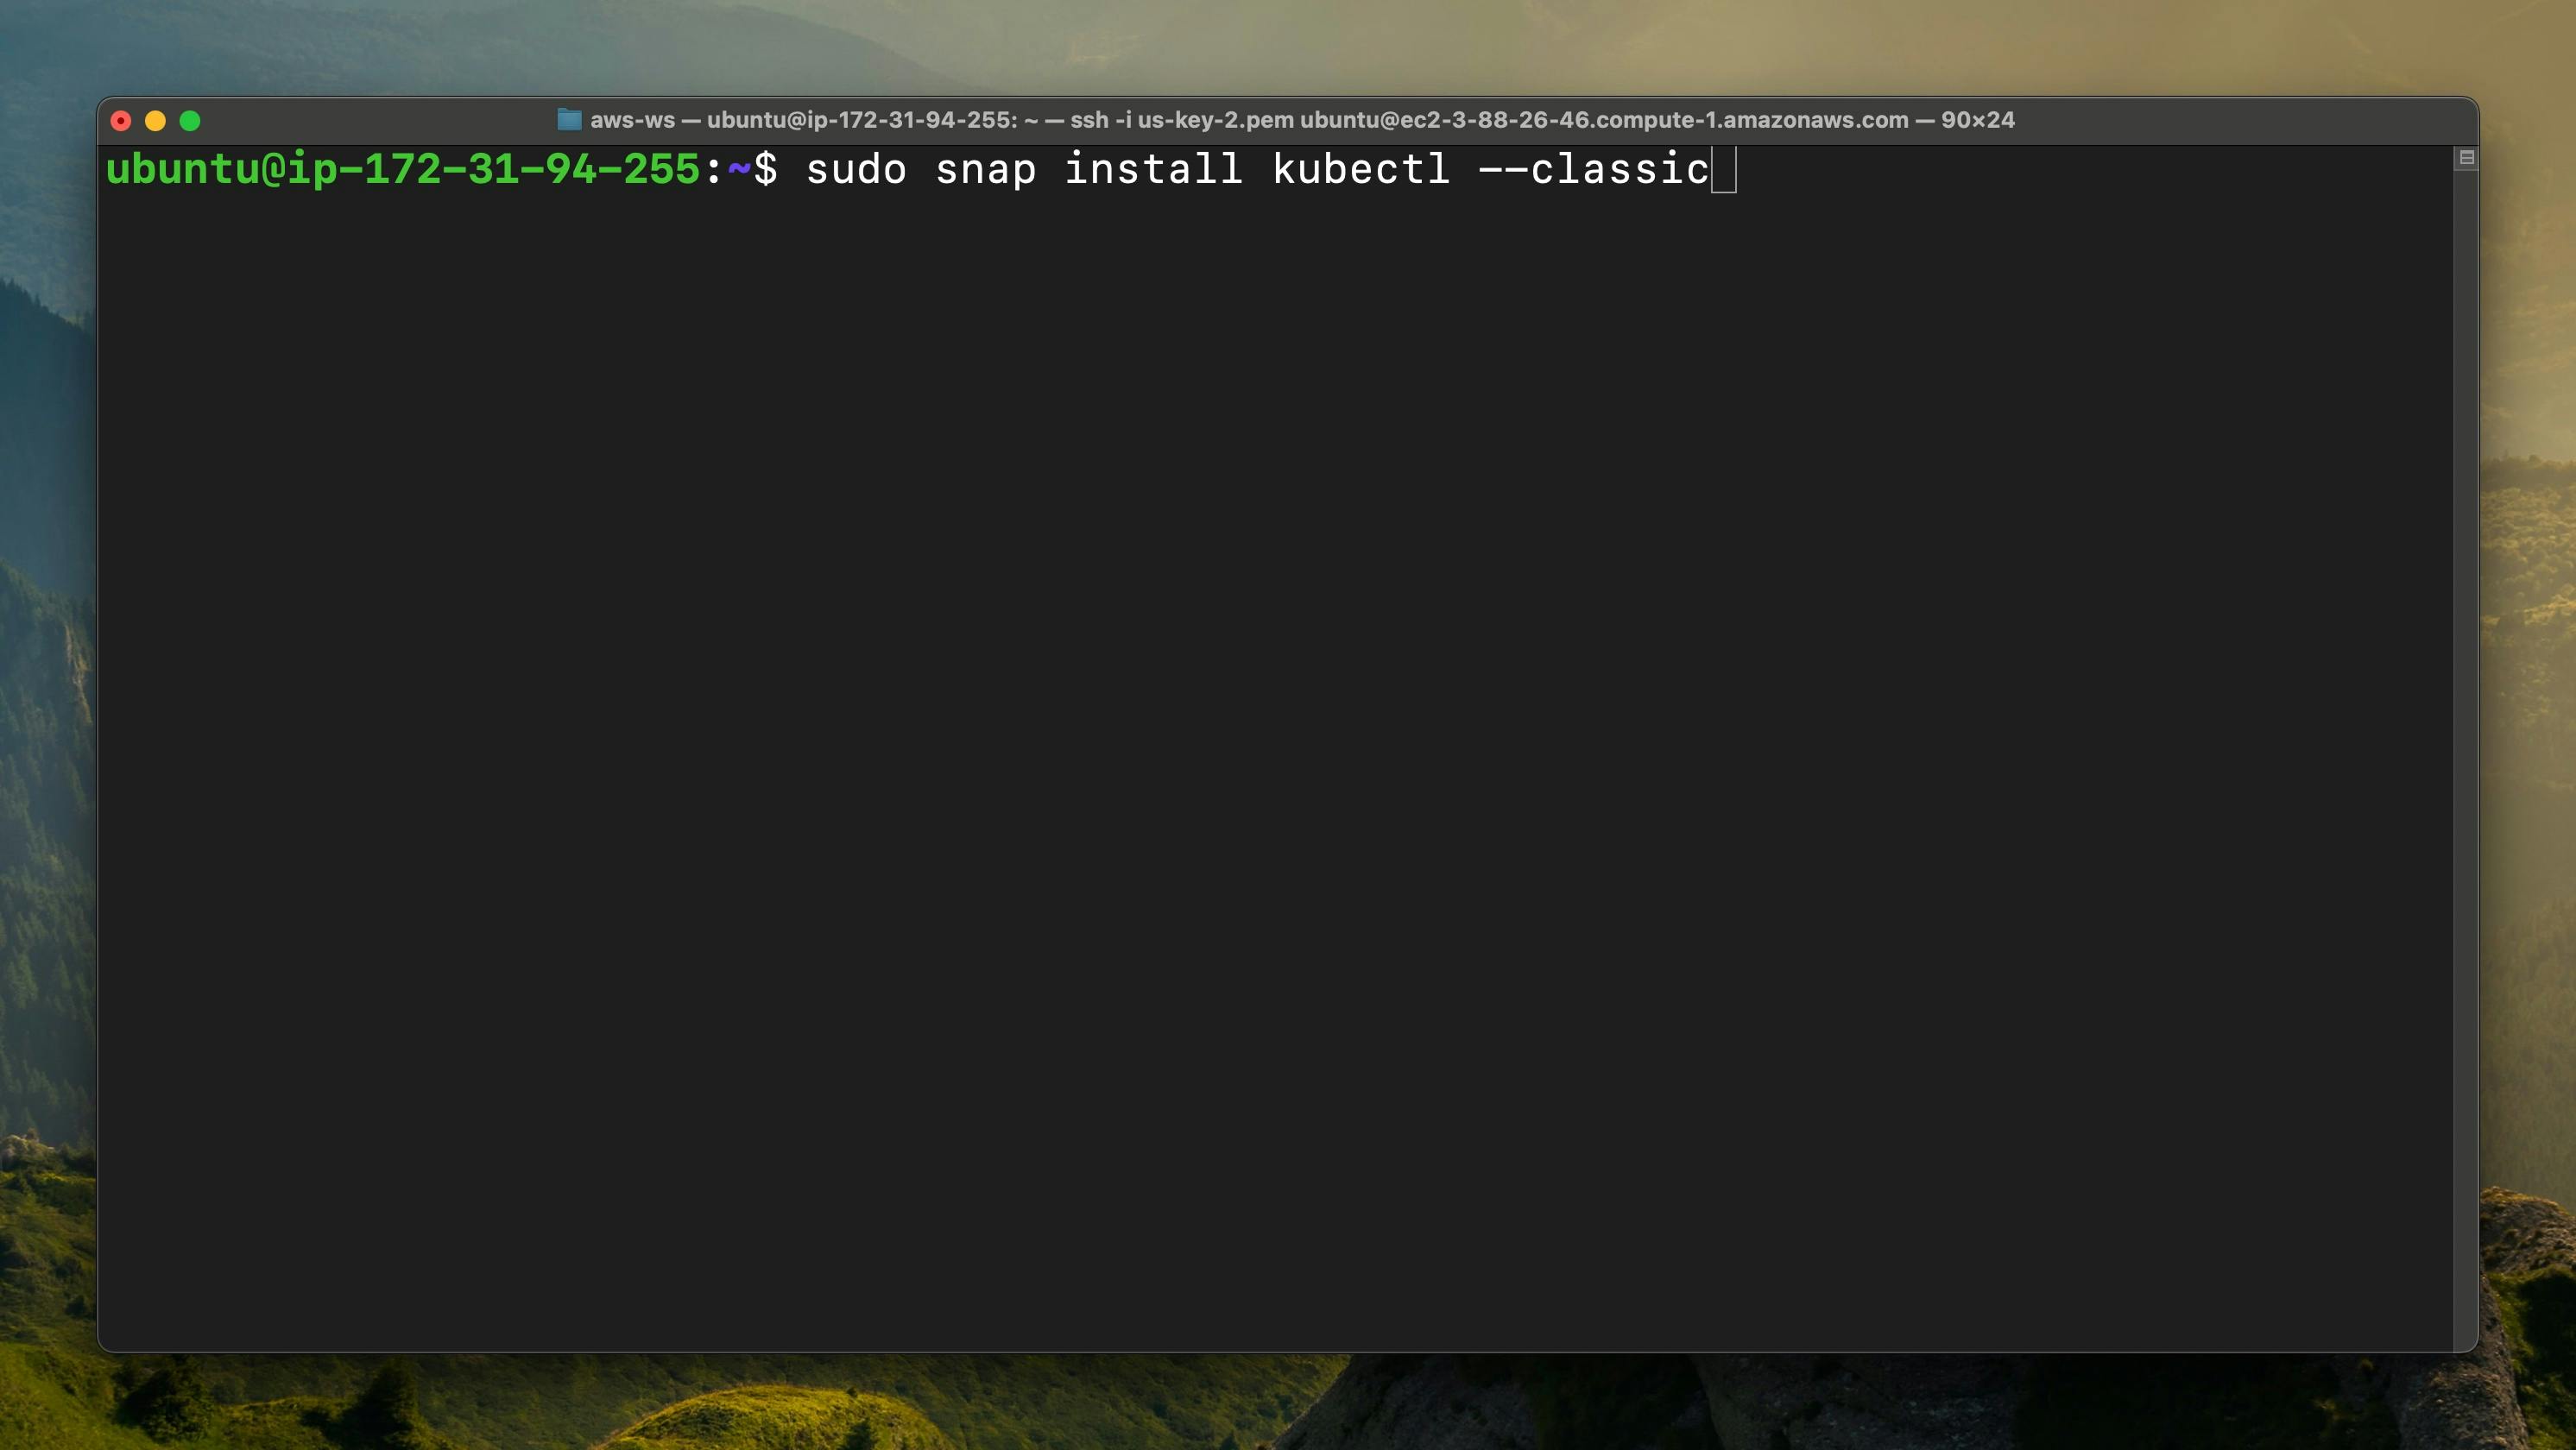
Step - 21
Paste this command for installing the kubectl
sudo snap install kubectt --classic
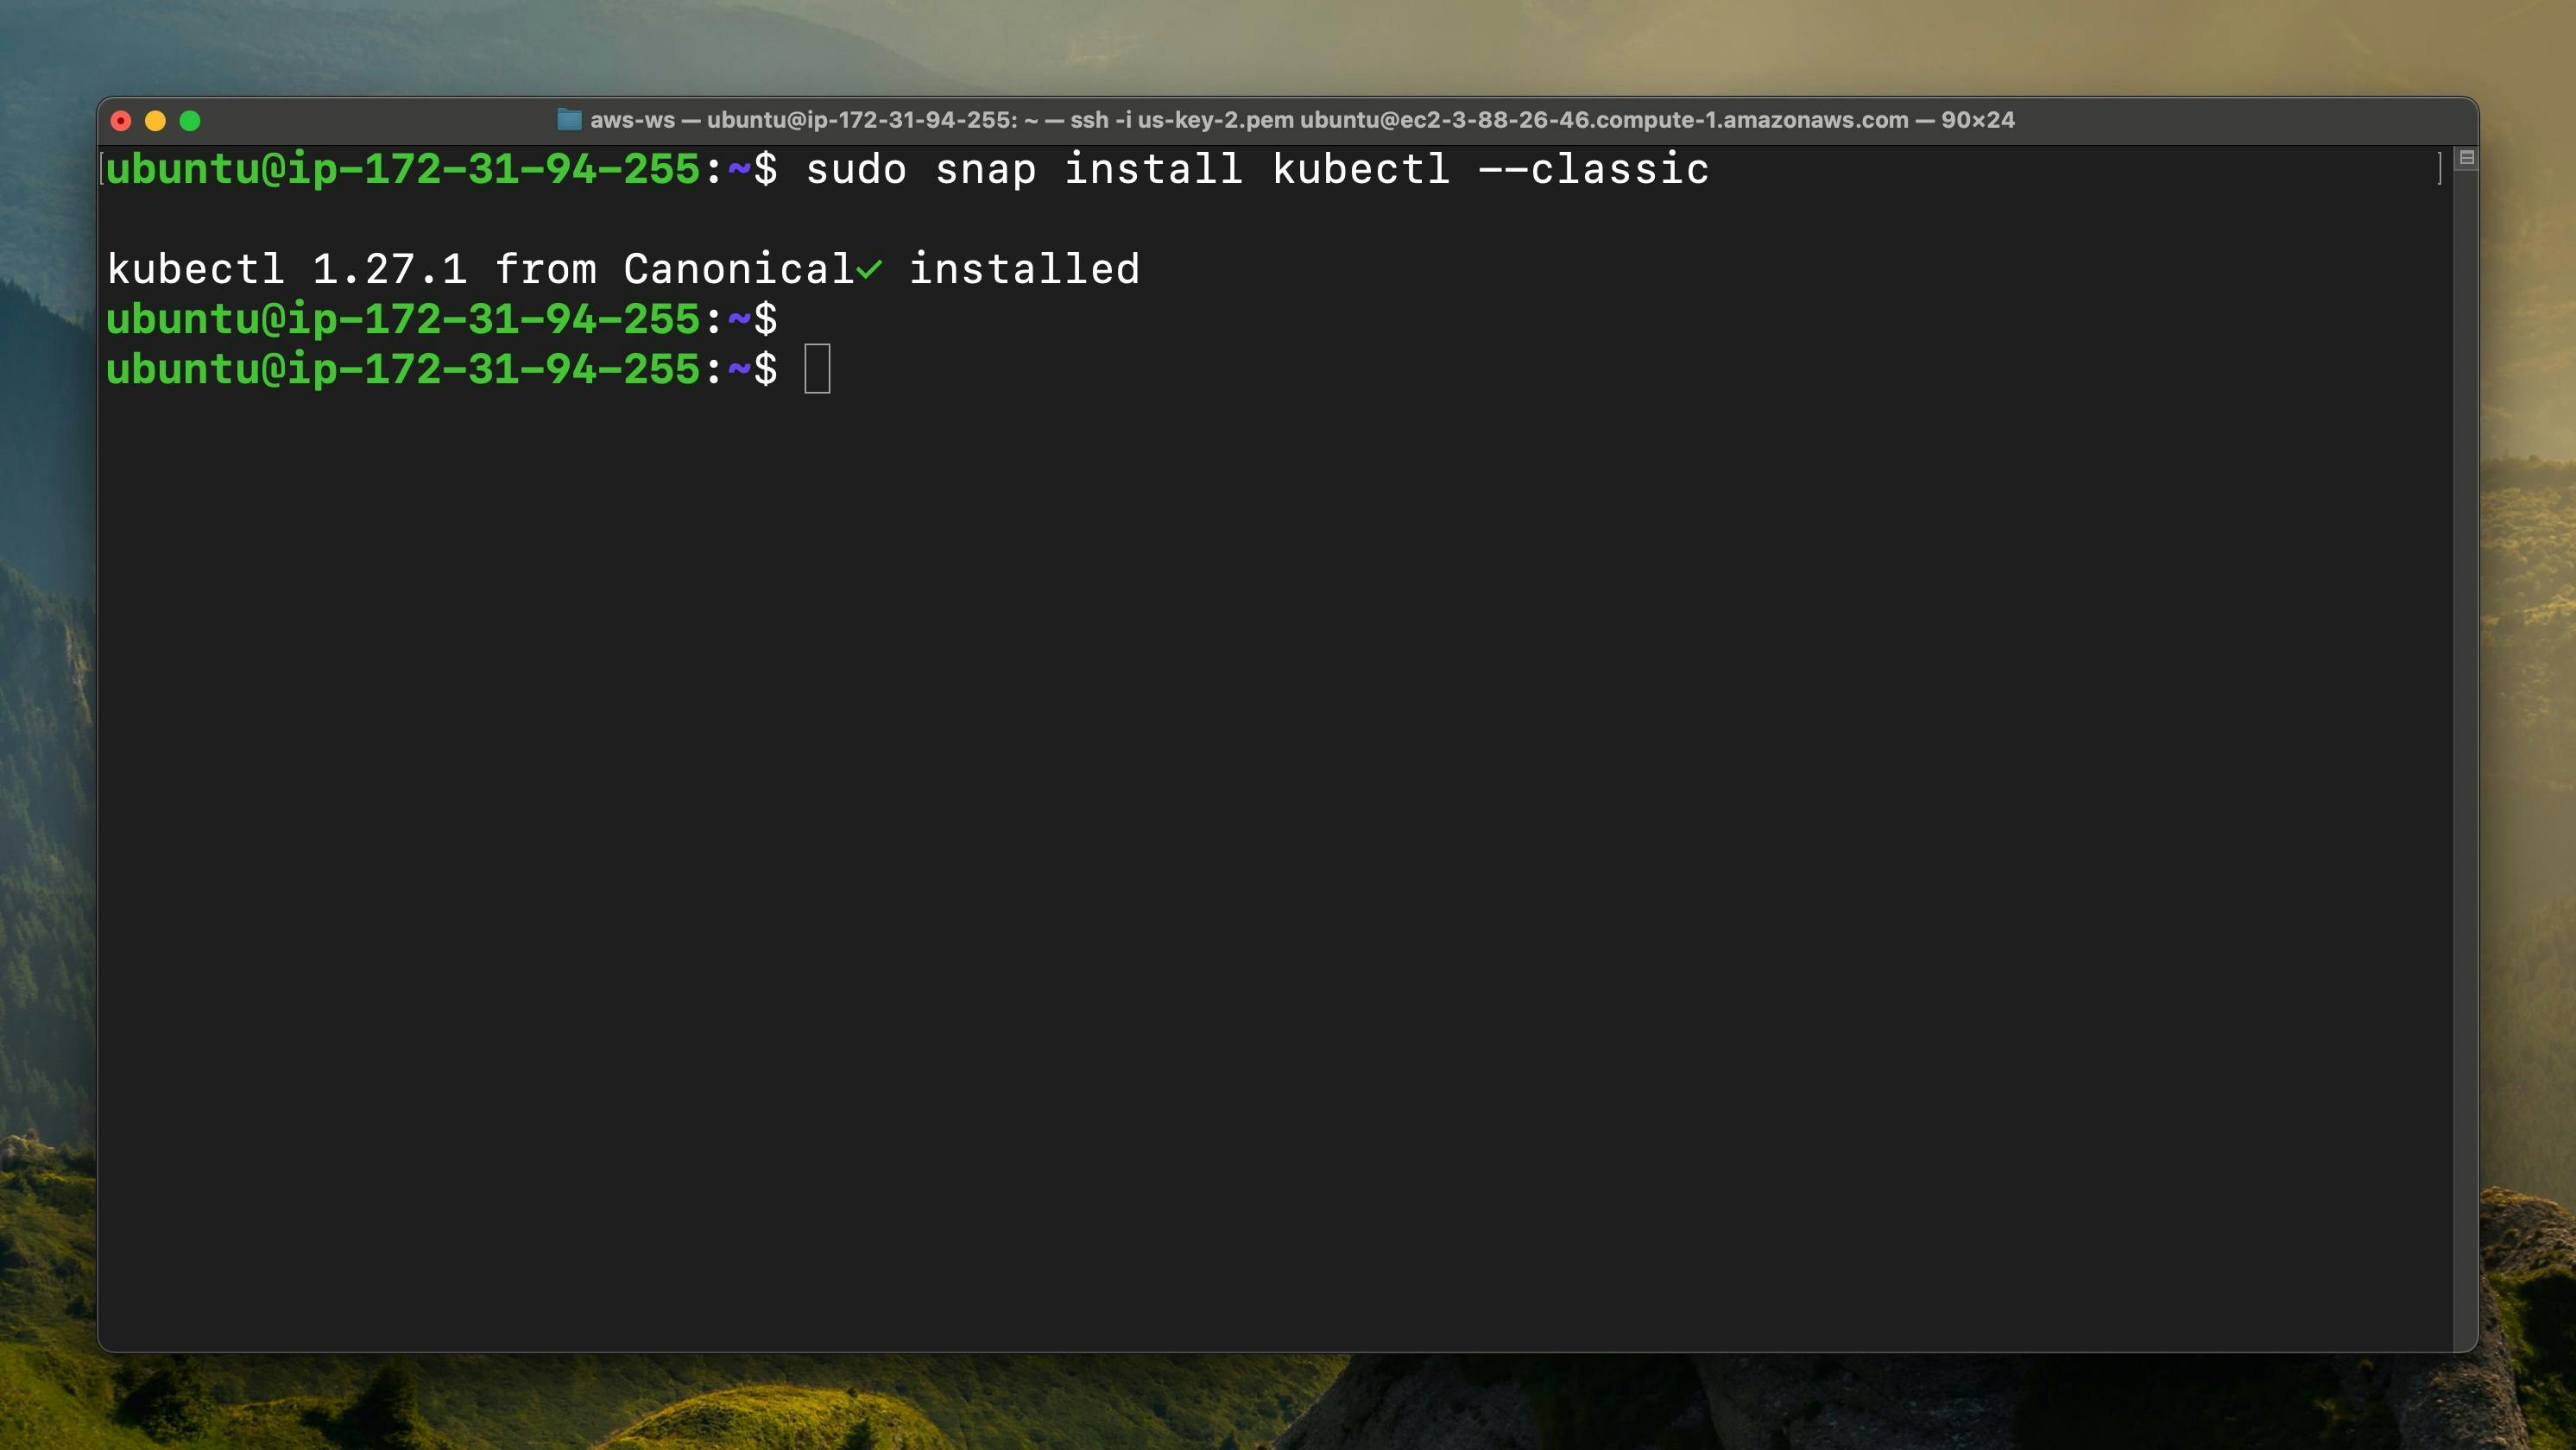
Now kubectl is successfully installed
Step - 22
Now if we check the node using the following command & as you can see that we get the node info